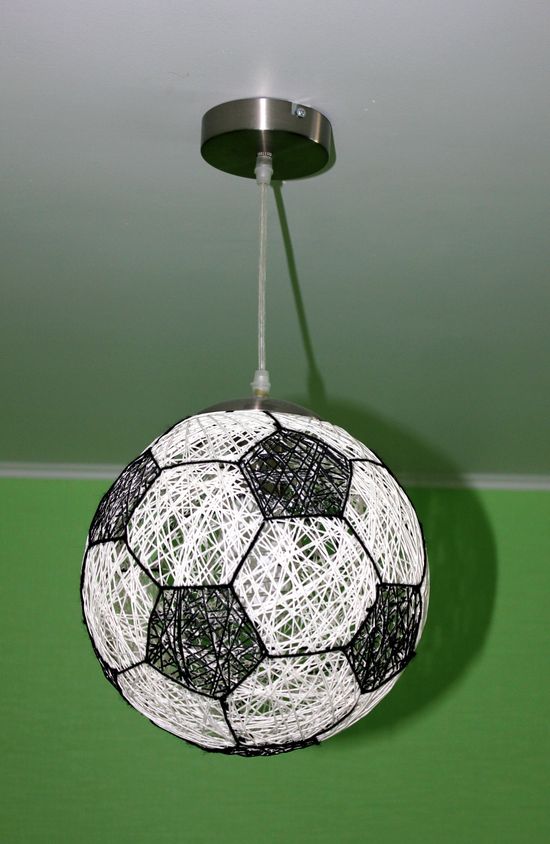
Lamp with your own hands A soccer ball: a master class with a photo. Fixture for a nursery own hands
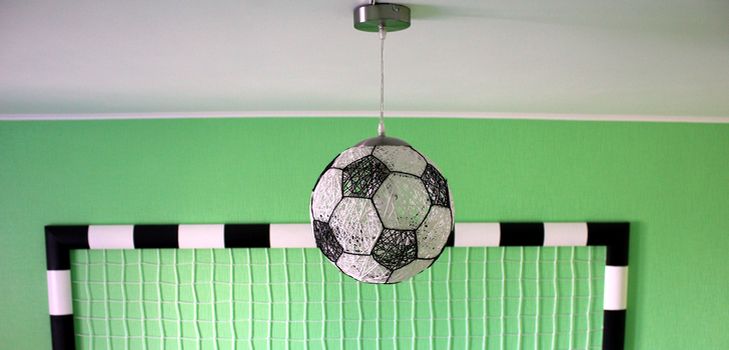
The desire of parents to make a children's roominteresting and cozy is understandable. To achieve this goal, some moms and dads include their imagination at full capacity, while others actively devastate their wallets, buying up unusual interior items in stores. But sometimes it happens that creativity is not enough, and the availability of money does not guarantee the embodiment of all desires. For example, if you want to design a son's room in a football style, then an excellent solution will be a lamp in the form of a soccer ball, a master class you will find in this article.
Lamp-ball with your hands - a master class
At the lamp-ball, made by own hands,there are many advantages: it is exclusive, and, therefore, will make the interior of the children's room unusual, it does not require large investments, well passes light bulbs, it is safe for children, since it can not be broken, made of environmentally friendly materials. But, its main advantage - to make such an original lamp-ball at home is very simple.
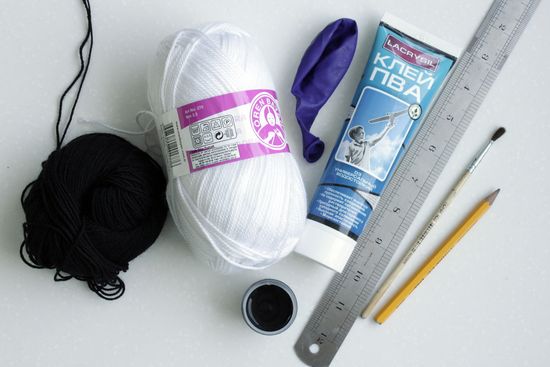
Necessary materials:
balloon
PVA glue
150 gr. white acrylic yarn and 50 gr. black yarn
scissors
gypsy needle
black acrylic paints and a brush
centimeter, protractor and ruler
a sheet of white paper in A4 size and a pencil
the holder for a plafond, a cartridge and a bulb
Main stages:
Let's start with creating a round white ball of threads. It actually will be a lampshade for a lamp in the form of a soccer ball. To do this, you need to inflate a balloon, round in shape. The size of the balloon is the size of the future lamp. Then you need to chaotically wrap the ball with white acrylic threads, impregnated with PVA glue, and allow it to dry thoroughly. Threads are better not to take thin. When the glue is completely dry, just pierce the ball with a needle and remove it from the resulting cocoon - the glue soaked in glue will retain the shape of the ball.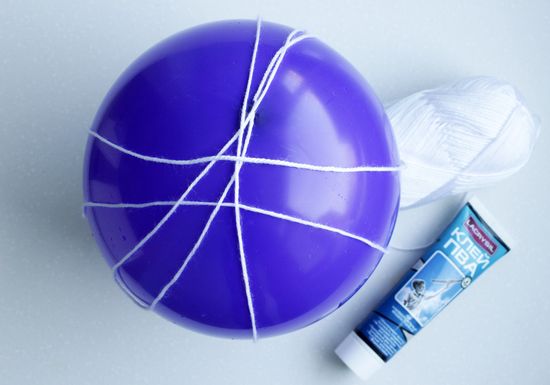
On a note! To quickly impregnate the thread with glue, thread it into the needle and pierce the can of PVA. Pull the thread through the glue, remove the needle and wind the thread on the ball.
Then we start creating polygons forsoccer ball on paper. At this stage, you will need to show all your mathematical abilities in order to correctly calculate the size of the polygons for the luminaire. Usually a soccer ball consists of 20 hexagons and 12 pentagons. Their dimensions will depend on the size of the ball itself. It will be necessary to draw and cut out one pentagon and one hexagon from paper. To properly draw a pentagon on paper, you will first need to measure with a centimeter the circumference obtained from the thread of the ball, and then divide it by 15. As a result of these calculations, you will get the length of the side of the polygon. Denote it by paper as a segment of AC. Immediately divide this segment into 6 identical parts. Then from point A, describe the arc with a radius equal to the segment AC. Write the same arc from the point C. The intersection of these arcs will give the point M. Through this point and the middle of the segment AC draw a vertical line. On this straight line from the point M, postpone a segment equal to 4/6 of the segment AC. As a result, you get the point 3, which will be the top of the pentagon. Then from the point obtained, describe the arc whose radius is equal to the segment AC. When you cross this arc with the other two drawn from points A and C, you get points 1 and 2. They will also be the vertices of the pentagon. By connecting points 1, 2, 3, A and C, you will get a pentagon. It will be easier to build a hexagon. It is better to use the protractor here. Knowing that the sides of the hexagon are equal to the length of the segment AC, and the angles are 120º, you quickly build on the paper the desired hexagon.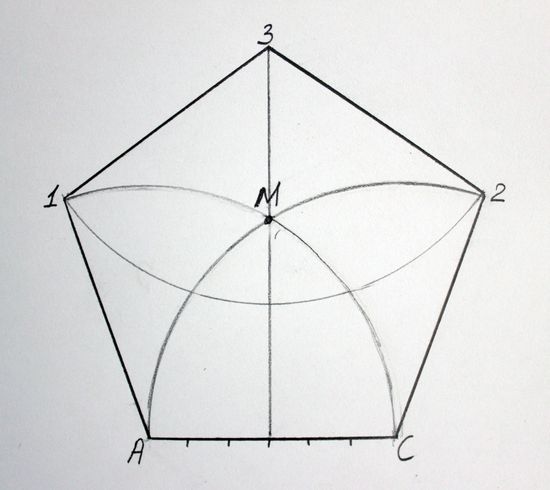
After the templates are ready to proceedembroidery of polygons on a plafond. Take the gypsy needle with the black yarn threaded into it. The ends of the yarn should be long - at least 1 meter of thread doubled. You will need many threads to mark out all the polygons on the ball. Carefully pierce the white thread of the plafond from the inside, pulling out a needle with black threads. Take a pentagon cut from a paper and attach it to the ceiling so that the black threads come out in one of its corners. Embroider the pentagon, gradually fringing the paper pattern. One stitch will be equal to the length of one face of the polygon. It is very important to carefully stick the needle in the filament of the plafond, so as not to disrupt the shape of the ball and the stiffness that the dried glue gives. After the first pentagon is embroidered, take a paper sample of the hexagon and attach it to the ball so that one of its faces exactly coincides with the face of the pentagon. Continue to embroider until you fill the entire balloon with polygons.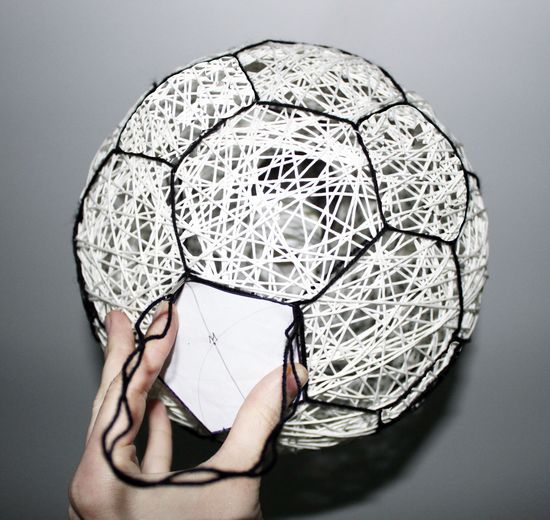
Let's start painting polygons. Take acrylic paints of black color and paint them with embroidered pentagons.
On a note! Acrylic paints are environmentally friendly and they do not take to hands. This makes them the most preferred when designing a children's room.
In fact, the plafond in the form of a soccer ball is ready. It remains only to cut a small hole in it to insert a holder with a cartridge in it, and attach a wonderful lamp to the ceiling.