Stands for flowers with their own hands: photo, video
 You can decorate and equip your garden and house inany time. And lovers of home and garden flowers, there are simply huge opportunities for the realization of creative ideas and fantasies - beautiful plants are able to decorate themselves with almost any object. An excellent field of activity is the creation of flower stands for your own hands.
Step-by-step instruction for making a flower stand by yourself
In order to make a floor stand for flowers, as in the photo, and decorate the villa area and even a green corner in the apartment, we will need the following materials:
• 2-3 wooden buckets of different sizes
• strong, round wooden stick
• Joiner's glue
• 2-3 (one for each bucket) of a small piece of board
• decorative elements - paint or rope
Step 1. To begin with, it is necessary to decide whether we want to leave the buckets in their natural form or decorate. If for a stand you decide to use old, not so beautiful buckets, then it is better to paint them. You can stay on natural, woody shades, or you can fantasize with bright colors. Also, buckets can be decorated with a rope, beautifully braiding them around it.
Step 2. A wooden stick will also require attention. Paint it.
Step 3. When the appearance of the bucket is ready, take the prepared pieces of boards and make a hole in the center of each. It is also necessary to make holes for drainage at the bottom of the bucket.
Step 4. Glue the plank with the hole in the bottom of each bucket with joinery glue. In two smaller pails, you need to make another hole, so that it coincides with the one already on the board.
Step 5. We begin to fix the stick with the largest bucket, which will be below. In the hole in the plank we pour the carpentry glue and insert the stick. When everything is dry, put a smaller bucket on the stick and fill the hole with glue. Let's dry out and do the same with the last, smallest bucket.
Step 6. After our design dried up, and we checked its stability, pour the soil into the pails with the nutrient mixture and plant the flowers. Best in the stand will look like falling, cascading flowers. They can be either large or small.
Unusual flower stands with own hands

Decorate the garden sometimes help the most unusualsubjects. For example, boots and galoshes. Flowers look in them very original and grow no worse than in pots. But the black color is somewhat boring, so they better paint. For these purposes, acrylic paint is suitable. You can immediately take a color, but it is better to buy white paint as the basis and a few colors for it.
Since the boots-stands, most likely, will bestand on the street, they should be covered with 2-3 layers of paint, after which you can put a funny picture. For drainage in the sole it is necessary to make holes. If you are not sure of their stability, better attach the boots to the ground. In such nice "pots" it is best to plant annual plants, which can be replaced during the summer and autumn.
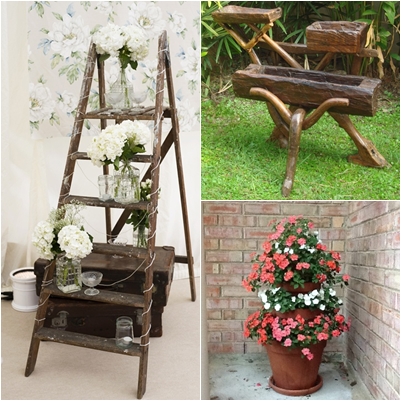
Stand for flowers from a tree with your own hands
Cute and original coasters are obtainedfrom natural material (see photos and videos). It can be almost any stump or part of the trunk with interesting branches. To ensure that the floor stand lasts longer, it needs to be properly prepared.
Step 1. Well clear the trunk of the bark and check if it is rotten places on it.
Step 2. We rub the surface with a large nacre. It is not necessary that it be absolutely smooth. But it is important that no one is scratched, and clothing does not cling to the trunk.
Step 3. We make from the board or plywood base to put on them flower pots. They can be round, square or rectangular. We attach them to the aligned branches of the trunk. A trunk or a stump can be installed directly into the ground or attached to a wooden base.
Step 4. Cover the stand with varnish for wood or we paint it in your favorite color. All these products look unusual and even exclusive and give great pleasure in the manufacture.
Video: how to make flower stands with your own hands
For clarity, we recommend that you watch the video with step-by-step master classes.