Easter eggs with their own hands of pasta, beads, paper and thread - From satin ribbons Artichoke and Kanzashi to kindergarten, photo by step

Decorative Easter eggs with your hands -the most incredible, unusual and various crafts for the bright Easter holiday. Skilled beadwork that resembles Faberge jewelry eggs, extraordinary figures of pasta, similar to the refined golden filigree, wonderful things from paper and threads in decoupage techniques, which are the embodiment of the most magical direction of hand-made ... And what are the interior eggs made of rags and satin ribbons in the style of "Kanzashi" and "artichoke". They bring the atmosphere of a joyful celebration in the house, supplement the atmosphere with traditional Easter elements, give joy and positive emotions to both adults and children.
After viewing our best master classes with photos and videos, you will learn how to make extraordinary Easter eggs from the materials for the gift to the kindergarten or home decor.
Decorative Easter eggs with their own hands in kindergarten - ideas in the style of "decoupage"

"Decoupage" is an amazing technique that allowsthe most typical and unremarkable thing to turn into a real art object. But the most paradoxical fact is that in the course of such needlework it is not necessary to use rare materials, tools and skills. It is enough to get suitable for the form of workpieces, a couple of thematic napkins with an Easter pattern and a few tubes with glues and varnishes. In addition, the ideas of Easter eggs in the style of "decoupage" are very fresh and relevant - why not use them, making a festive hand-crafted article in a kindergarten.
Necessary materials for decoupling Easter eggs in kindergarten
cardboard blanks in the form of eggs
Decoupage paper in gray and blue-green tones
acrylic paint white and blue
decoupage glue
decontamination lacquer
pearl lacquer
stamps
pigment inks black, golden and silvery
thin wire
decorative elements (scraps, die cuts, beads, laces, feathers, rhinestones)
scissors
glue
glue gun
Step-by-step master class on creating Easter decorative eggs by own hands using the method of decoupage
Foam plastic or cardboard billet-egg for decoupage paint with white acrylic paint.
Prepare silicone stamps in the style of "retro" or "provence". Choose black ink.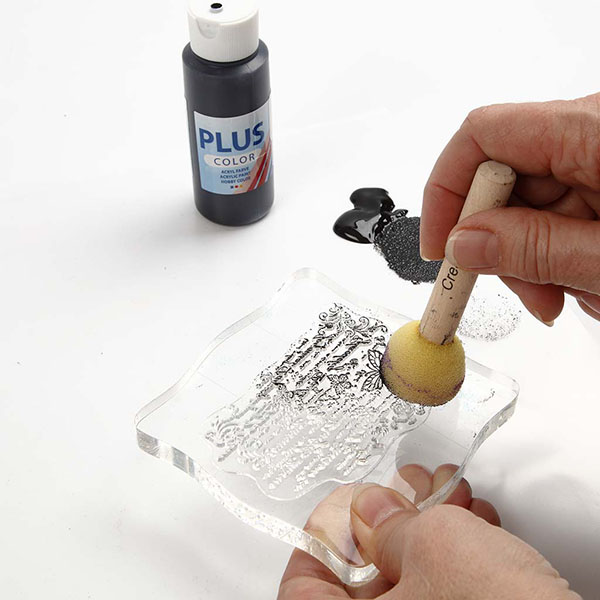
On paper for decoupage leave black prints stamps.
Tear the sheet into small pieces and cover them with a special glue.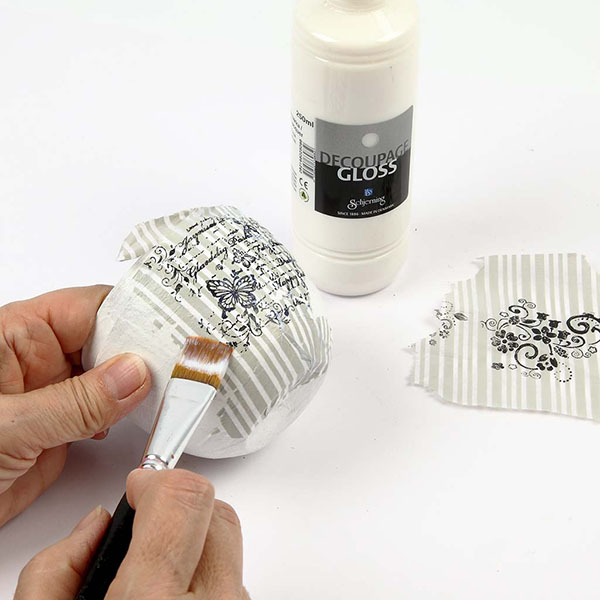
With the help of a stamp of another configuration, leave golden and silver prints on the stuck egg.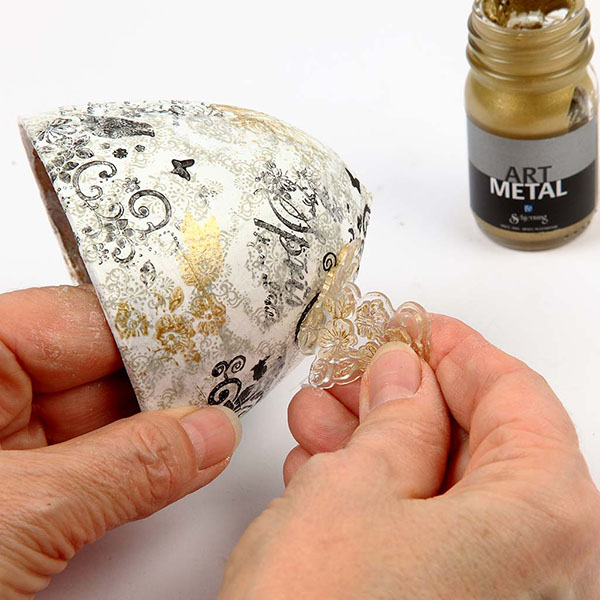
Cover the Easter egg with a matte varnish. After complete drying, cover the product with white cotton lace using a silicone adhesive gun.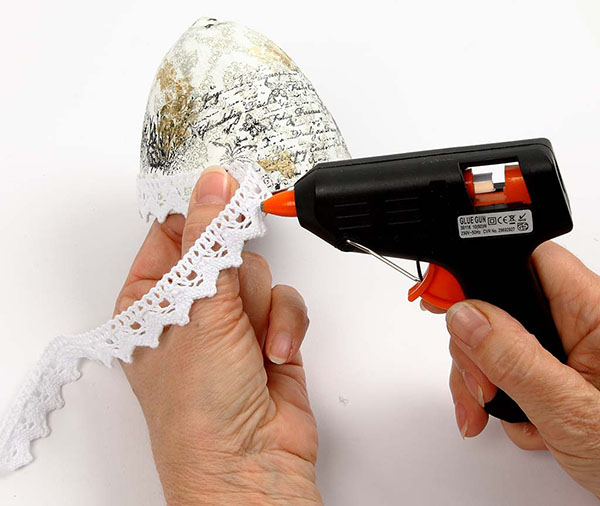
Over the lace tie a string of lace. Fix it with glue.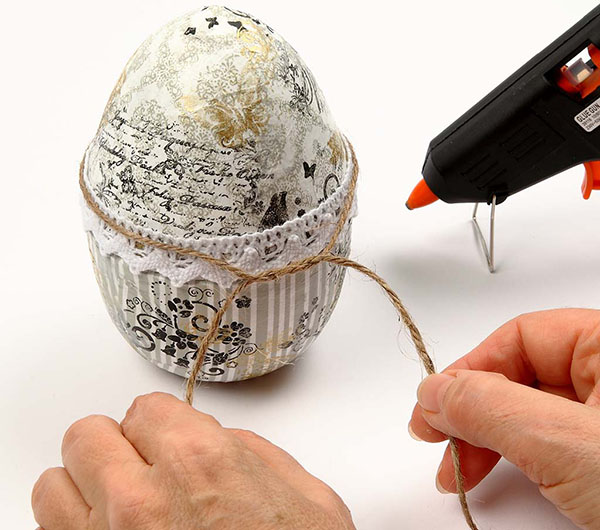
In the bundle bundle insert a beautiful decorative feather, glue several mother-of-pearl beads.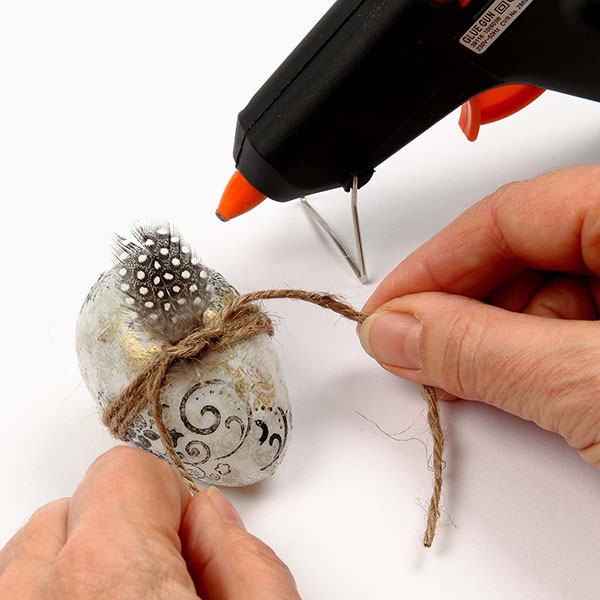
Through the upper and lower opening in the egg, draw a thin wire. Cover the upper segment with a loop, and on the bottom, put on several decorative elements.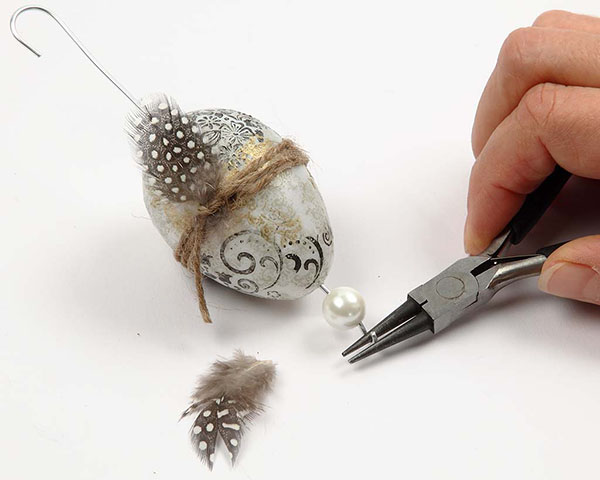
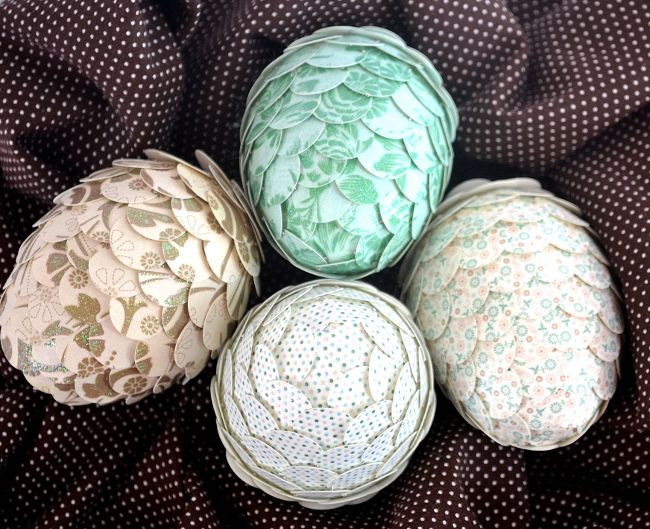
In this technique, you can make a simplified version of the Easter egg. For this, cover the inner surface of egg-coated egg shells with designer paper in blue-green tones.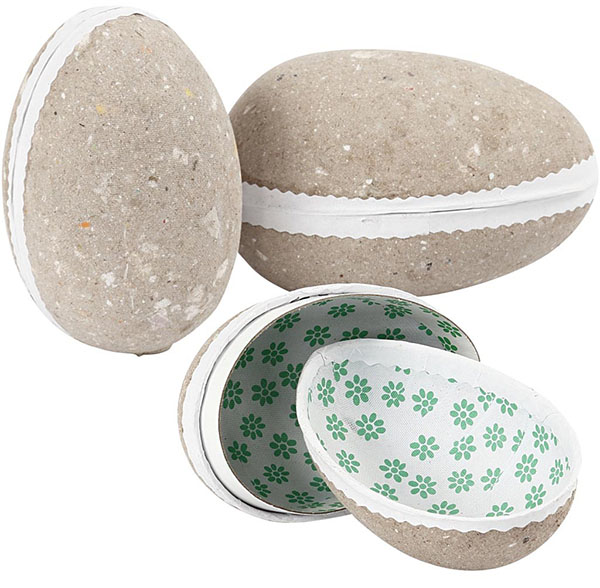
The outer surface of one half is painted with white acrylic paint.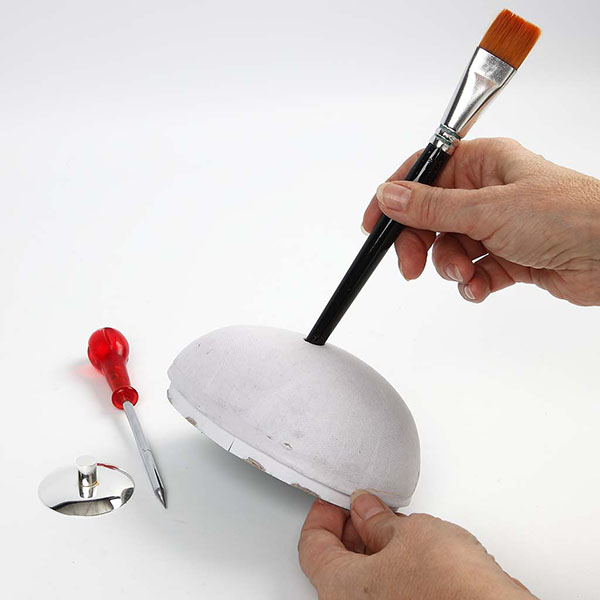
Recover the second half in blue.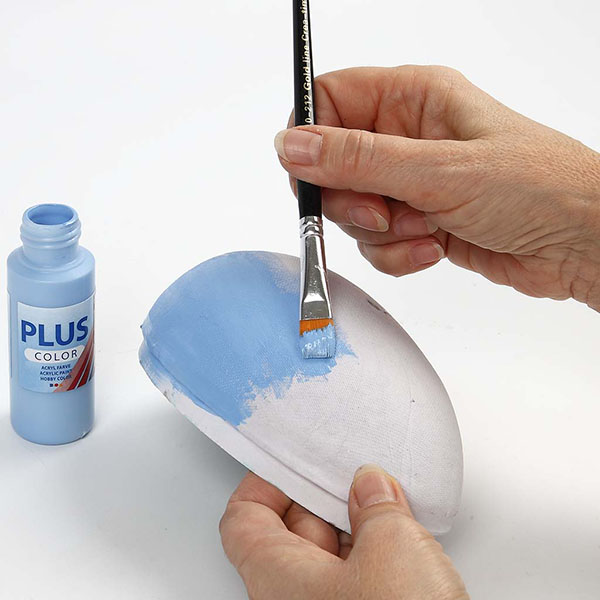
From a thin napkin or decoupage card tear off the necessary ornament and glue in the center of the white shell, using glue.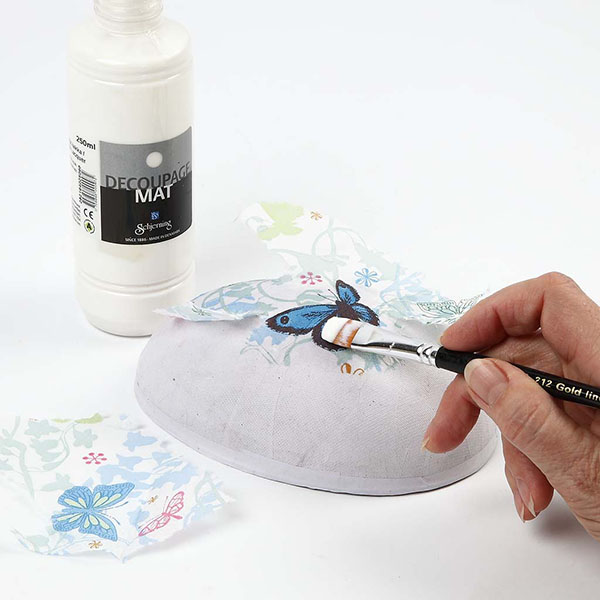
Add in the same way additional prints of other colors.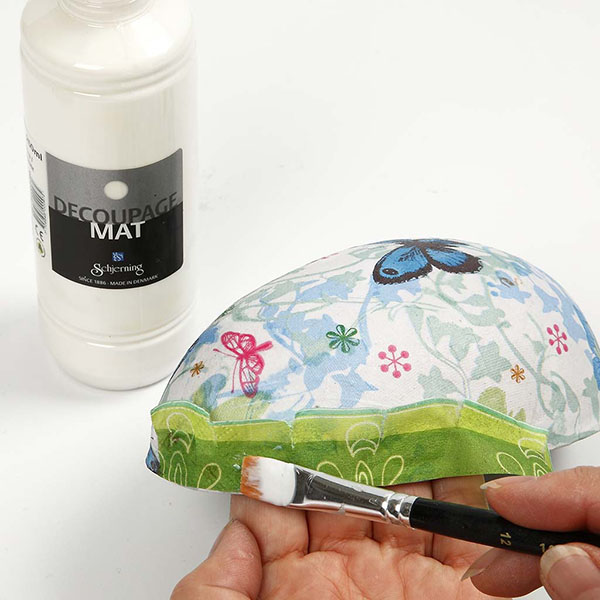
After complete drying, cover the Easter egg around the perimeter with half-beads or rhinestones.
Glue to the product decorative dragonfly. Easter egg with your hands to the kindergarten in the style of "decoupage" is ready!
Bright Easter eggs from satin ribbons or flaps with their own hands in the style of "artichoke"
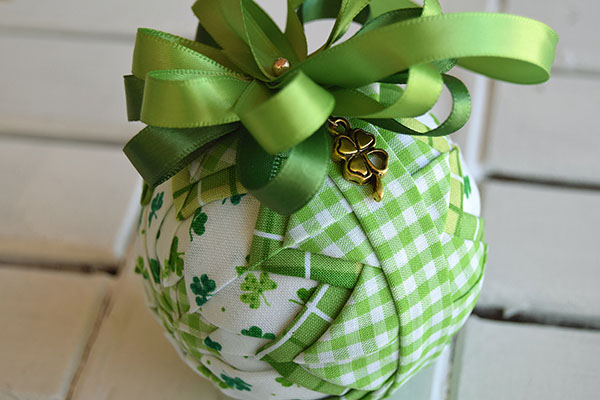
Colorful Easter crafts - eggs in style"Artichoke" is an unusual and original decoration, created by hand from satin ribbons and cotton flaps. Colorful textile elements with a checkered and floral pattern, successfully combined in a color scheme - an ideal choice for making Easter eggs not only a stylish decoration, but also an effective holiday gift for a loved one who appreciates beauty.
Necessary materials for the Easter egg from patches and ribbons in the style of "artichoke"
egg-foam blank
flaps of four colors
needle with thread
ribbons, braid
pins-studs
Master class with a photo on the creation of the Easter egg in the style of "artichoke" with their own hands
To create the Easter decor in the form of an egg, select four pieces of the same fabric of different colors.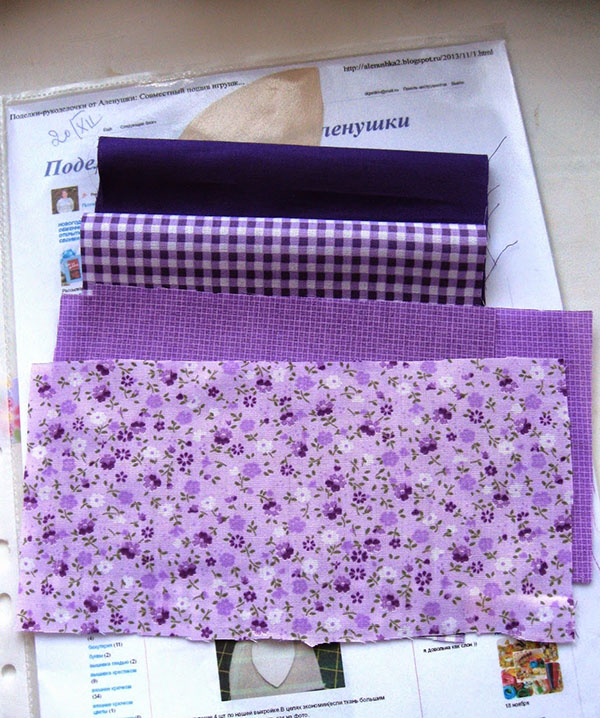
Cut an even number of rectangles of each color.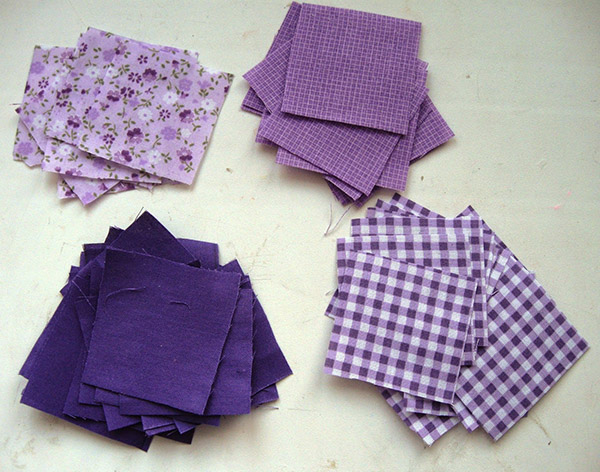
To the central part of the workpiece (crown), attach the rectangle using 4 studs. From the other rectangles, make triangles by wrapping the two edges in the center.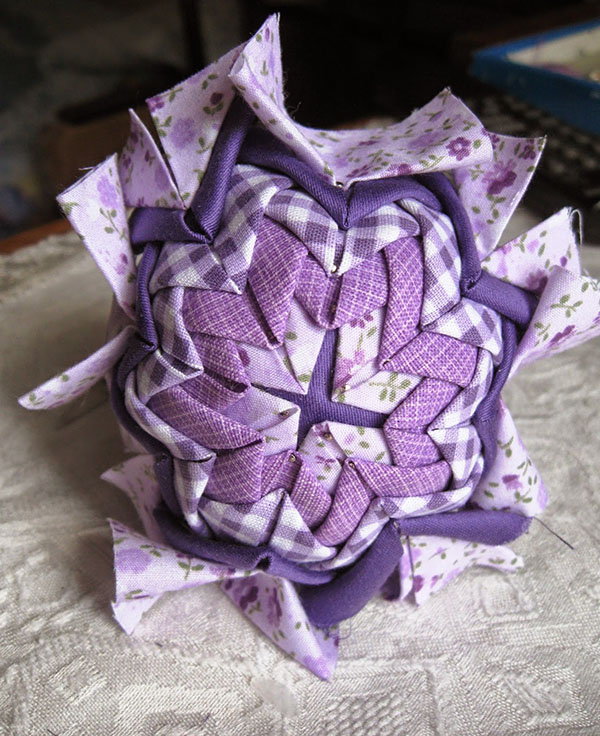
On a pre-fixed rectangle on the workpiece, fix 4 triangles so that their corners converge at the center point.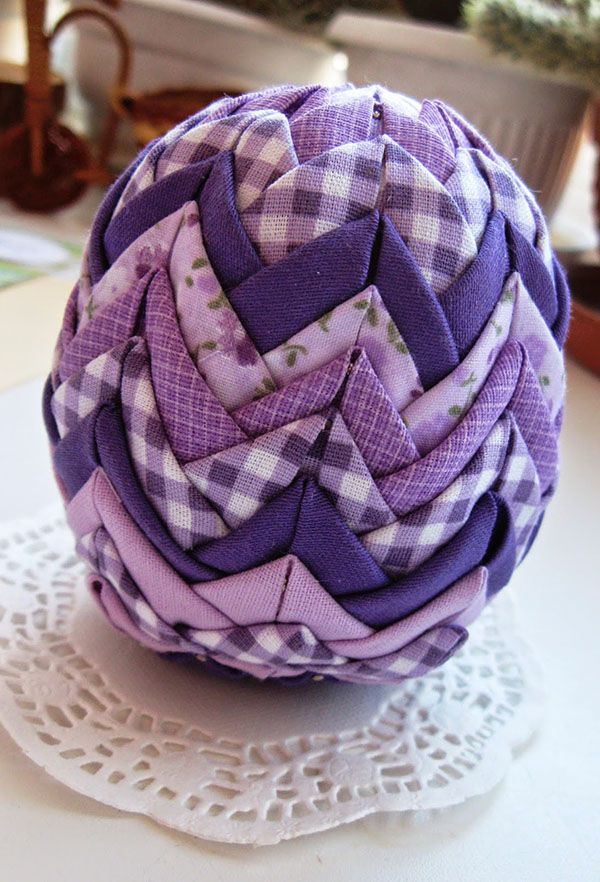
With a small indent from the first layer, fix the second layer of triangles of the other color.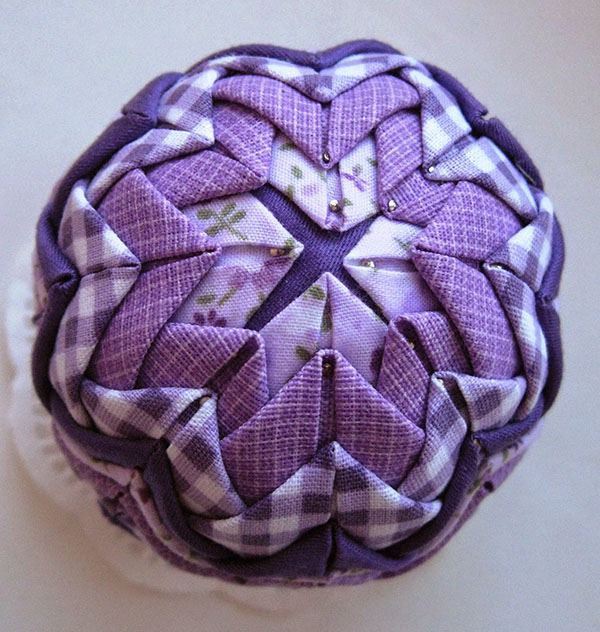
Each subsequent layer is fixed with an overlap to the previous one. Attach the corners with pins-studs.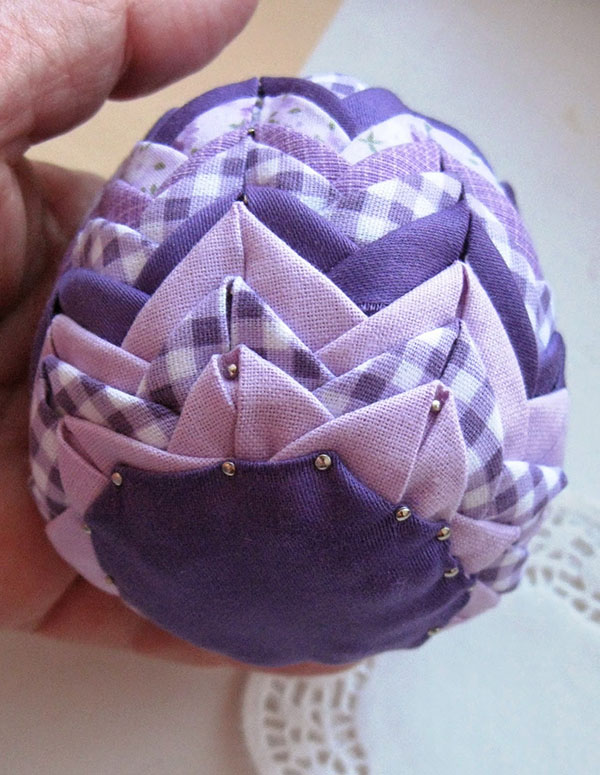
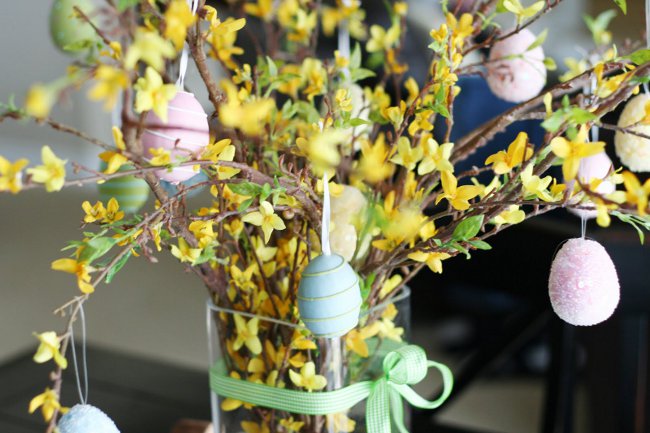
The last layer is fixed on the bottoma single-colored patch. Attach a loop or bow to the top. Such a bright Easter egg from satin ribbons or flaps with his own hands in the style of "artichoke" will decorate a symbolic tree or thematic composition.
Amazing Easter eggs with their own hands of beads: a master class with a photo
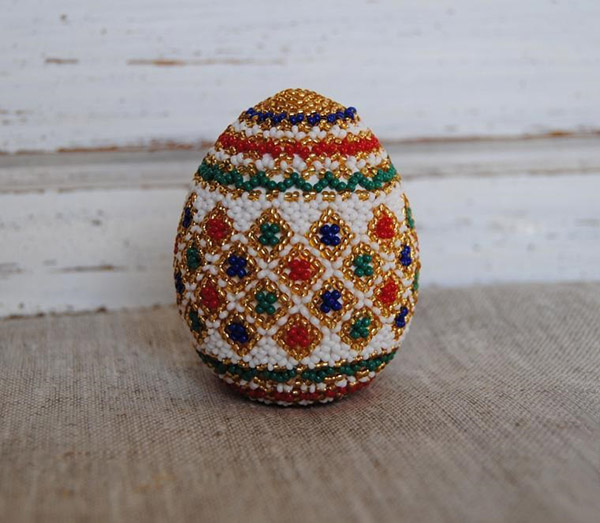
A great way to have fun and usefullyfamily leisure on the eve of the bright Sunday of Christ - to make amazing crafts with your own hands: cardboard baskets, felt rabbits and, of course, Easter eggs from beads. Collect everything at one table, take out a scattering of bright beads, unwrap the cut of the nylon thread - and enjoy the needlework for a pleasant home conversation.
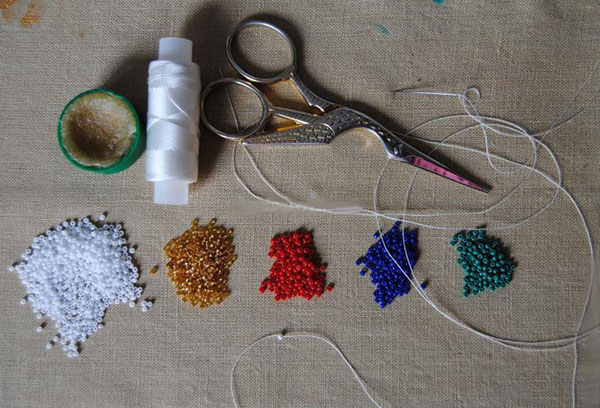
Necessary materials for crafting "Easter egg from beads" with their own hands
blank of plastic or wood 6-8 cm high
thin bead needle
Czech beads of different colors
wax
nylon thread
Master class with a photo to create an Easter egg from beads with your own hands
In the first random bead, thread a needle with a kapron thread three times. In this way, you can fasten it to the end.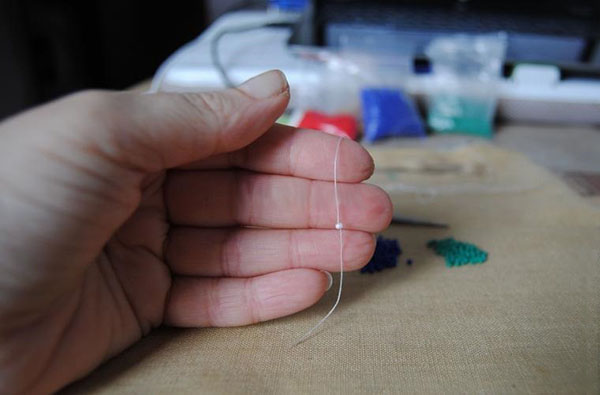
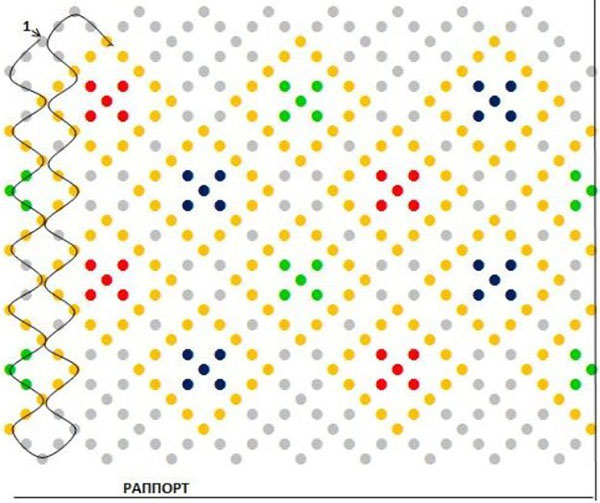
Following the scheme, begin to weave a girdle for the Easter egg.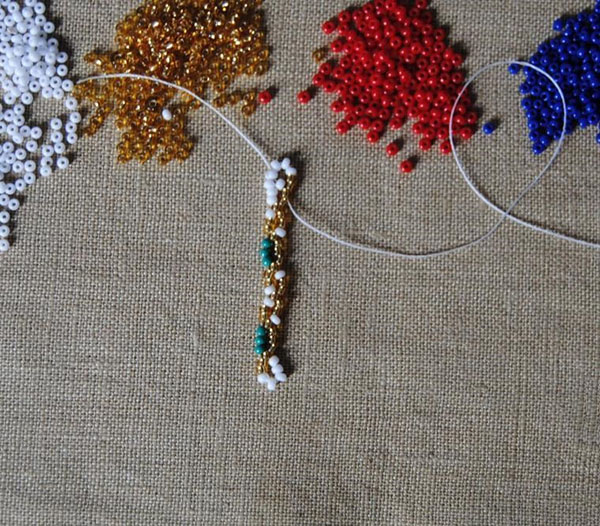
Continue weaving the girdle to the desired length - the volume of the egg.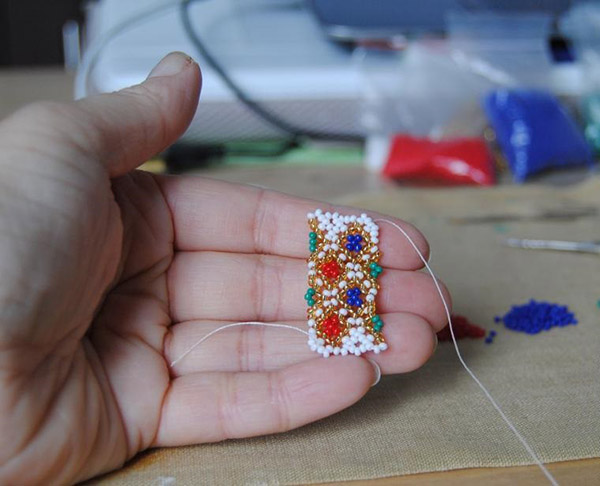
Connect the edges of the girdle, passing through the outer beads nylon thread.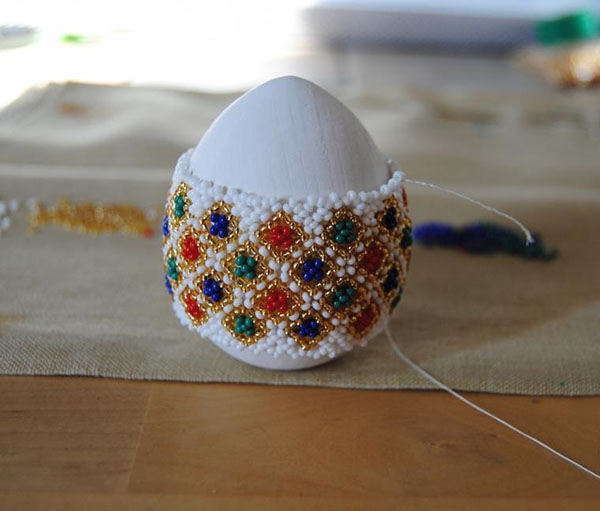
To prevent the belt from hanging on the workpiece, make the upper and lower rows more tight.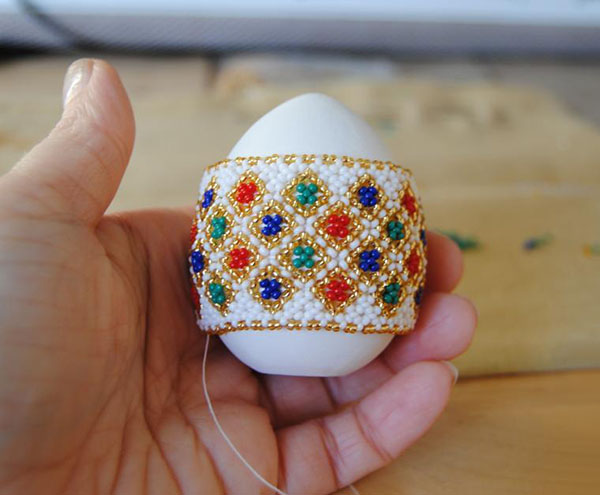
Start to braid the crown, making a line of the same color. To do this, wear one bead and pass the needle through every second in the already existing row.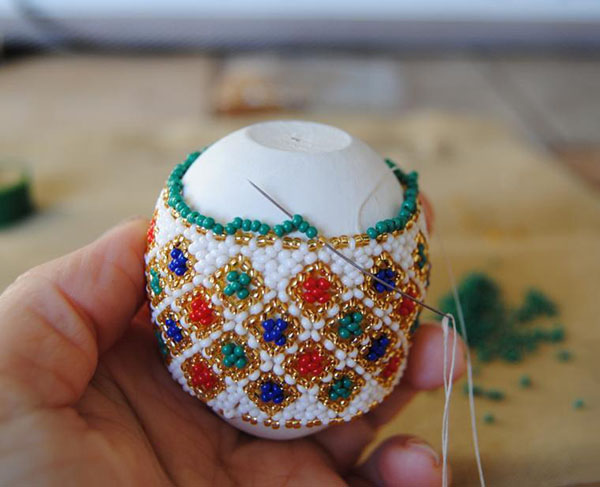
Continue to alternate the colors of the beads, displaying patterns. Blue-red-green-gold is ideally combined.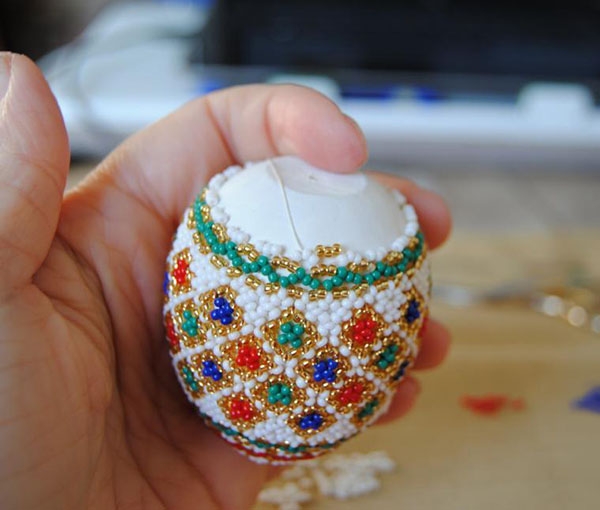
Taper knit with beads, threading through 2 or 3 beads.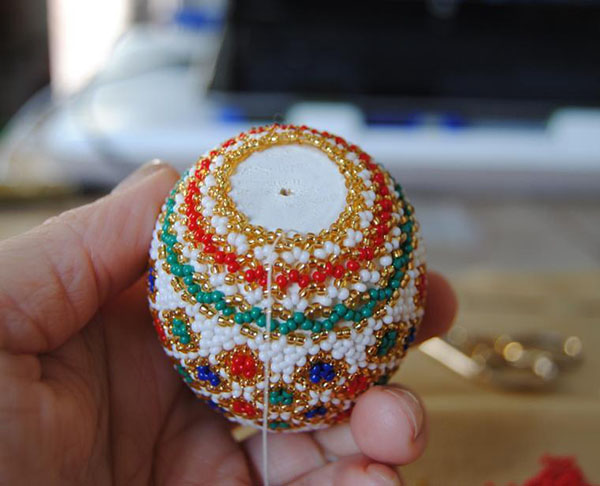
Finish the bottom of the head, reducing the beads in the row. Seretinku make a large bead or the same small beads.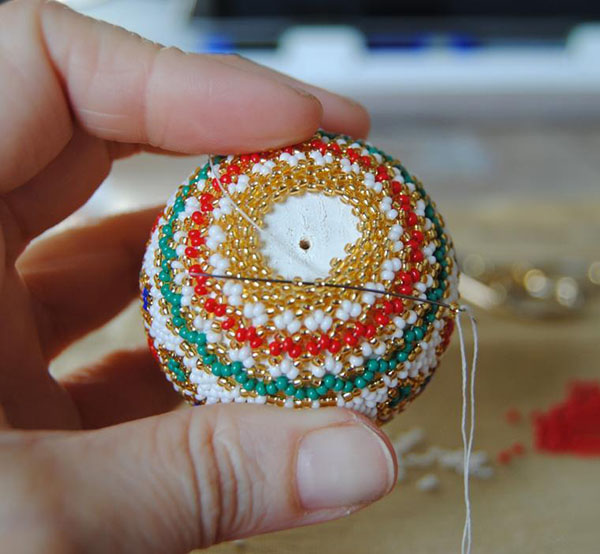
Similarly, trim the top of the Easter egg.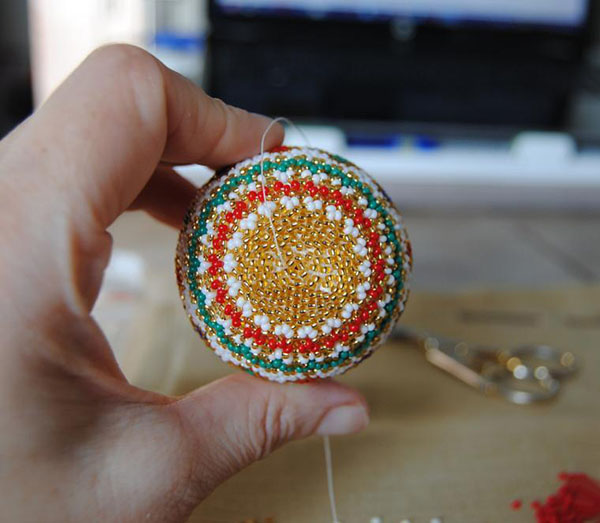
Instead of ornate openwork patterns, you can weave ordinary parallel rows.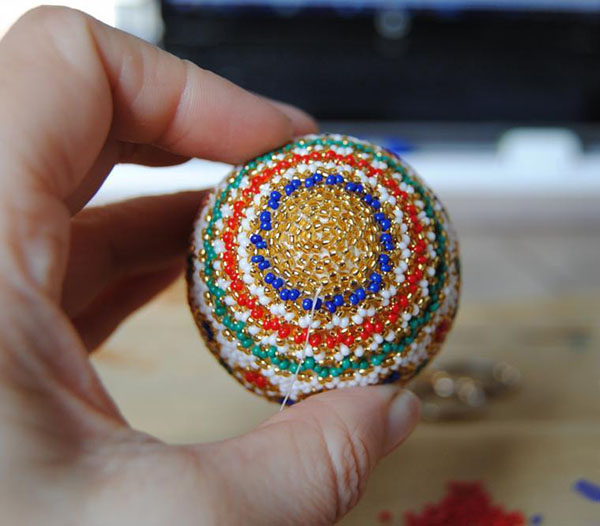
Through the last bead, thread the thread three times,to firmly fix it. Amazing Easter egg with your own hands of beads according to the master class with the photo ready. Find an odd job worthy of a place in a festive interior or present a product to an expensive person.
Easter eggs in the style of "Kanzash" - Crafts from the hands of satin ribbons
Stylish and elegant eggs from satin ribbons instyle "Kanzash" will be an excellent decoration for the Easter tree, mantelpiece, chest of drawers and even a dining table. Thin pearly ribbons give the products a special glamor, and a primitive execution allows anyone who wants to become the author of such beauty.
Necessary materials for Easter eggs from satin ribbons in the style of "Kanzash"
eggplant billets
satin ribbons with a width of 0.5 cm
glue gun
decorative elements (sequins, beads, beads, etc.)
scissors
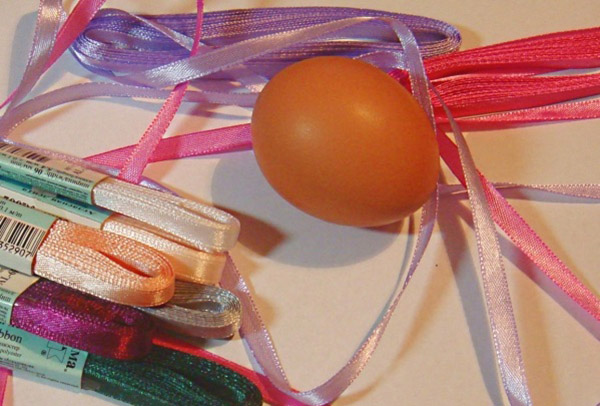
Master class for making crafts - Easter eggs from satin ribbons
To the bottom end of a clean and fat-free egg, attach the two ends of a thin satin ribbon using a heated glue gun.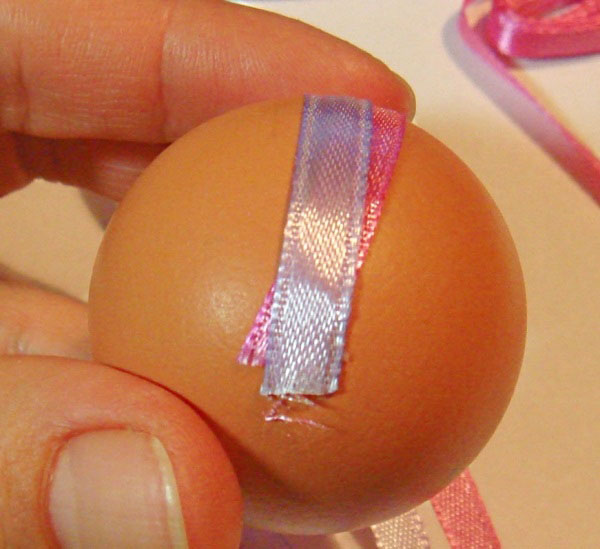
Gradually wrap the egg with ribbons, crossing them at the ends.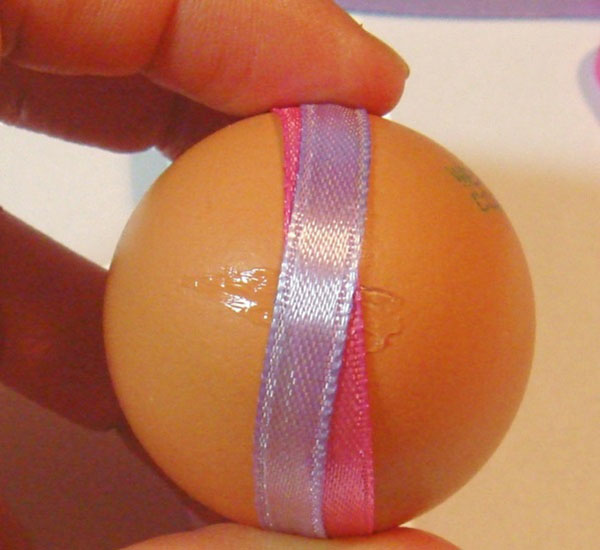
After each half-turn, fix the material with hot silicone.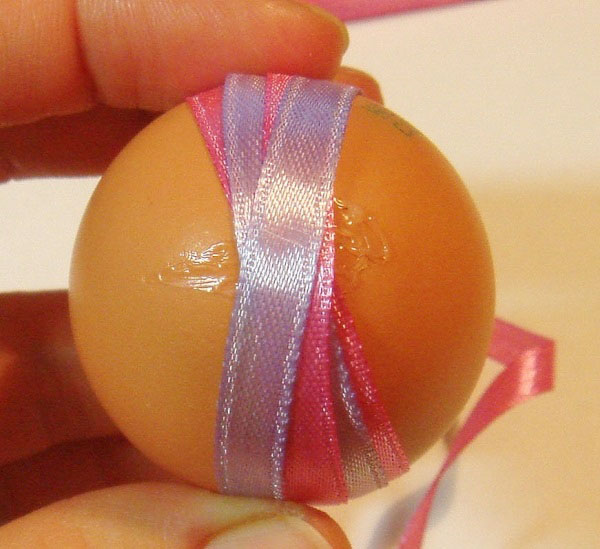
When the egg is completely covered, set the ends of the ribbons and firmly glue them on the bottom of the craft.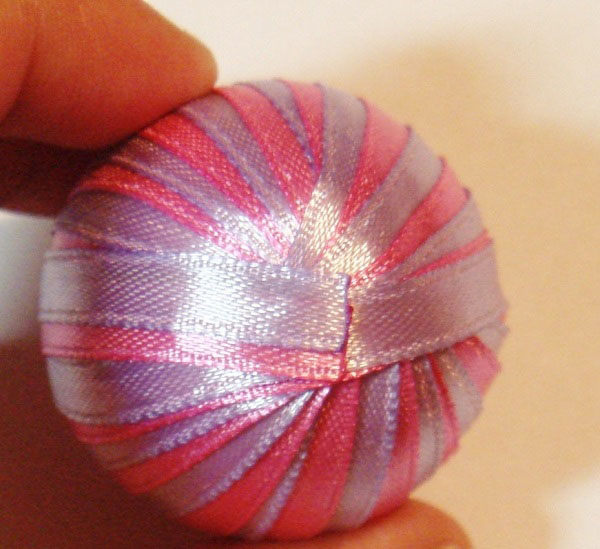
A simple interlacing of ribbons creates an unusual relief on the Easter egg.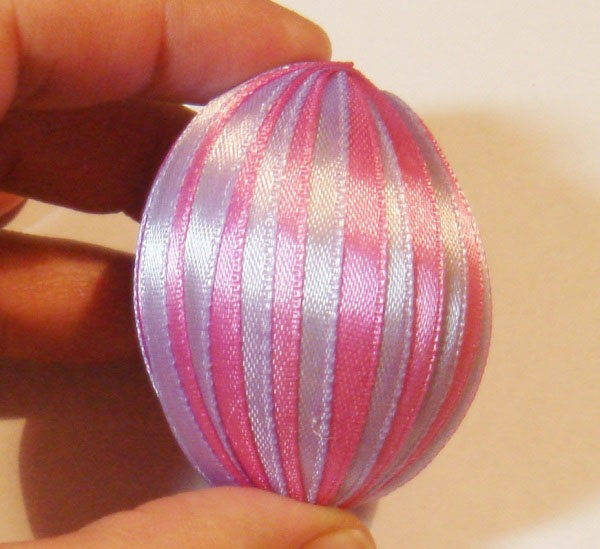
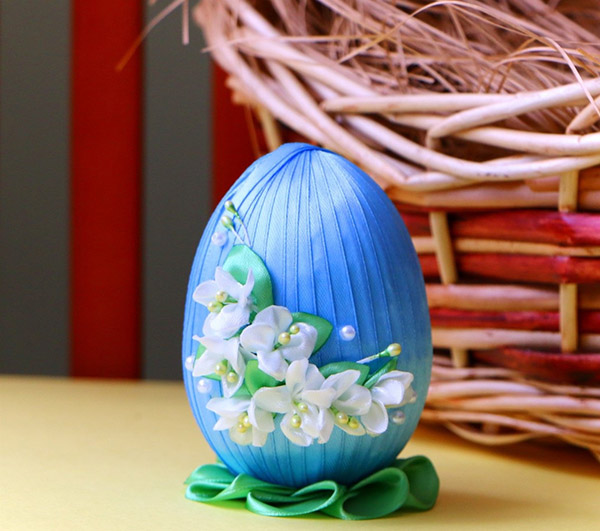
When the silicone completely dry out, decorate the hand-made articles with decorative elements: flowers, beads, beads, cuttings of their wood or felt.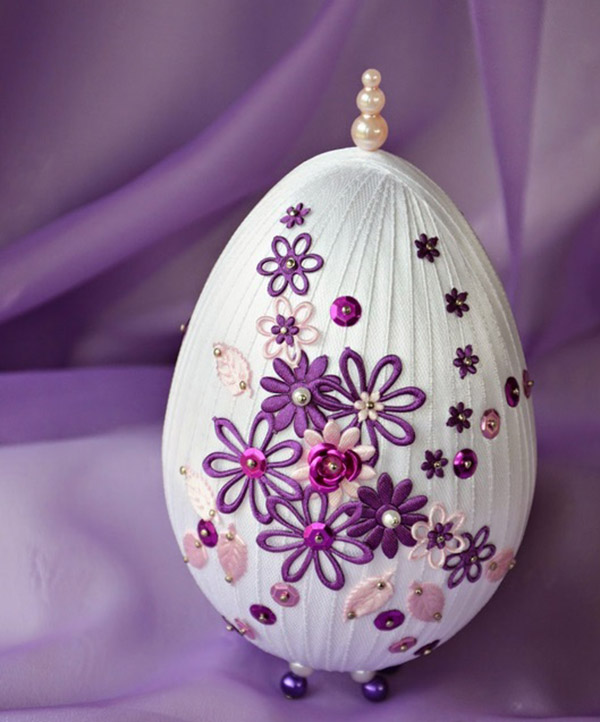
Spend a little more time and make anydecorative podstavochku for the product. So, the Easter egg in the style of "Kanzash", like hand-made from satin ribbons, will look even more impressive.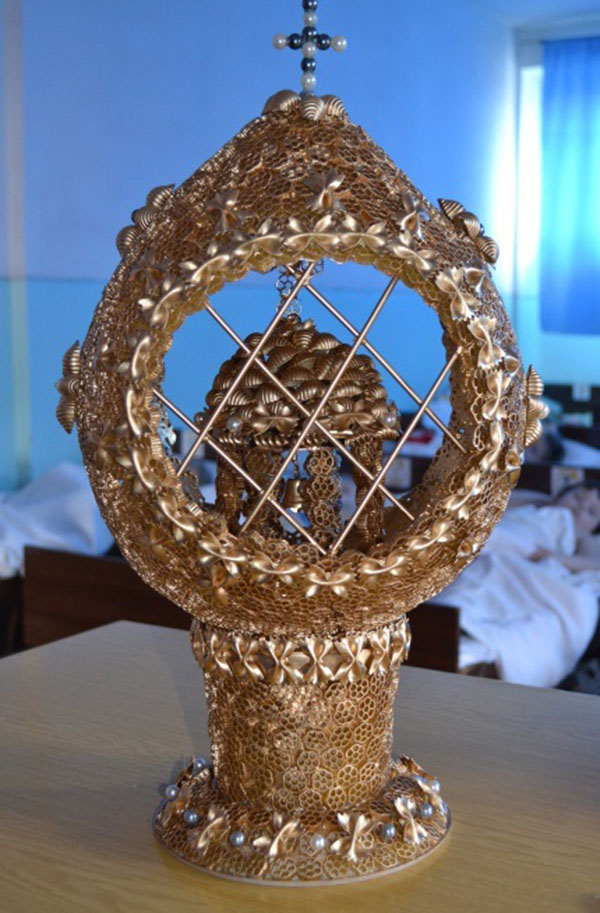
Interior Easter eggs with your own hands from pasta: master class with photo and video
Extraordinarily beautiful, almost perfectEaster eggs from pasta delight, touch, delight the look. But to envy the owners of such a decorative craft is not worth it. It is better to take in the hands of an ordinary balloon, to get from the kitchen shelf all sorts of different pasta and make a delightful Easter figure with our hands in our master class with photos and videos.
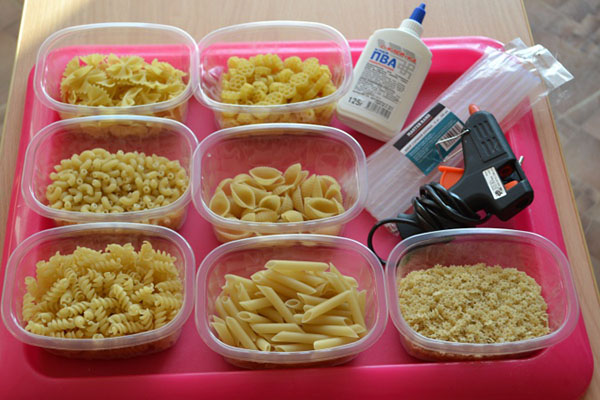
Necessary materials for Easter eggs from macaroni own hands
figured pasta
glue gun
PVA glue
balloon
CD
bellbell
paint is golden or silvery from the bottle
Master class with a photo on making an Easter interior egg from curly pasta
Inflate the balloon to a suitable egg shape(of any value). Place the ball on the stand and apply a lot of PVA glue. Gradually, attaching the macaroni closely to the macaroni, cover the whole figure. On both sides, leave round or oval holes, as in the photo.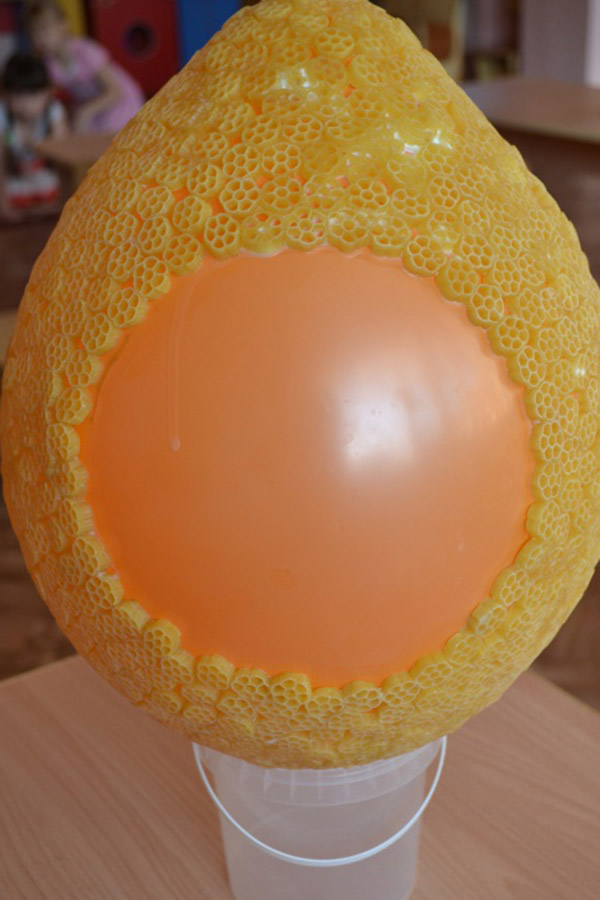
While the egg dries, start making a chapel. Use a glue gun to assemble small columns. The finished chapel should be placed in a decorative egg.
Glue the columns to the old CD. Make a small neat dome. Fix the part on the columns. At the top, put a cross pasted from macaroni. Hang the bell under the dome.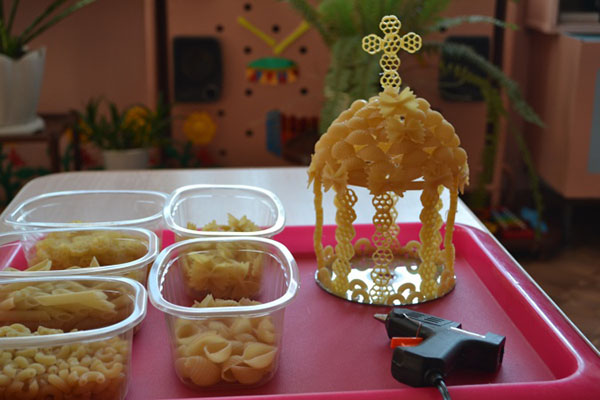
Set the chapel in the egg. Close the front and back windows with a long spaghetti grille. Using imagination and imagination, make a stand for a decorative Easter egg.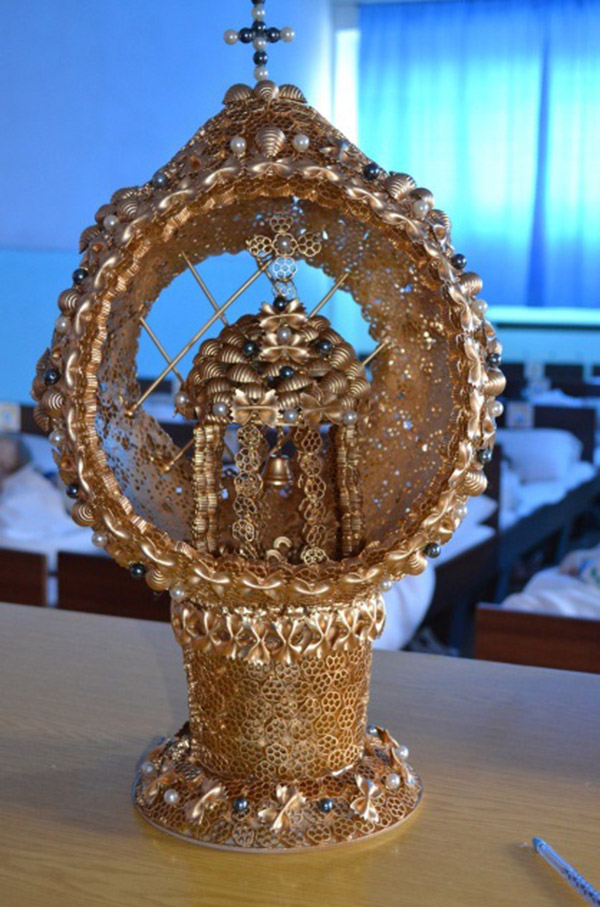
Paint the craft with golden paint from the can. Wait until everything is completely dry.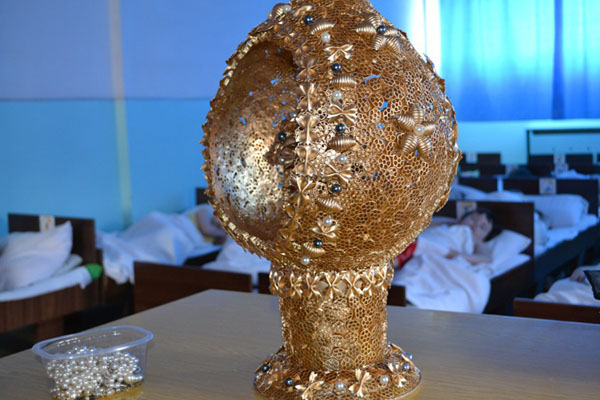
Decorate the interior Easter egg with yourhands of macaroni of different shapes with pearls, beads, bows, etc. The main thing is that the finished product turns out to be interesting, unusual and not overloaded with details. Photo58
Easter eggs with your own hands from pasta andpaper, beads and threads, from satin ribbons in the style of "Kanzashi" and "artichoke" ... There are many options for festive handicrafts. Choose a suitable master class with photos and videos - and start creating an Easter souvenir.