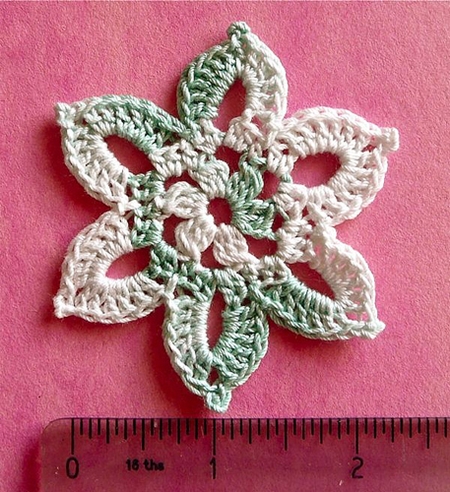
Knitted snowflakes
 How to make a snowflake from paper, both adults and children know. And do you know, how to make a knitted snowflake? Knitted snowflakes, made with the help of a hook, will become not just an ornament, but also a great gift for friends and relatives by the New Year.
Knitted snowflakes can be hung on the tree or simply attach them to walls, curtains. You can even on strings and ropes of different length to hang knitted snowflakes to the ceiling - you will have your own snowfall at home. And also knitted snowflakes can be used for scrapbooking, decorating gift bags or as unusual stands under the glasses on the New Year's table.
Crochet New Year's snowflakes crochet, as a rule, according to schemes from specialized magazines, the Internet. However, beginners can have difficulty in knitting snowflakes, because they do not always manage to correctly read such schemes.
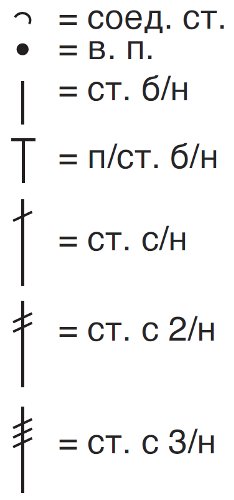
When you're going to make knitted snowflakes, remember that designations for crochet patterns can differ significantly in different sources. Therefore, in order to avoid difficulties, it is recommended to select the circuit with the decoding of the symbols.
For example, in schemes for crocheting snowflakes with crochet for designation of air loops (cp.) almost always you can find black filled circles or "contour" circles. But semi-columns (st.) In some schemes are indicated by the sign "+", in others - in the form of the letter "T", in the third - in the form of a horizontal arc.
Knitted snowflakes usually consist of several parts - rapports. Rapport in knitting is usually calledrepeating part of the pattern. In crochet patterns, the rapports are usually indicated by an asterisk (*). Often in the diagrams only images of one rapport are given, it is understood that the rest of the snowflake rapports should be knit similarly.
Here an example of a simple knitted snowflake by the New Year. In the snowflake there are 4 rows, for knittingOnly air loops are used (indicated by circles in the diagram), columns without a crochet (indicated by crosses) and half-columns (indicated by black triangles).
For the beginning, a chain of 6 air loops is knit. The received chain should be closed in a ring by a connecting column. Then the first row is knitted: 3 air lifting loops and 2 air loops, rapport. For rapport, a pile with a cuff is tied into the resulting ring, 2 air loops. Repeating is repeated 7 times. Only 9 times. The series ends with a connecting loop. Further, the second and third rows are knitted according to the scheme:
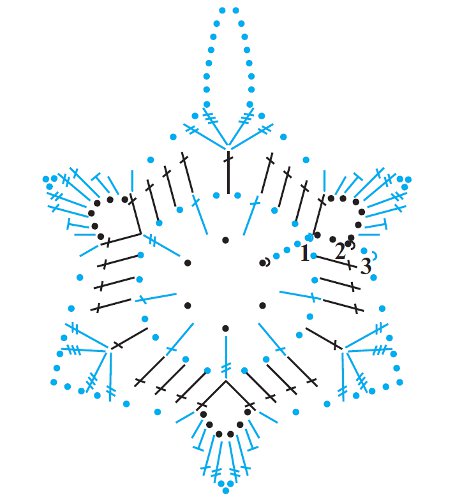

Second row. There are 3 air loops for lifting,then 6 more air loops. Next, you should tie one column with a crochet into the last connecting loop of the previous row. Then 3 stitches with a crochet are knitted, in the middle of two air loops a 1 stile with a crochet is tied. Next - 3 more columns with a crochet.
In a column with 2 rows of the previous row1 stile with a crochet is tied, then you need to make 6 air loops and in the same loop one more column with a crochet is a rapport. Repeat repeat 2 more times.
Third row. An air loop for lifting is transmitted. After that, in the chain of 6 air loops of the previous row, 1 bar is laid without a crochet, (*) 1 half-loaf without a crochet, 1 pile with a crochet and 1 pile with 2 nakidami. Next, tie 3 air loops, 1 stool with 2 nakidami, 1 pile with a crochet, 1 half-pile without a crochet and 1 pile without a crochet (*). Remember the sequence described from (*) to (*).
In a column with a crochet of the previous row1 stitch without crochet and 2 air loops are fastened. (**) Next, you need to skip 3 stakes with a crocheted from the previous row and in the 4th column with a crochet tie a 1 stool with 2 nakidami. Next, you need to knit 1 an air loop, a column with 3 wraps, a chain of 16 air loops, one column with three capes, one air loop and one column with 2 capes - everything is tied into one column (**).
After this, you need to tie two air loops,skip 3 posts with a crochet of the previous row and in the 4th column, insert one column without the crochet. Next, knit a pattern according to the sequence described from (*) to (*). Then two air loops are tied and then the pattern is knitted according to the sequence described from (**) to (**), but instead of a string of 16 air loops a chain of 5 air loops is needed. According to the scheme, the rest of the pattern is added.
After the knitted snowflakes are finished, im it is necessary to impart rigidity. This can be done with the help of special spraysor with the help of starch, a strong sugar syrup. Starched crocheted snowflakes should be well stretched and smoothed, and then left to dry.

