Summer bag crochet: master class with photo and video. Step by step instruction on knitting a summer bag
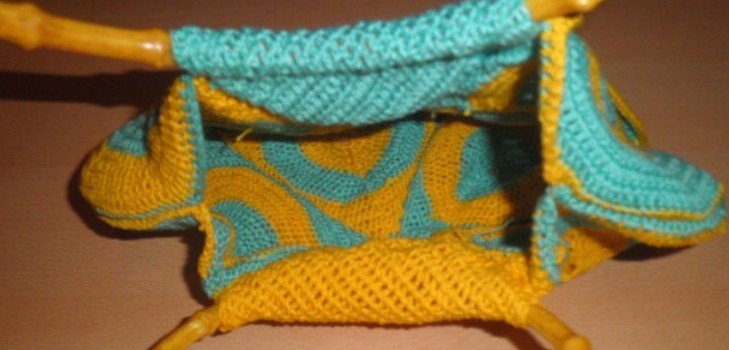
Yarn: "Iris" 100% mercerized cotton 25 g, yellow and turquoise. Consumption of yarn - only 340 gr (170 g yellow, 170 g turquoise);
density: 30 columns in 13 cm.
tools: hook number 2.5, scissors, needle; finished wooden round handles
Summer bag crochet - step by step instruction
The front part of the bag consists of 4 motifs, the top part and a wooden handle
Front bag detail motif
A chain of 6 air loops is sewn into a circle in a yellow thread. Next, we continue knitting in a circle with 12 stitches with 1 cape. The last and the first columns of the series are joined by a half-column without a crochet.
3 air. etc. for lifting a row, then we knit 4 rows of yellow threads according to scheme 1.
From 5 to 7 the rows of the scheme are knitted with a thread of turquoise color.
Next: 4 rows - yellow, and 1 last row of turquoise threads. The motive is ready.
Such motifs for the front part we knit 2 pieces. We knit 2 more motifs according to the same scheme, but the alternation of colors in the reverse order: we begin knitting with turquoise threads and alternate.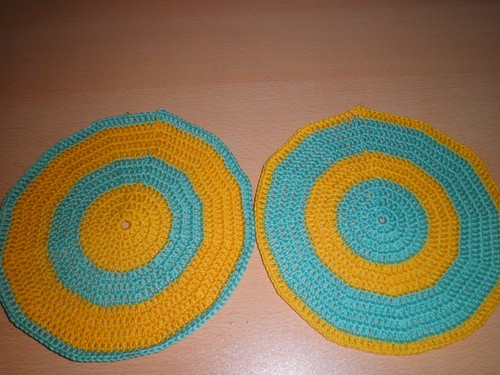
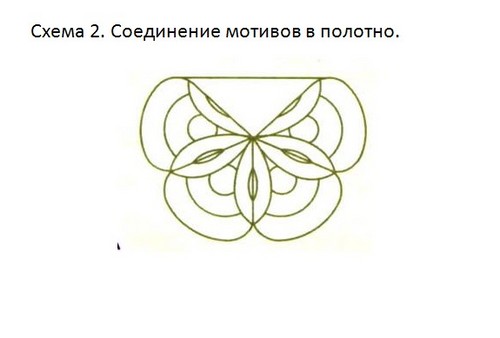
Each motif is bent from 2 sides so that a triangle is obtained.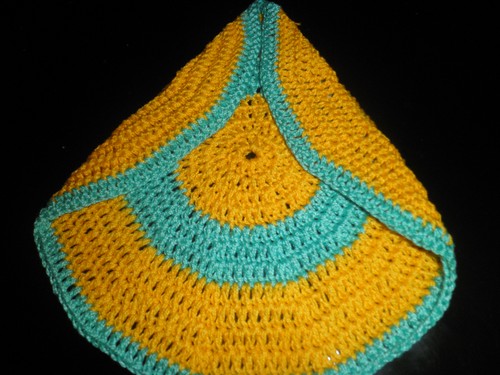
Stitched seam we sew motifs among ourselves in places of folds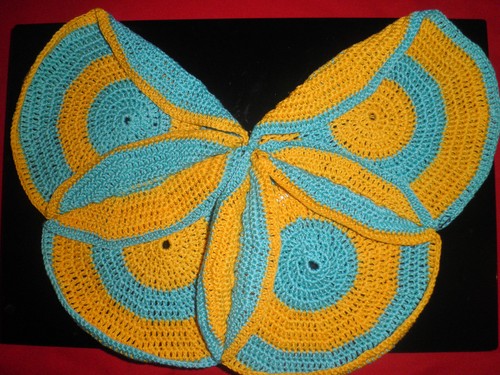
Top of front part
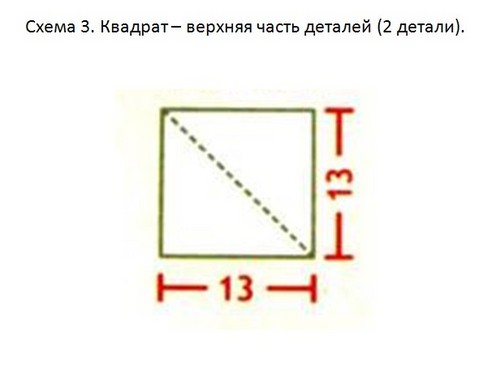
A chain of 30 air loops (13 cm) with turquoise threads.
We knit the canvas from the columns with 1 crochet to a height of 13 cm. We obtain a square of 13 x 13 cm.
The connection of the upper part of the front part with the handle of the bag
Wooden handle placed on the finished top (square) on its diagonal
We bend the square and connect its corners with a hook..
In the double canvas, we connect the sides of the triangle of the cloak of Art. b.. The back part is knit like the front. Only the top part of the back part is knitted with yellow threads.
We connect the motifs with the handle and the top part. The handle with the top of both parts is sewn with a dense seam in a triangular notch in the canvas of motifs.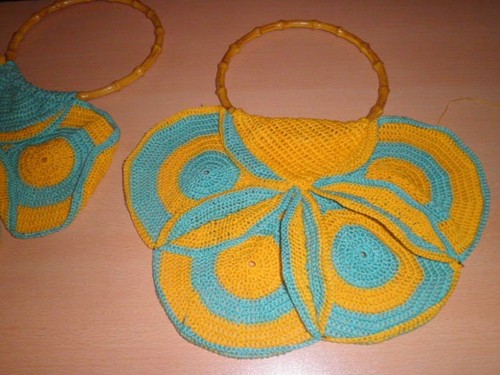
Connecting the front and back parts together
We put the front and back parts on each other face.
The edges on the opposite side of the handle are sewed together by a tight seam.
We turn the bag on the front side.
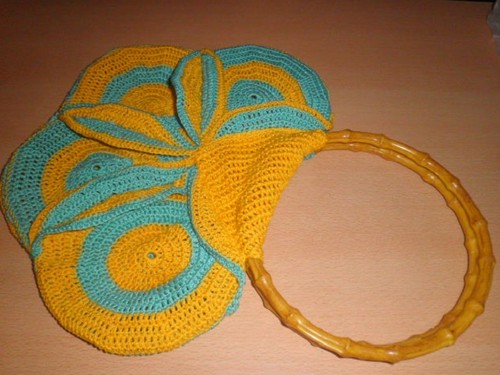

Summer bag crocheted ready!
Read more:

Summer Hat Crochet: Scheme, Video, Photo

Summer bag with knitting needles: photo, video. How to tie a women's summer bag - step by step instruction

Summer blouse for full crochet - master class. Step-by-step instruction for knitting a summer blouse for complete

Children's summer panama crochet: photo, video. Step by step instruction on knitting the children's summer panama

Summer booties crochet: diagram, photo, video. Step-by-step instruction for knitting cymbals

How to tie a summer baby cap crochet. Master class on knitting of children's summer hats

Female summer Panama crochet: photo, video. How to connect the women's summer panama - step by step instruction

Children's summer panama crochet: photo, video. Step by step instruction on knitting the children's summer panama

How to tie a summer baby cap crochet. Master class on knitting of children's summer hats

Summer booties crochet: diagram, photo, video. Step-by-step instruction for knitting cymbals

Summer bag crochet: master class with photo and video. Step by step instruction on knitting a summer bag

Summer Hat Crochet: Scheme, Video, Photo

Summer bag with knitting needles: photo, video. How to tie a women's summer bag - step by step instruction

Summer blouse for full crochet - master class. Step-by-step instruction for knitting a summer blouse for complete