Volume brooch with own hands

Today, a brooch is a stylish accessory thatYou can emphasize your individuality, express your mood, and add perfection. Is it difficult to make a brooch yourself? If you are a little friends with a sewing machine, you can do it.
Let us consider in more detail how one can make a brooch with a cameo with his own hands.

Preparatory stage
Necessary materials:
- fabric for embroidery (in our case cotton Bomull (Bomul))
- Threads for embroidery (in our case DMC # 938)
- brooch cloth
- sealant (collar doublerine (also known as coarse calico adhesive) and non-woven fabric)
- brooch accessories
- Threads in the tone of the canvas on which the embroidery is made
- sewing machine
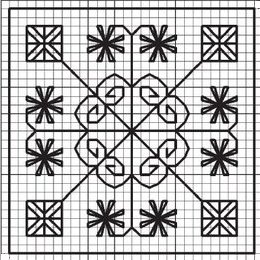
For manufacturing our brooch the following scheme was used.

The embroidery was made on cotton Bomull (Bomul) through two warp threads in one thread of a floss.
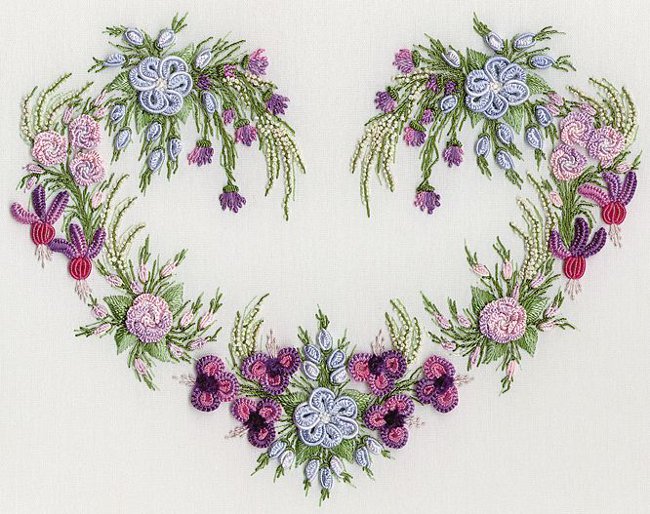
If you do not embroider, then the image of the female profile can be found in special fabric panels or patchwork coupons.
You can also search for a napkin with a cameo image and transfer it using a decoupage technique to the fabric. You can transfer one of the images below to the fabric, printing it out first.

The process of making brooch
So, we already have a picture of the female profile on the fabric.
Cut out two identical squares from cotton,corresponding to the size of the embroidery. In our case, this is an American cotton brown in polka dots. We cut out squares of the same size from the collar doublet. We will also need another square of flesh colored cotton and a piece of non-woven fabric to seal it. Before you begin to assemble the brooch, you need to compact the tissues.

Wetting the collar double, glue itusing a hot iron to the underside of brown cotton in polka dots. Flizelin paste hot iron to a piece of flesh cotton and the wrong side. Sealants glue, rearranging the iron from place to place, as if walking them.

Make a window for our brooch. Fold the "sandwich" - the square of brown cotton face up and the square of the corporal cotton face down.

We impose on the embroidery tracing paper and draw an oval pattern for our brooch.
Cut and transfer to the wrong side of beige cotton.

We select the thread in the tone of the canvas, on which the embroidery is made.

Using a sewing machine, plot the line exactly along the line that you drew.

This will look like our workpiece, when the line will be laid.

Now, take the sharp scissors and cut the hole inside the oval.

Like this.

We make frequent incisions along the entire circumference of the ovalwith the help of sharp scissors, which are well cut with the entire blade to the very tips. This is an important point, since the incisions should end somewhere in millimeters from the seam, but in no case do not cut it.

Tough work with the notches is done, you can form a window for a brooch. As shown, but the photo below, take the beige square for the edges and ... push it through the window.

Well steamed and smooth our workpiece. That's what should turn out in the end.

Laying a canvas with embroidery underneath the workpiece, sew it on the typewriter.

That's such a neat line should be the result.

Turn the work to the wrong side and, leaving a small allowance, cut all the layers except for the front one - brown cotton in polka dots.

Now we need a second square of compacted cotton, which we prepared at the beginning. Fold both squares - a whole and with embroidered faces facing each other.

Sew them together, plotting a line around the stock. Leave a small area unshielded, to turn the work on the front side.

The remainder of the material is cut with zigzag scissors.

Through an unshielded patch we turn out the brooch.

We sew the accessories for fixing the brooch, fill it with a holofiber and sew a non-sewn area with a secret seam.
That's how our brooch looks from the front side.

And here so with the purl.

We hope you liked this master class and you learned some useful information from it.

Creative inspiration to you and even lines.