A gift for the New Year with their own hands: felting pinets, master class with photo

If the holiday is approaching, you have already purchasedgifts, but still do not know what to give a small member of the family, recently appeared. We will tell you how to make warm booties using only natural materials. The legs of the baby will always warm your work of art, made for him with love. Use our master class with a photo, it does not take very long. Give the baby and parents warmth of their soul. We wish you good luck in your work.
For work you need:
- wool (in combed ribbon) about 30 grams (green), 10 grams (white), 5 grams (pink)
- soft synthetic mesh (tulle)
- towel
- water, soap, glue
- thread, needle
- silk ribbon

Step-by-step instruction:
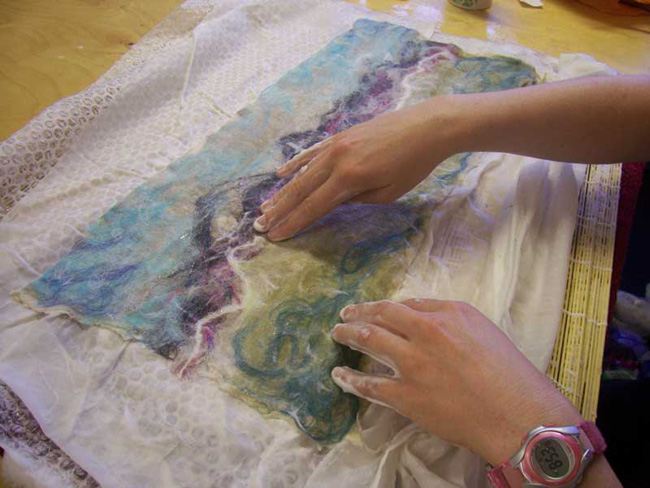
- On the harvested surface (in a container orany other special surface we put a soft synthetic mesh) begin to lay the wool. The grid from the right edge should remain approximately 25 cm. We take 15-17 grams of wool, divide it into layers and lay it in a thin layer. Then lay the next layer with an overlap on the past, each layer must be perpendicular to the previous one. We use all the wool (15-17 grams), making our first pinetochku. Its size depends on the age of the baby. We do on the baby (0-3 months), so our workpiece will be 18 * 18 cm in size.
- Cover the resulting blank with a grid. We will make this step with the help of the already existing grid in the last stage, which lay at the very bottom. On the right side, the rest of the grid is shifted to the left, as shown in the figure below. Then water with soapy water, you can use ordinary water. All our woolen blank should get wet. If you used ordinary water, then soap over the mesh to make a soapy surface. Soap is dipped in water and rubbed in a circular motion.
- Then we smooth our workpiece so that itwas flat and remove from it our mesh. Let's dry out the soap solution for 15-20 minutes. Next, take a towel that absorbs water well, wrap our blank in a roll with a towel and roll. 20-30 times in each direction.
- Let's proceed to the formation of our little miracle. If the billet is very dry, we add soapy water + glue to it, the ratio of water to glue is about 1/3 (we wet it, we do not need to add glue), so that the figure bends well and without problems takes the form we need. We begin to impart volume and shape to our workpieces. We measure that on the foot (the bottom base) there are approximately 90-10 cm (depends on the size of the baby, on which you are doing this miracle). Bend the edges, neatly molding the shape we need. The excess is cut off, the recess for the leg remains approximately 4 * 4.5 cm.
- The same thing we do with the second one. When cutting excesses, it is necessary to trim the edges carefully so that they are smooth and solid. It is done by fingers - smooth irregularities in circular motions until completely leveled.
- After manufacturing and shaping ourPinetochkam give them time to dry up (10-15 minutes). If during this time they did not have time to do this, then take a towel and gently dry it. This is done with push-ups, but the crafts do not need to be twisted, otherwise they can lose even structure and shape. You can just slip in the towel neatly small slippers. Thus, the whole soap solution is removed, you can gently wash our figures (also dipping, not under the water stream), if you failed to completely remove the white foam. Our figures are ready, align their shape, if something went wrong with the last stage. Now we are waiting for them to dry completely.
- We turn to the decoration of our little charms. We take the wool, spread it with a small square (3 * 3) on the harvested surface (as in the first stages of our master class: container, synthetic mesh). Lay out layers and each layer is perpendicular to the previous one, then cover the blank with the right side of our workpiece and cover with a soap solution, stroking the coat on top. When the preform has dried up a little and absorbed this solution, we remove the mesh from above, take the wool and start to shape the ball (gently rolling it with our hands on the board). After the round beautiful ball has turned out, let it dry completely.
- You can take wool of different colors forwe took white, pink. Twenty white and five pink circles rolled as indicated above. We glue on glue, or we sew our circles. We asked for the booties on the top with white balls and made a flower in front.
- We conclude our work with tape. We sew a ribbon behind our pinetochki so that you can tie it to the foot of a child, and it is not lost, or used as a decoration, a hook for storage.


Our little beautiful, lovely booties are ready! From them it is impossible to tear off the eye! Do this miracle, you will not regret, please your kids and children of your family and friends for a fabulous holiday - New Year!

Read more:

A gift for the New Year with their own hands: a hair clip for their own hands, a master class

A gift for yourself on the New Year: a cover for a phone in the felting technique, a master class with a photo

A gift for the New Year with their own hands: a hair clip for their own hands, a master class

A gift for yourself on the New Year: a cover for a phone in the felting technique, a master class with a photo

A gift for the New Year with their own hands: felting a purse, a master class with a photo

Gift for yourself on New Year's Eve: how to sew a toy "Bunny", a step-by-step master class with a photo
Wet felting

Summer booties crochet: diagram, photo, video. Step-by-step instruction for knitting cymbals

Wet felting
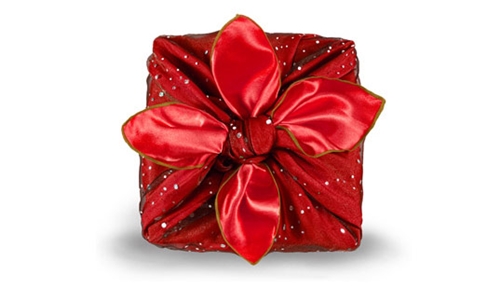
New Year packaging for gifts with your hands: photo master-class

A gift for the New Year with their own hands: felting a purse, a master class with a photo

A gift for the New Year with their own hands: felting pinets, master class with photo

Gift for yourself on New Year's Eve: how to sew a toy "Bunny", a step-by-step master class with a photo

Summer booties crochet: diagram, photo, video. Step-by-step instruction for knitting cymbals