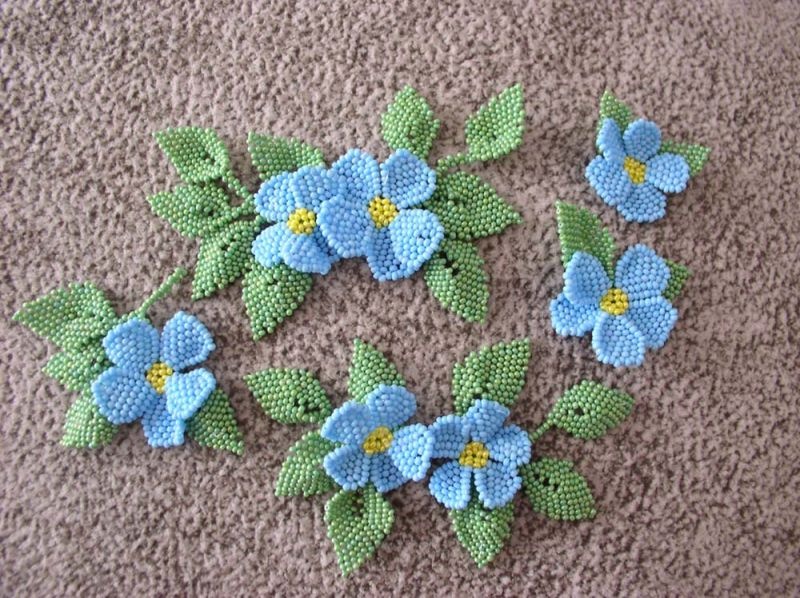
How to make a bracelet from beads with your own hands: photo, scheme, video

Weaving all kinds of beadwork -the occupation is fascinating. There are many master classes that help beginners to join this simple craft, and experienced craftsmen to learn new patterns. In what ways can you weave a bracelet from beads with your own hands?
Step-by-step instructions for making beaded bracelets
This female jewelry always remains in fashion. Particularly valued products made by themselves. It is in them invested a piece of the soul. Before you start weaving a beaded bracelet, you'll have to find the right instruction.
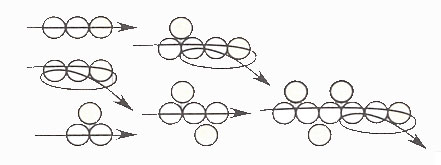
Master class 1: bracelet from beads by a simple method
The master class is designed for beginners, hewill help quickly make a bracelet of beads with your own hands, having spent a minimum of time. This pattern is simple, it is called a cross. It is easy to master even the one who has never picked up the beads. For work it is necessary to prepare a needle, a strong thread, fishing line. Beads can be one or different colors.
Weaving bracelet with a simple method of beads is carried out according to the following scheme.

How to make a bracelet from beads? Step-by-step actions for beginners with a photo:
We string 4 beads onto a string or line, andafter we close the ring. To do this, enter the needle from the first to the third bead. The result is a cross. Next, you need to put on 3 more beads and pull the needle into the fourth bead of the previous link. Get a cross again.
Similarly, we need to continue the weaving until the bracelet from the beads of the required length comes out.
Work on the weaving of the product is not yet complete, because the bead bracelet looks uneven. To fix this flaw, you should return to the beginning of the chain.
Needle must pass through the side beads of the first link.
You need to type three beads, and then enter the needlein the side of the starting link to form a cross. After it is displayed in the upper bead of the last cross. Then you need to dial two beads and insert the needle into the side bead of the second link, and also the upper one of the previous one. How to do it, clearly displayed in the photo.
The needle is output through the top and side onlythat the created cross, as well as the side bead of the third link. Next, we must continue to weave until a bracelet of the required length is obtained. In the end, you will have to return to the beginning of the second row and align the weave.
At the end of the weaving, the fastener should be attached to the product.
Master class 2: a simple way to weave a bracelet from beads
This variant of weaving bracelet from beadsis considered simple, so it is also suitable for beginners. For work it is necessary to prepare beads, a button, a strong thread or a fishing line. You can also use a lace.

Weaving bracelet from beads in a simple way is performed as follows:
From the prepared thread or line make a loop, and then tie a knot.

Begins the usual weaving of pigtails about 4 cm long. Next, string the bead, and then weave it into a pigtail.
So you should string on beads and immediately weave into the common pigtail.
After completing the weaving, at the end of the product is also made a pigtail from the thread about 4 cm.
On the opposite side, you also need to tie a knot and put on a button. It will serve as a fastener for the bracelet.
Master class 3: bracelet from beads chain
This variant of weaving bracelet from beadsis performed using the "chain" technique. Such work is possible not only for an adult, but also for a child. To make a bracelet from beads, this method requires a thread or a fishing line, as well as beads of three colors. When everything is ready, we must begin the weaving.
The master class is presented below:
15 beads of green color are put on a string or line. Then the ring closes, as in the photo. As a result, the ends of the thread will pass through the last bead.
Then, on both sides, 7 beads of the same color are threaded, the ends of the thread are passed into the 8th in opposite directions. It turns out the next ring.
Similarly, other rings are braided, until the desired length is typed.
Further, two more pieces of the same length are weaved, only using beads of other colors.
Then the obtained pieces of the bracelet are intertwined with each other, which can be observed in the photo.

Master class 4: three-dimensional bracelet from beads
Make a bulky bracelet of beadssimply, it is necessary to apply already familiar technique of weaving cross. The product itself is made of squares. If desired, they can be made in different colors. Before you start, you should prepare beads, clasp, thread, needle, scissors, and also beads themselves. It is advisable to use a kapron thread, but this is not important. It is quite possible to apply a conventional fishing line.
The bead bracelet is made as follows:
4 beads are threaded on a string or line, fromthey should make a ring. Then, 3 more beads are worn, weave the cross-stitch technique. It is described in the first master class. It is necessary to finally get 7 crosses, then pull the thread to the left and begin to weave the second side of the square.
Gradually weaving all 4 sides, we will get a square that can be seen in the photo.
To make it denser, you should create a second row around it, and then attach them together.
Similarly, you need to make the required number of squares from the beads.
The resulting squares are woven with beads. This can be seen in the photo.
First the thread is stretched from one side of the bracelet, then the other. The beads share the squares.
On the edges there will be a bare thread, it should be filled with beads. The ends are fastened on both sides by means of a fastener.
The bracelet made of beads is ready.
Master class 5: bracelet "Emerald" from beads and beads
To make a simple "Emerald" bracelet, you will have to use beads, fishing line or a very strong thread, green and transparent rhomboid beads.
The process of making a simple, but beautiful bracelet is as follows:
We string 3 beads on a string or line. Then we put on one bead of green color from both ends. Both pieces of thread are pulled through another bead in opposite directions and tighten the product.
On each side, one more green bead is passed, then the ends again stretch through three new beads.
Then three beads are passed from both sides, the ends of the line are passed through the very first three beads. Everything is delayed, it turns out an interesting flower, as shown in the photo.
Add the green bead on both sides, stretch the ends of the thread through a new bead.
Then you need to string another bead green at both ends. Next, add 3 beads and extend through both ends of the thread.
Add three beads on one side, stretch this thread through the previous row. The result is a second flower, similar to the first one.
On the one hand, the thread string three beads,Both ends are skipped through them. On each side add on a transparent bead. Then beads are strung, and then both ends of the thread are pulled through it.
On both sides add one more transparent bead, string three beads and pass through both ends of the thread.
On the right you should wear three beads, and the end of the linepass through the base between the green and transparent beads. Then you need to add 3 more beads, pass through both ends of the thread, tighten. Put on one green bead on each side, 1 bead. Both ends of the thread are stretched through it.
Again add one green bead, then - 3 beads, through which both ends of the thread are stretched.
On one side, add three beads, and the thread itself is pulled through the previous mix of green and transparent beads.
Similarly, the product of the desired size is weaved. A fastener of this kind is attached.
A beautiful beaded bracelet, made by myself, is ready.

Video: how to make a bracelet of beads with your own hands
This video shows a master class on making a bracelet from beads with rings.
The next video shows how to weave a simple thin bracelet from beads.
A master class on weaving a square bracelet from beads is presented on the following video.