Postcard on May 9 with your own hands for children, photo. Postcards on the 9th of May Victory Day from paper, to veteran, to the competition, in 1st class

Every year on May 9 in the Great Victory Day weWe honor the heroes who, at the cost of their lives, youth and health, gave us a peaceful sky in the distant 1945. Unfortunately, every year there are fewer and fewer survivors who saw the horrors of the Great Patriotic War with their own eyes ... Veterans leave quietly, taking with them terrible memories and incurable spiritual wounds connected with losses of native people and combat comrades. Therefore, while these great heroes still live among us, it is absolutely worthwhile to thank and congratulate on their main holiday. Even a postcard on May 9 with his own hands made of colored paper can lift the mood to the veteran, especially if it is made by children with respect. Then you will receive simple master classes with phased photo and video on making postcards by yourself on May 9 - from paper, with pigeon, for children's competitions. These options for festive handicrafts are perfect for students of grades 1-3.
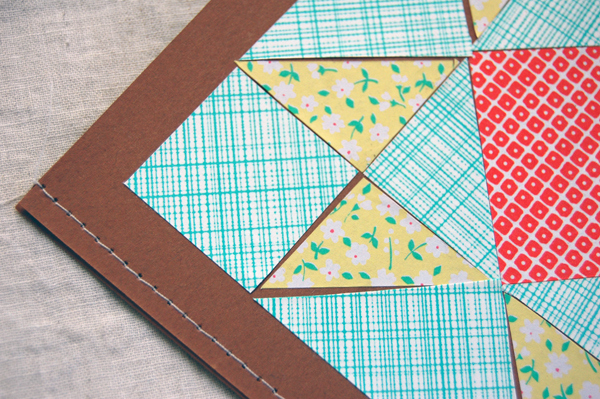
Beautiful postcard on May 9 with your own hands from paper with templates, in stages
The first version of the beautiful postcard on May 9hands of paper with patterns can be called classic. In the design of the postcard there are tulips - flowers-symbols of the Victory Day, as well as one more symbol of the holiday - St. George ribbon. To make such a beautiful postcard on May 9, you need colored paper and cardboard templates. Read more about how to make a holiday card in the master class below.

Necessary materials for a beautiful postcard on May 9 with your own hands from paper with templates
colored paper
cardboard
glue
plasticine
scissors
ruler
simple pencil
Instructions how to make a beautiful postcard on May 9 from paper with templates in stages
We will have a one-sided postcard, so first of all we cut out a rectangular 15 by 10 cm from a dense orange or golden cardboard.
Then from plain white cardboard or densepaper we need to make templates - for this simple pencil draws drops, stars, oblong petals. Then cut out the patterns and use them to make the workpieces: 5 drops of orange paper, 10 petals of red paper, 3 stars of different sizes (2 orange and 1 yellow). Cut out the blanks and put it aside.
From orange paper we also cut out a long wide strip, and from black paper - a strip of the same length, but narrower. Black then cut into 3 identical stripes.
Now we turn to the design of the postcard. First glue the tulips - first glue droplets of drops, and then the petals on the sides, forming buds of flowers in two rows.

Now glue diagonally a wide strip of orange. It should slightly overlap the lower row of tulips.
Over the orange strip we paste thin black strips - the St. George ribbon is ready. Also glue a large star, overlapping the tape a little.
We glue the remaining blanks of stars on top of the main, let the appliqués dry.
It remains to add a congratulatory inscription. To do this, from the finely rolled plasticine we put the inscription "May 9". Done!
A simple postcard with the Victory Day on May 9th with your own hands for class 1 pupils, a master class
The option of a simple card with your hands for a dayVictory May 9 from color paper for students of the 1st class is waiting for you in the next master class. Despite the rather simple design, such a postcard is voluminous and very bright. How to make a simple postcard on the Victory Day on May 9th with your own hands for 1st grade students in a step-by-step master class with the photo below.
Required materials for a simple postcard with Victory Day with your own hands for class 1
paper
napkins
colored paper
scissors
glue
Instructions for a card for the Victory Day on May 9th with your own hands for class 1 pupils
On this card there will be carnations, which we will make from a normal napkin. Napkin fold in half, and then again in half.
Then add a triangle from the napkin diagonally, and then again.
Cut off the cone, as shown in the photo below.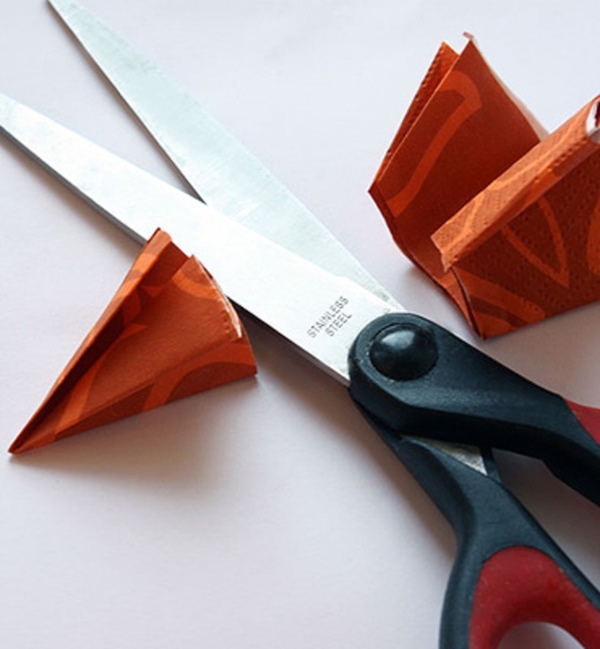
Cut the workpiece to about half the cone into thin strips. One flower will need 3 such identical blanks. Straighten each piece and glue them to each other.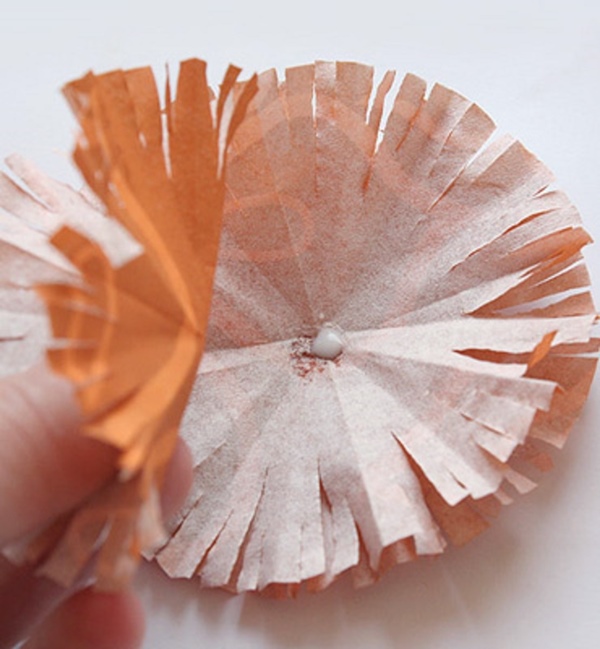
Fold the workpiece in half, forming a budcarnations. From the pieces of the napkin we make similar blanks of smaller sizes. We cut out the number 9 from yellow paper. We glue the nine and the blanks of the buds onto a folded piece of paper.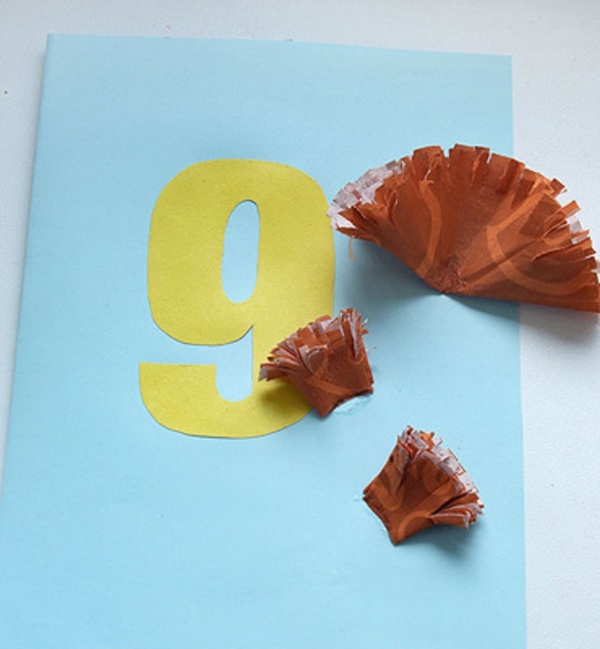
We cut out stems and leaves for carnations from green paper - we glue them to buds, forming carnations. From the yellow paper we cut out the letters - m, and, I. We glue all the blanks, as in the photo below.
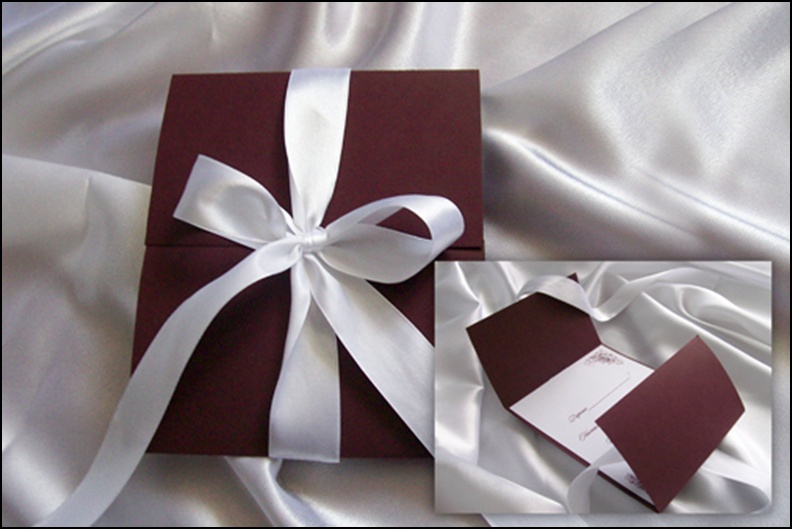
Original postcard on May 9 with his hands to the veteran, a step-by-step master class with a photo
Veterans deserve special attention throughout the year, andnot only on Victory Day. But it is on May 9 that we can present a special gift to the veterans of the Great Patriotic War, for example, an original postcard with our own hands from a step-by-step master class with the photo below. This version of the postcard is made in the origami technique and resembles a military cap - one of the symbols of military service. More details on how to make an original postcard on May 9 with your own hands for a veteran in a step-by-step master class next.

Necessary materials for the original postcard on May 9 with their own hands for the veteran
double-sided paper of green color
glue
scissors
George Ribbon
decorative star
Step-by-step instruction for the original postcard to the veteran on May 9
Fold the sheet of paper in half, as shown in the photo below. Smooth the fold line with your finger.
Bend the upper corners of the fold line, as in the next photo.
Now we bend the bottom of the strip, about 1/3 of the entire length. We smooth the fold line and bend it one third again.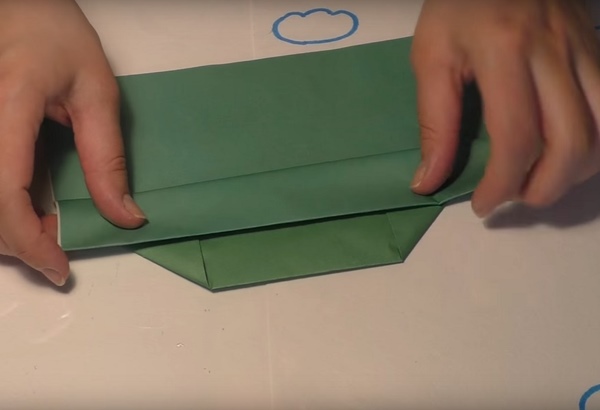
Turn the workpiece over to the other side and repeat all the same. Bend the two edges of the strip inward, as in the photo.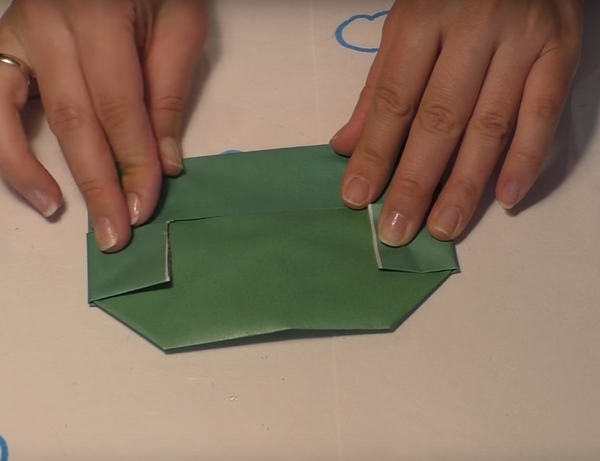
Now you need to hide the edges in the inner pockets and carefully spread the cap from the inside.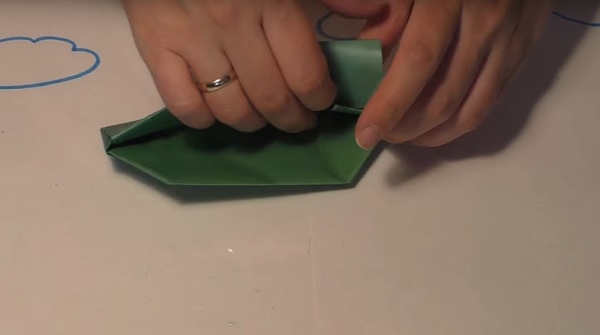
We turn to decorating - cut off the St. George ribbon strip along the length equal to the length of the cap. Glue it to one of the lapels.
It remains to paste the decorative star and add a congratulatory inscription.

Postcard with Victory Day on May 9th with your own hands for children, step by step
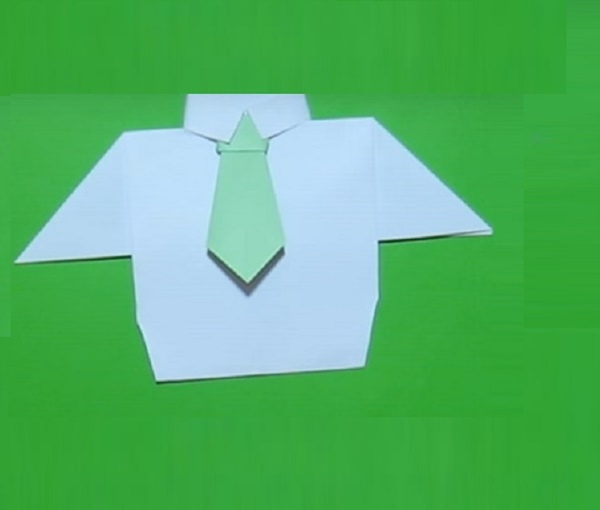
Postcard in the form of a shirt is one of the mostpopular versions of congratulatory crafts with their own hands in the performance of children for traditional military holidays - February 23 and May 9 (Victory Day). Usually such a postcard in origami technique is made of green or white paper - these colors are associated with military uniform (traditional and festive). Learn how to make a postcard on the Victory Day on May 9 with your own hands for children in the form of a shirt from the next master class.
Necessary materials for a postcard with the Victory Day with their own hands for children
paper
scissors
glue
Instructions for the card on the 9th of May Victory Day with your own hands for children
We place the paper horizontally and bend it in half.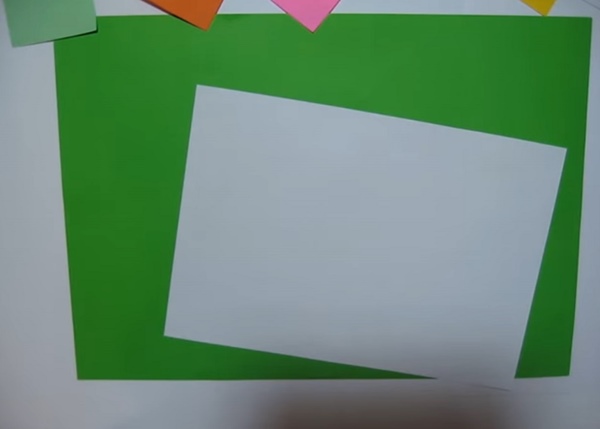
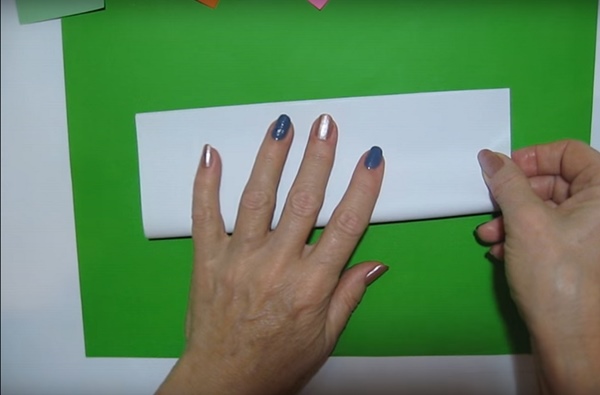
We draw a finger along the fold line. Expand the sheet and bend one of the halves, as shown in the next photo.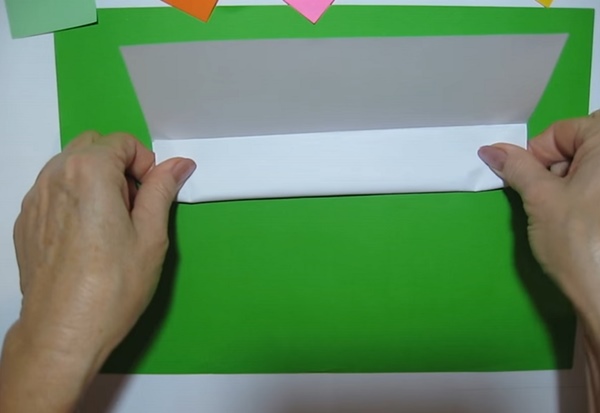
Repeat the same with the second half of the workpiece.
Now carefully spread the sheet, but so that the fold lines remain. From above, bend the corners of the paper inward, forming a triangular spout from the center line of the fold.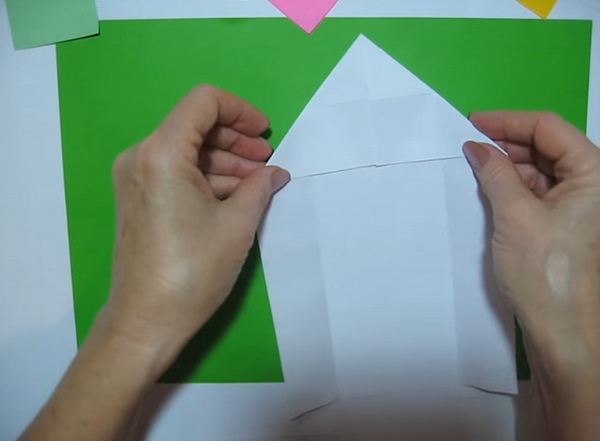
Straighten the workpiece, fold it in half and fold the triangle inward. Then bend the lower part upward - it turns out the silhouette of the inverted trapezoid.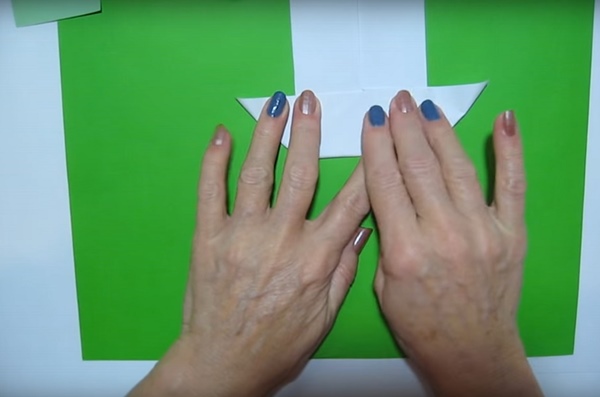

We turn the workpiece and from the other side we bend the strip, 2 cm wide.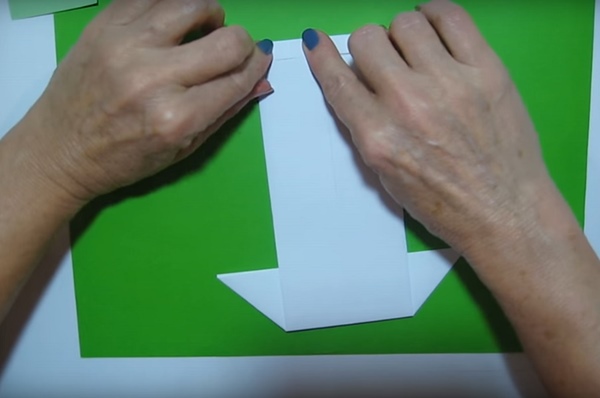
Again, turn the workpiece to the other side. Now bend the corners from the top to the inner fold line, as in the bottom photo.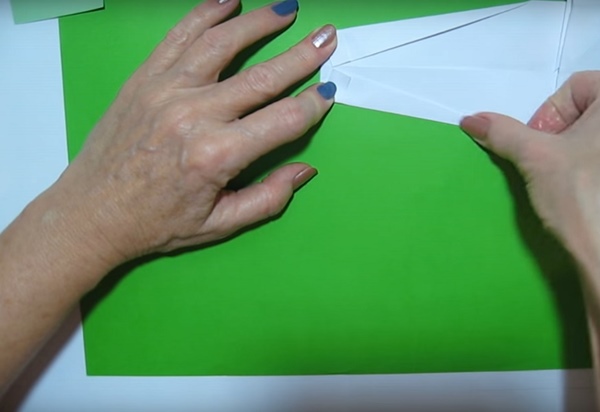
Now lift the lower part and turn it under the protruding upper bend, gently bend from below.
From a paper of contrasting color we cut out a small tie.
We glue the tie under the collar and our postcard-shirt on May 9th is ready! It remains only to supplement it with congratulatory inscriptions on the back.
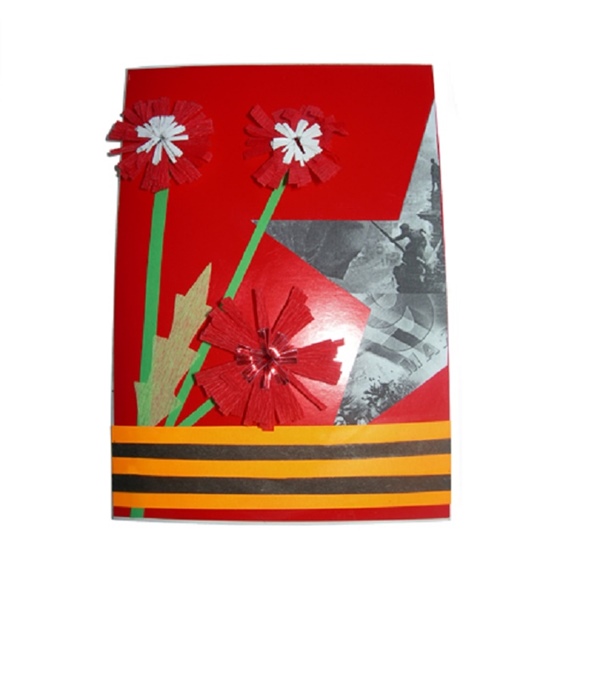
Children's card for May 9 with their own hands for the contest, master class with photo
Often on the eve of the celebration of May 9 in schoolsthere are thematic competitions, for example, children's cards with their own hands. At such competitions, not only the originality of the submitted works is evaluated, but also their connection with the history of this holiday. The next master class with a photo on making a children's postcard on May 9 with their own hands for the contest will suit in this respect perfectly.
Necessary materials for a children's postcard in honor of May 9 for the contest
colored cardboard
colored paper
napkins
scissors
glue
Instructions for a children's card with their own hands on May 9 for the contest
For the basis of the card, let's take a cardboard of a bright color, for example, red. Also for registration we will need a printout of a newspaper with military photos, a template of which can be found on the Internet without difficulty.
From the printed page of the newspaper we cut out the star - its height should correspond to the height of the postcard. Cut the star in half and glue it to the cardboard base.
From the green paper we cut out three thin strips - they will become stems for carnations, which will decorate the front side of the holiday card.
Now we turn to the production of St. George'sribbons: from orange paper we cut out a wide strip, and from black we cut three thin black stripes. We glue the black blanks to the orange strip, and then to the bottom of the postcard. The length of the ribbon should be equal to the width of the postcard.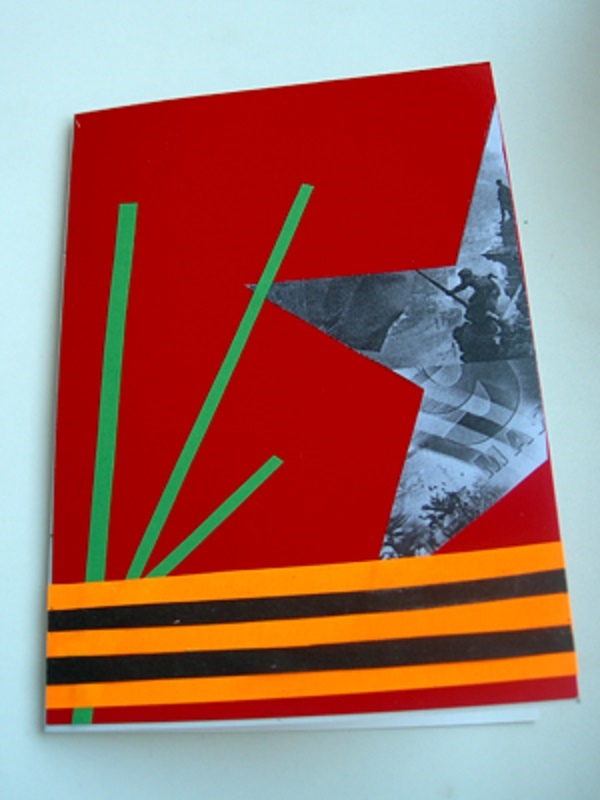
From napkins of red or pink color we cut out a wide strip. Scissors make fringes on napkins and wrap.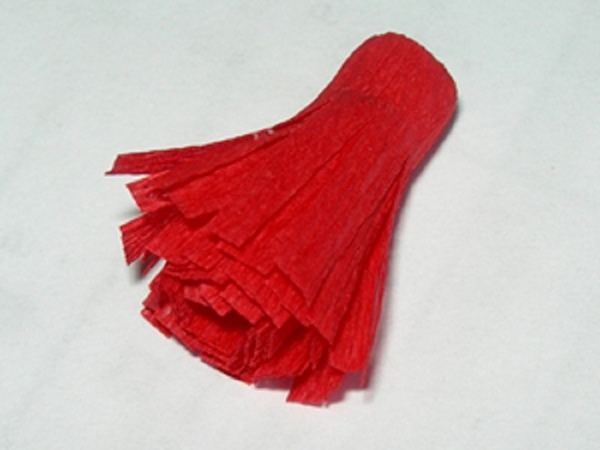
Straighten the bud out of the napkin, holding it from the bottom,so that the clove kept the shape. We glue the blanks, we also add leaves from the green paper. Above, buds can be decorated with a center of fringe of contrasting color. Done!
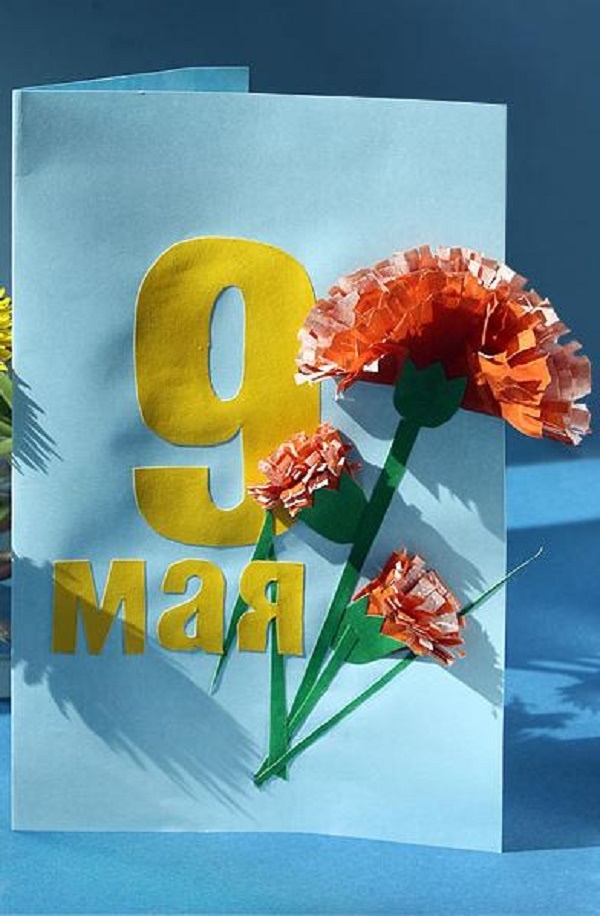
The variant of the postcard on May 9 with his own hands in the form of a flag for children, a step-by-step master class
Another version of the original postcardHands on May 9 for children in the form of a flag awaits you in a step-by-step master class below. This simple option is perfect for the youngest, for example, pupils of a kindergarten. More details on how to make the original version of the postcard by May 9 with your own hands in the form of a flag for children on.
Necessary materials for a postcard on May 9 with their own hands in the form of a flag for children
colored paper
cardboard
beverage can
glue
St. George Ribbon
simple pencil
ruler
Markers, colored gel pens
Step-by-step instruction for the postcard version by May 9 in the form of a flag for children
First of all, we cut out a rectangle from red colored paper. Then, from one side, cut out the triangle - the shape for the flag is ready.
From the yellow cardboard we cut out the figure 9 and paste it to the flag.
With felt pens or colored gel pens we add a congratulatory inscription.
Part of the tube is coated with glue and attached to the flag.
We let the workpiece dry and we tie a bow from the St. George's ribbon on the handle of the flag.
Postcard in the form of a holiday flag is ready!
Master class postcards on the 9th of May Victory Day with their own hands with pigeon, video
Dove is a well-known symbol of the world, whichquite often decorates the cards with their own hands to the Victory Day on May 9, including in our next master class with video. Such an option of a holiday card with the help of adults will be able to master even the smallest ones. See a simple master class postcards on the 9th May Victory Day with your own hands with a dove in the video below.
Postcard on 9 May with your own hands is a great waycongratulate veterans and close people on the Great Victory Day. To make an original postcard to the Victory Day it is possible from usual colored paper or napkins, having decorated with a clipping from an old military newspaper or the silhouette of a pigeon. We hope that our master classes with step-by-step photos and videos for children, including for 1st class, inspire you to children's creativity and participation in thematic competitions.