Polycarbonate greenhouse with own hands: sizes, prices, drawings, photos, video. Construction of a greenhouse.

Many owners of summer cottages wantmaximally use their hundreds of land "lands." And how to achieve high yields of vegetables without GMOs and other "chemistry"? It is necessary to create the most favorable conditions for tomatoes and cucumbers for growth and fruiting. So, an excellent solution will be a greenhouse made of polycarbonate - with its own hands it can be built even by a beginner in the construction business. The main thing is a little patience and exact observance of technology, and the result will surpass all your expectations.
What is the advantage of polycarbonate? This vitreous material is made in honeycomb form and belongs to the class of synthetic polymers. It has a number of advantages: high resistance to unfavorable conditions, temperature fluctuations, chemical compounds, mechanical loads, attractiveness in the aesthetic sense.
The location of the greenhouse made of honeycomb polycarbonate
The greenhouse is a structure that representsWooden frame, covered with glass, film or polycarbonate. As a material for the frame, plastic and metal can also be used. All greenhouses are divided into seasonal and capital. In the second variant, it is meant to make a foundation of metal or wooden bars, and polycarbonate covers.
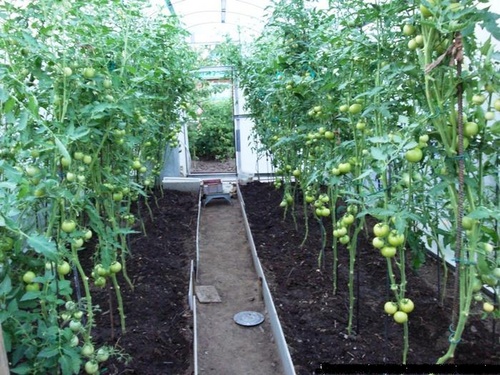
Before embarking on the construction of a greenhouse,It is necessary to determine the choice of place. Experts advise placing the structure in length in the direction of "north-south". This will allow the plants inside to receive a sufficient amount of sunlight, and the adverse effects of cold northern winds are minimized.
Important criteria for choosing a location:
Close location of the residential building, as well as the hozpostroek with a supply of fuel for heating.
If there is a small piece of construction it is better to place next to the house or summer kitchen - this will provide good protection from winds.
Deepening the structure by 0.7 m will help significantly save on fuel, reduce temperature fluctuations, and also reduce shading for stunted plants.
The greenhouse is assembled in a well-lighted area, which is not affected by the shadow of the trees.
Devices for power and water supply should be placed near the greenhouse.
Drawings of greenhouses from polycarbonate - project, schemes, photo
The erection of any structure begins with the drawing up of a drawing, which will allow the correct calculation of the possible loadings of the frame.
What should be the size of the greenhouse? This indicator is determined at the request of the owner of the site, as well as based on its capabilities. Typically, the size of the structure is affected by the type of plants for which the erection of buildings is planned. The width can be about 2.5 m - in this case the distance between the beds is about a meter. The most common size is 210 x 60 cm.

As for the form, it is often prefered arched or with straight walls. For example, in the second variant, three sheets of polycarbonate will be needed.

What is the advantage of arched greenhouses? It:
on the top of the structure does not form a snow "cap" - thanks to the gentle sides
minimum number of carcass parts
quick and easy assembly - just fix the bent sheet
Important! Despite the obvious "pluses", arched greenhouses give less light and heat to plants inside. In this regard, straight-wall structures are more functional.
Many useful tips for installing greenhouses from cellular polycarbonate are presented in this video.
Polycarbonate greenhouse - sizes and prices
When determining the dimensions, it is necessary to take into account the parameters of typical types of sheets - 2100 x 6000 mm. This will accurately calculate the required amount of material and avoid cropping.
For example, we need four sheets - 2100 x 1500mm. As a result, the parameters of the straight wall will be 4200 x 1500 mm. But there is a choice of materials, the size of which will be two times less. The width of the greenhouse is determined by the amount of slope of the roof slope. If you cut one sheet and apply it to overlap, then it is possible to accurately calculate everything.

The height of our design is 1500 mm, and whenraising the walls by 200 mm, this figure will be 1700 mm (without taking into account the height of the ridge). When organizing the internal planning, it is necessary to take into account the scheme of placing the plants indoors, and only after that to start drawing up the drawing of the greenhouse.

Note! Polycarbonate is able to bend only one way, so that the situation can not be corrected and "bend" the material no longer.
The project of a greenhouse of polycarbonate - how to develop?
Any structure begins with the development of the project indrawings. This will allow you to plan the financial and time costs for the erection, as well as clearly indicate the order of work. Today, it is not necessary to be a professional engineer for drafting a project - it is enough to use ready-made drawings presented on thematic sites.
Construction of a greenhouse made of polycarbonate by one's own hands, drawings - on video:
You still made a decision in favor of the finisheda purchase of a greenhouse? The price of such a structure will be 10 - 11 thousand rubles - the most "budget" option. For this money you can buy a two-meter semi-arched construction with straight side walls. But the "arch" will cost a little more expensive - about 14 - 15 thousand rubles. What is the difference between these options? Basically, no.
The advantage of the swept construction is that snow can not accumulate on its surface. The cost will be from 15 - 16 thousand rubles.
When buying more "oversized" greenhouses frompolycarbonate (pictured) costs will be even higher. So, the cost of one big "house" for 6 or 8 meters - from 30 to 50 thousand rubles. However, for the same amount it is more practical to purchase several "small" designs, because, in this way, you will save considerably on warming up.

So, we continue our construction. Now proceed to the selection of the material for the frame. There are two options: a wooden beam or a metal profile. It is known that wood is exposed to moisture, so the most optimal solution will be the use of a profile made of metal.
Polycarbonate greenhouse with your own hands from the profile - with video
For the assembly of the frame of the greenhouse, a profile with a section of 40 x 50 mm of the following types is ideal:
Guide PN (wide) - for the execution of horizontal parts
Rack PS (narrower) - for the construction of vertical racks
When connecting these parts, the design is as strong and stable as possible.
Advice from professionals: in the manufacture of a profile frame for a greenhouse, it is better to arrange elements in the form of a triangle. The more such "triangles", the stronger the design will be.

The list of tools for assembling the frame of the greenhouse:
level
roulette
scissors for metal
electric screwdriver
Assembling a greenhouse made of polycarbonate - a step-by-step guide:
Fastening parts.
How to attach parts together? You can do this with riveting or screws. The advantage of the second method is that, if necessary, the construction is easily dismantled and transferred to another location (or simply added as unnecessary).
How to assemble a frame for a greenhouse made of polycarbonate? The video can be studied in detail this stage of the work.
We make a "pillow" under the foundation
The foundation is the guarantee of durabilitystructure. First, we make a markup on the area of the alleged foundation placement. Then we go into the soil (20 - 25 cm) and remove the upper part. We make a mound of small gravel, rammed and leveled. We fill the trench with a concrete solution, based on purified gravel and sand with cement (in a ratio of 5: 3: 1). The thickness of the resulting "pillow" of gravel should not exceed 5 cm.
Waterproofing
To this end, we use a roofing material, whichwe lay on the made "pillow" - in one layer. Why do I need waterproofing? The fact that concrete is absorbed by moisture from the soil, which in winter can lead to its destruction.
Foundation construction
Two weeks after the construction of the "pillow"you can start building a foundation. In this case, all fixing elements should be mounted in the masonry. The smoothness of the masonry is controlled by means of a building level.

Tape foundation is the most commonOption, the production of which does not require significant costs. Here, after a layer of gravel, we make formwork from old boards. Then the formwork is poured with concrete, prepared in the above proportions.
Polycarbonate greenhouse with own hands - assembly (with video)
At this stage, the work is carried out in the following sequence:
We mount one frame structure from the profile, cut to the desired length.
We collect the first frame and fasten the screws.
We measure and cut the material - we obtain separate details.
Parts of the frame are assembled together.


How to fix polycarbonate sheets on the frame? It is important here to properly connect the individual parts and ensure the sealing of the structure. The photo shows one of the most common ways of fastening.

The best greenhouse for seedlings. How to do, read here
How to make a polycarbonate greenhouse with your own hands: video
Polycarbonate greenhouse - heating

For the cultivation of vegetable crops in winter, the room is recommended to be equipped with a heating system. The most common options are:
Stove heating. The fuel used is coal, peat or a solar oil. This kind of heating is not only the simplest, but also inefficient and labor-intensive - the heat throughout the room is distributed unevenly.
Electric heating. These devices include tans or convectors, which are placed around the perimeter of the greenhouse made of polycarbonate.
Cable heating. The main advantages are: cheap installation, simplicity and duration of operation, uniformity in heat distribution, safety. In addition, such heating can be automatically regulated, which is extremely important for growing crops.
The best greenhouse from window frames. How to do, read here
A greenhouse made of polycarbonate by one's own hands isA great opportunity to use in your menu fresh, own grown vegetables and herbs. A little patience, perseverance and financial costs will bring the result, which will be an excellent "investment" in your future well-being.