Pothook-hen crochet, scheme. Master class on knitting the hook-hook
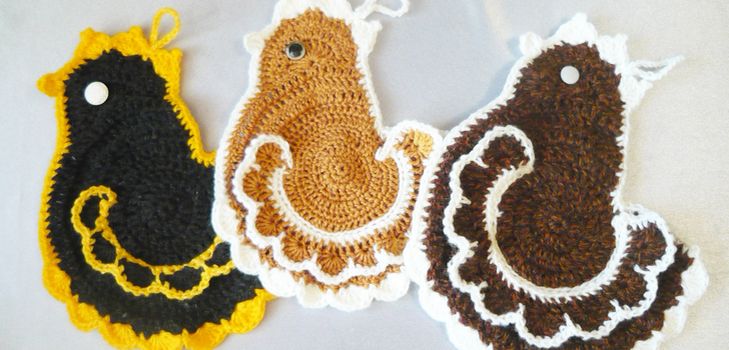
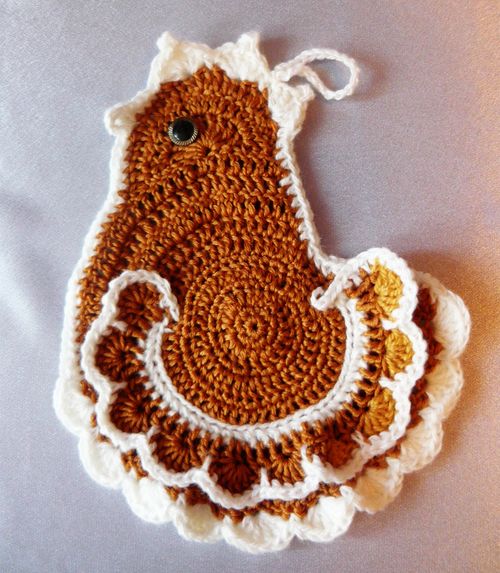
No one will come to mind to clean the hot platedishes with unprotected hands. There is always a towel or apron ready at the ready, but the potholes for this purpose are much more appropriate - both practical and beautiful. A crochet-hook-hook, which we suggest you to master in our master class, knits very quickly, and, most importantly, simply. Literally in an hour it will be possible to make by oneself a useful thing for the kitchen or an original gift to friends and relatives.
Yarn Peria Gold inci 70% acrylic, 30% wool; 100 gr / 270 m. Colour: sand. Consumption: 40 grams;
Yarn Sidney Wool Peria 40% wool 15% for 45% a krill; 100gr / 200 m. Colour: white. Yarn Consumption: 15 grams
Density of knitting: 2 st.s / n per 1 cm.
Tools: hook 3., thread, needle
Additional materials: button
Crochet hook-hook - step-by-step instruction
The main part of the padding
On the sliding loop, we unfasten 7 posts without a crochet. We tighten the loop.
The connecting post is fastened together by a hinge hanging on the hook, and the edge of the first column. The circle is closed - this is the zero row.
We send the first row in a column without a crochet. When knitting in a circle, remember the uniform addition of loops.
The second row is knitted with a crochet. It is necessary to connect a circle with a diameter of 8 cm.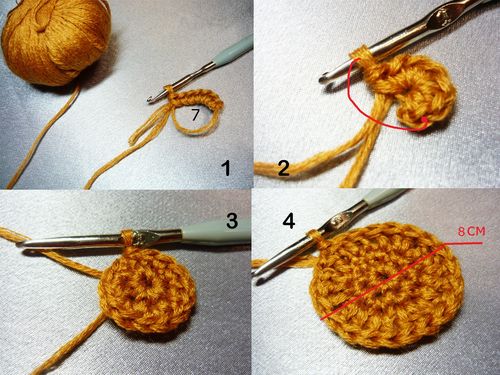
Repeat steps 3 and 4 from the previous step two more times. In total there should be 6 rows. It is possible and more, because it depends on the diameter of the circle - the basis for the future potholders.
In the seventh row st.s / n stop, without tying the 3 pillars of the base to the junction of the row.
We turn the circle inside out and knit in the opposite direction, like a canvas.
Thus, we sew another 4 rows. To the empty sector is even more expanded, in the course of work we subtract 3-4 loops along the edges.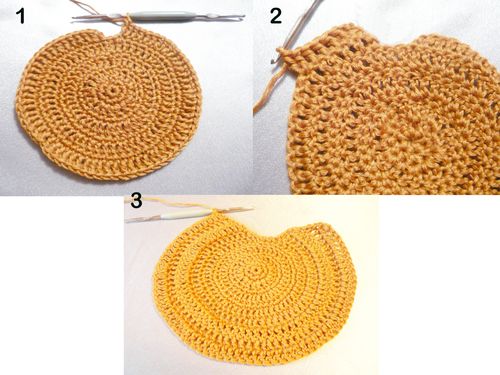
Chicken head decoration
If you start to knit on the left side of the empty sector, then the head will "look" to the left: a lifting loop, 2 st.b / n., Skip the 2 pillars of the base, from the third, to remove 9 bars from / n.
The last column with a cuff from the "vest" connecting loop is attached to the circle, then another 2 st.b / n.
We unfold the canvas in the opposite directionWe sew all the loops from the previous row with columns with a crochet. Along the way, add 2 loops, tying on the pair st.s / n from one base. The last st.s./n is attached to the main web by a connecting post.
Turn the direction of work again. Now half of the loops of the head are tied with columns without a crochet, then two half-columns with a crochet for the transition. The remaining loops of the base are tied with a column with a crochet, and the last one with a connecting post.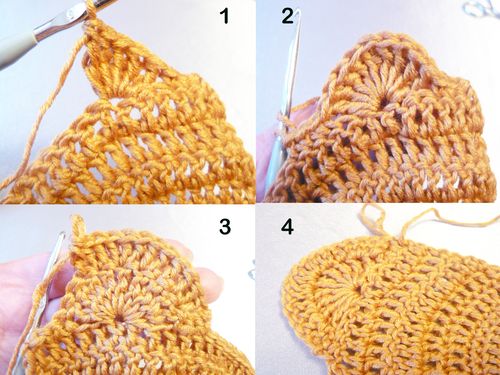
The string of sand color is fixed and cut off. We fix the white finishing thread to the upper corner of the sector, located opposite the head. We untangle the back with columns without a crochet. On the top of the head according to the scheme, we untangle three elements of the scallop and the beak.
Decorating chicken tackle
Part of the circle in the chest area is tying st.b / n.
We turn to knitting "fan": 6 st.s / n from one loop of the base, pass the loop of the base, st.b / n, pass the loop of the base; then repeat. We finish at the beginning of the tail.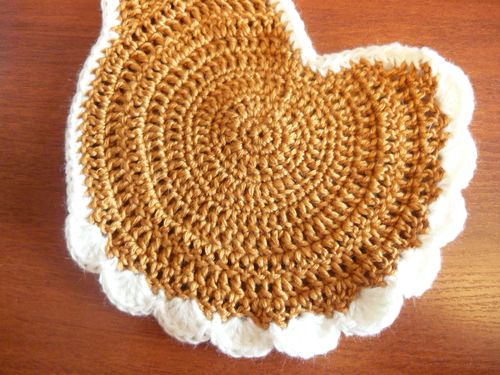
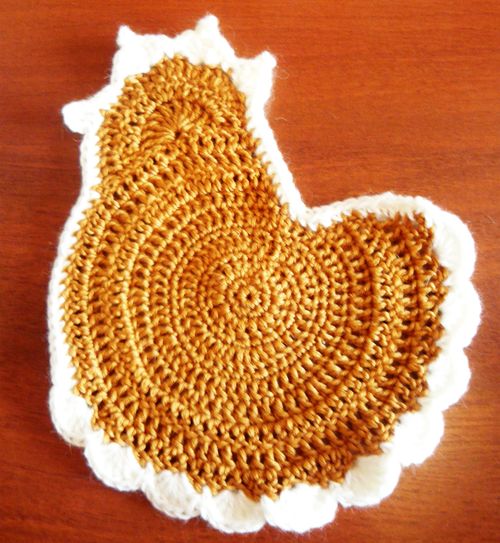
Sew a button that will act as the eye of a chicken.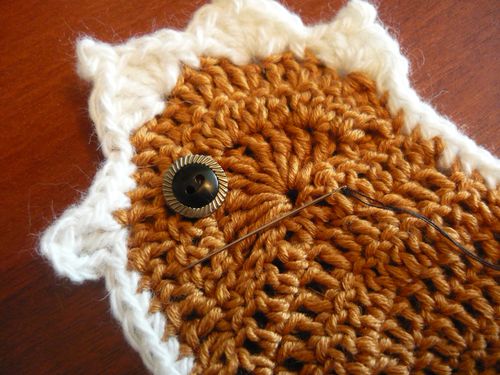
Decoration of the wing of the chicken-pothard
In the center of the circle of the crochet we pull out the loops, which will be the basis for knitting the wing. This element has the form of a semicircle, and in appearance it is similar to a sewing seam "loop".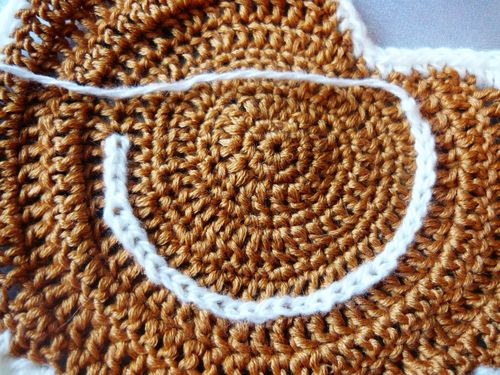
Crocheting technique "stitch" stitchnext: the thread is on the wrong side of the work, the hook is inserted from the front side, the thread is picked up and pulled out - one loop is formed. Repeat this step, another loop appears. The second loop is pulled through the first one. She will settle with a loop in a line, and the second will remain on the hook.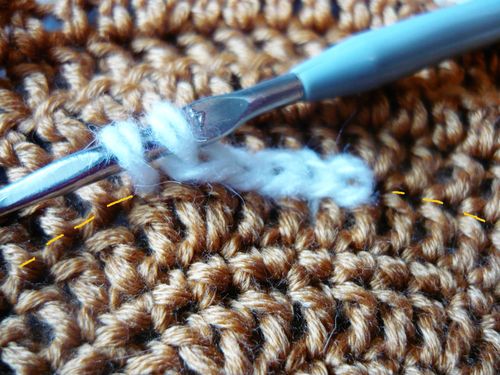
On a note! To make a straight line it is necessary to make a gauge between the rows of columns.
Since all the loops on the wing will be locatedits front side, then you have to start knitting each row only on the right. Since the thread is at the end after the end of the previous step, it must be translated to the beginning: on the wrong side, stretch the thread to the desired place, cut off to pull it to the front side and tie it back on it. Nodule in the process of disguise.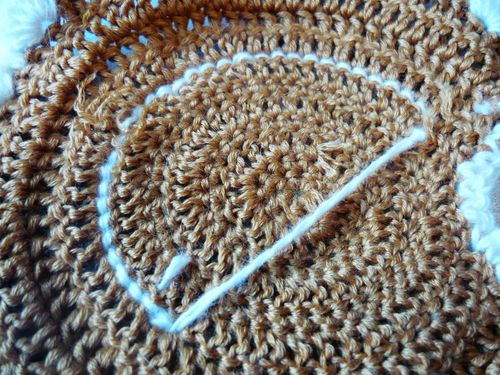
The first row of the wings: hook hooks pick up the top wall (it is marked with a dwarf in the photo) loops from the stitch and unfasten st.b / n. We fix the white thread and cut it off.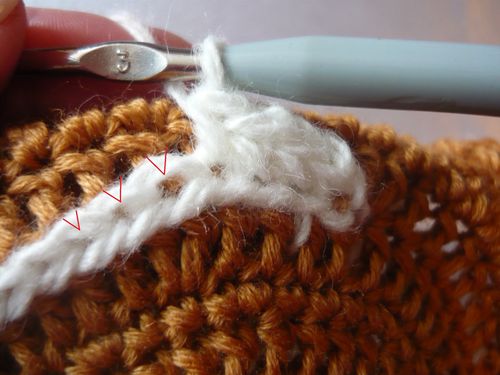
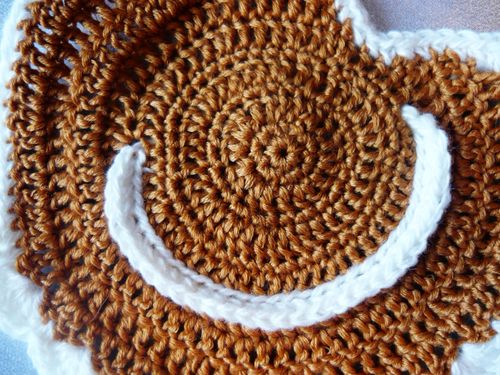
Return to the beginning (right edge) and attach a string of sand color. We send a number of st.s / n.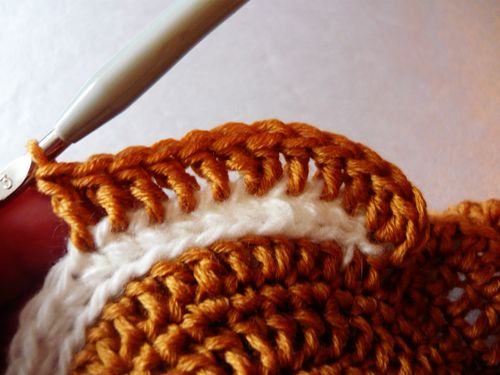
We return the thread to the beginning, to the right edge. We knit a number of "fringes" by analogy with the binding of the edge of the trunk. We fasten the sand thread, it will no longer be needed.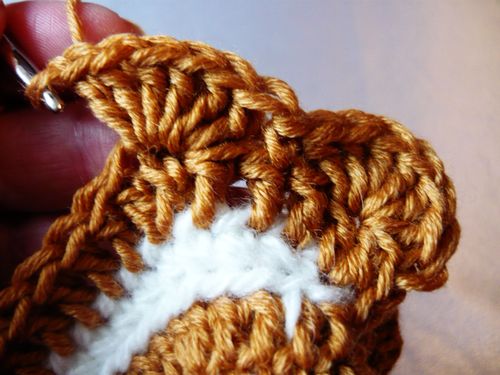
The thread of white color is fixed to the right at the beginning of the row. The closing line is st.b / n. A small nuance: st.b / n between "fans" is not obtained from the loop of the base of the previous row, but from the loop even lower - where the series of st.sn was. Get a beautiful long loop.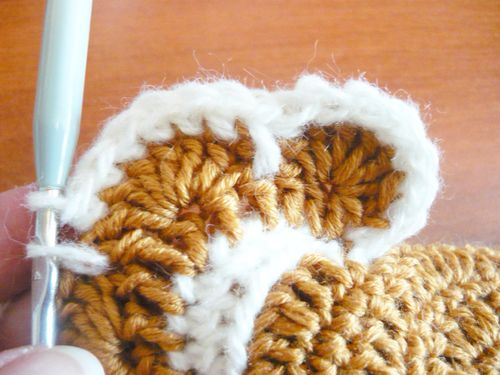
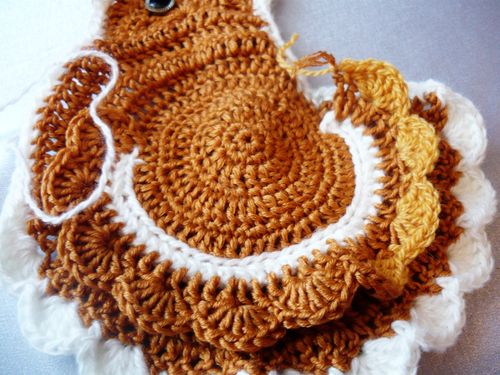
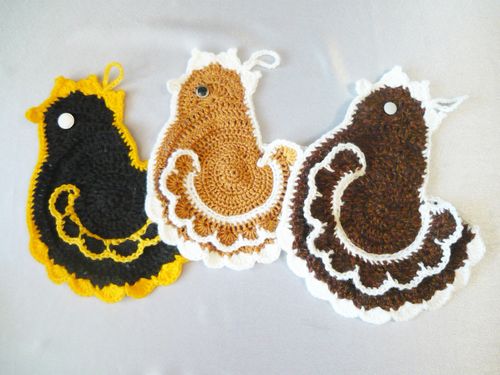
At the top of the chicken we knit a chain of 20-25Air loops for the formation of a hinge-suspension. To make the stitching even more interesting you can play with yarn colors, sizes, and then the chicken will become in its own way original.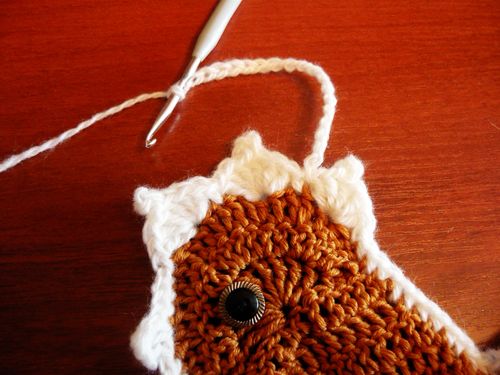
Read more:

How to tie the pothooks for the kitchen with your own hands: diagrams and photos

Children's summer panama crochet: photo, video. Step by step instruction on knitting the children's summer panama

Summer booties crochet: diagram, photo, video. Step-by-step instruction for knitting cymbals

How to tie a summer baby cap crochet. Master class on knitting of children's summer hats
How to tie a fishnet summer vest with a crochet. Master class on crocheting a summer vest

Summer bag crochet: master class with photo and video. Step by step instruction on knitting a summer bag

Female summer Panama crochet: photo, video. How to connect the women's summer panama - step by step instruction

How to tie the pothooks for the kitchen with your own hands: diagrams and photos

Children's summer panama crochet: photo, video. Step by step instruction on knitting the children's summer panama

How to tie a summer baby cap crochet. Master class on knitting of children's summer hats

Summer booties crochet: diagram, photo, video. Step-by-step instruction for knitting cymbals

How to tie a fishnet summer vest with a crochet. Master class on crocheting a summer vest

Summer bag crochet: master class with photo and video. Step by step instruction on knitting a summer bag

Female summer Panama crochet: photo, video. How to connect the women's summer panama - step by step instruction