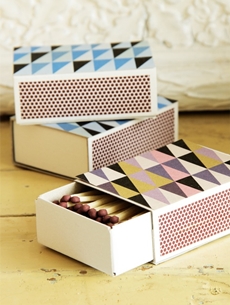
Crafts from matches with own hands, diagrams, photo
 Those who are seriously fond of handicrafts from matches,sometimes they create real masterpieces - ships, palaces, churches, models of famous historical monuments and complex figures of animals and birds. But even small and simple artifacts made from matches made with their own hands, give great pleasure and occupy a place of honor in the house. With children, you can, for example, make a five or six-pointed star.
Star - Crafts from matches with own hands
Materials:
• one or two box of matches
• Adhesive
• colored cardboard
• scissors
• beads and sequins
Step 1. On the sheet of colored cardboard draw a beautiful star. It can be cut out along the contour, but you can cut it around the circumference. In this case, you get a star in a circle.

Step 2. In the center of the picture we draw two more stars - one in the other. Their rays should go parallel to the rays of the large star and be located from it at a distance slightly larger than the length of one match.
Step 3. We glue the contours of the inner stars with paillettes or large beads. Leave it to dry.
Step 4. After all has dried up, we begin to lay out and paste matches between the big star and the middle asterisk, starting from the tips of the rays. Almost all matches will be the same length. But on the inner junctions between the rays of the need to be pruned in order to preserve the shape of the star. Matches must be glued so that their heads are pointed outward, to the outside of the star.
Step 5. After drying, the resulting star can be decorated. For example, paste on the outer contour of beads or sequins; put the center of the asterisk with matches and so on. Such an asterisk will look good on the wall as a decoration. And for the dolls of the daughter of matches you can make furniture - chairs and a table. To do this, you need to select the smoothest matches and cut off the heads.
Stool - crafts from matches
Step 1. Make the back of the chair. Put two matches parallel to each other. The third match is broken or cut into two equal halves and glued through a small gap with the ends to the inside of the long matches. We got the back of a chair with crossbeams.
Step 2. Make the base for the seat. We cut two more matches into equal halves. Glue them together in the form of a square. When they dry, glue them to the front two legs of the chair. The length should be equal to the rear legs, the dimensions of which must be determined in advance. Glue the base to the back of the stool approximately in the middle or a little lower.
Step 3. In order for the chair to be stable, glue the crossbeams from the small blocks cut from the matches into the spaces between its legs.
Step 4. Make a seat. We glue together the blocks from matches. On the inside of the resulting flat part we glue two cross bars. By length, they should be slightly smaller than the distance between the sides of the base of the chair. Lubricate them and the top of the base with glue, insert and glue the seat. The chair is ready.
Table - children's crafts from matches
Step 1. For the table, we also make a flat part, gluing matches without heads together. We glue in parallel to each other two matches to the underside of the future table, slightly receding from the edges.
Step 2. For the legs cross two matches and glue them in the middle to each other. We make two such constructions. At their ends should be bevels, so that it would be convenient to glue the legs to the table top.
Step 3. To the long crossbeams of the countertop, we stick two small cross-bars opposite each other. They can be made from 1/3 of a match. They should be located closer to one of the edges and serve as stops for the legs.
Step 4. We glue the legs to the crossbeams. One side of each leg is glued to a small crossbar, and the other to a large one. For resistance to the inside of the legs just below the crossing, we glue two transverse bars. Puppet chair and table of matches can be painted after drying.


