How to make a leather bracelet with your own hands: photo master class
 Women's leather bracelets are braided and flat, and the preferences are different for everyone, but all agree in one - leather bracelets made by oneself, more interesting and original than in stores.
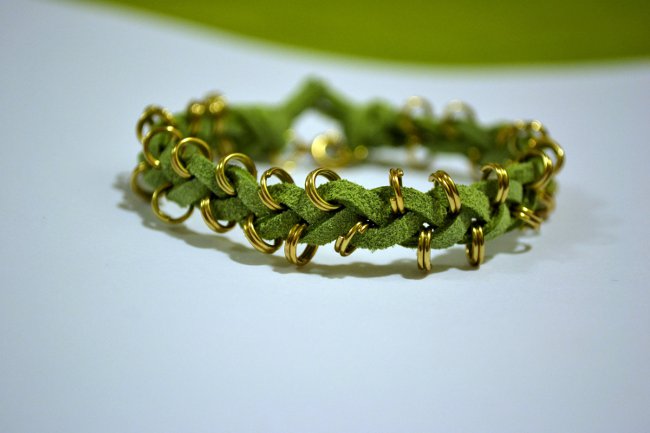
Weaving bracelets from the skin is quite simple - the strips are intertwined like ordinary threads. How to make a flat leather bracelet? Too simple - follow our master class.
How to make a bracelet from leather?
You will need:
- strip of skin - width approximately 4 cm Buy skin specifically for the bracelet is not necessary - for sure you have some old leather belt, a purse or an upper, soft part of the boots that have long been worn down on the sole. The skin can be black and brown, - The first looks more contrast with bright embroidery, the second looks more vintage;
- several brads in the form of hearts (colormetallic). Brads are a kind of decoration in scrapbooking, small metal plates of different shapes on the pins. They are not only suitable for scrapbooking, and you can purchase them in any store for needlework;
- mulina (red or pink thread) and a thick needle;
- button.
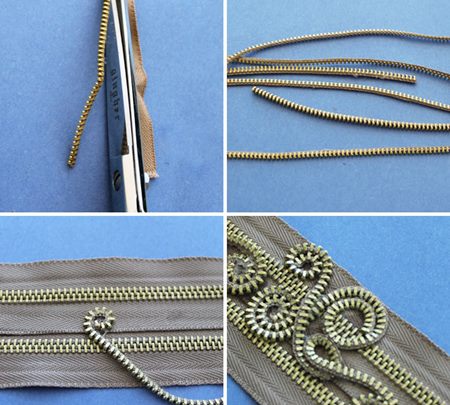
Manufacture of leather bracelets: turn-by-turn photo instruction
First you need to measure your wrist. Remember, it's not worth taking the length with a reserve - a flat leather bracelet, unlike braided leather bracelets, should fit tightly around your hand, and not hang on it - the stock is still needed (for the button), but two and a half centimeters full enough.

If you want to make a bracelet for severalsize, just attach to the part of the tape where the bottom of the button will be, a few more such pieces at the same distance from each other (like holes on the watch strap). Now its length can be adjusted. Attach the top of the button to the other side of the bracelet with a hammer.
The next steps for making leather bracelets will differ depending on which bracelet you want to make.
- Laconic, with a vertical row of hearts-brads bracelets made of leather (photo)
Determine where the middle of the future bracelet is from the skin, and pierce the hole about 0.5 cm from the top.

Then make a few more of these holes, one under the other, at the same distance. Insert the brads and secure them. Done!

- With embroidery
Measure the strip of skin and divide bypencil on equal parts. In the center, embroider a heart with pink or red mulina (start and finish sewing about 0.5 cm from the edges of the bracelet) - use deliberately rough stitches.

In the left half of the heart, piercing the hole, insert the same shape of the braids. Done.

- With embroidery a "sign of love" (HOHO - generally accepted inEurope and America the designation of "kiss and embrace" - X for a kiss, and O - for a hug. And it can be like love embraces and kisses, and friendly)

Fix the two brads-hearts on the bracelet ondistance of 2 cm from each other, fill the gap between them with an embroidered cross from a pink floss; add the same cross on the left. You got the inscription "HOHO". Done!

Author: Katerina Sergeenko