Master-class on volumetric embroidery
 Thanks to the last article, our readers are already a little familiar with the technique of voluminous embroidery. So that you can better imagine the whole process of creating embroidery, the Country of Soviets offers you master-class in volumetric embroidery.
Relying on the advice of the inventor of the technique of voluminous embroidery, Helen Pierce, the Land of Soviets will tell you, how to embroider a pansy. Volumetric embroidery in the form of pansies will be an excellent decoration for handicrafts, boxes for necessary trifles or handbags.
Pansies come in a variety of colors. Therefore, to create them we need woolen yarn of different shades yellow, blue and violet colors. The number of coils of each color depends on the number of shades. You can combine colors in different ways. Back petals (2 pieces) are embroidered with dark purple or black threads.
For the leaves we need 4 hanks of green and 2 hanks of light green wool. In addition, you need to take pale green thin silk threads and white, yellow, black and green thread mulina. Also useful is a thin green wire, the main fabric and medium-density fabric for the flower elements.
Let's start with the petals. We translate the pattern of the petal (1) on the cloth andwe put it in the frame. We sew the contour of the flower with stitches and fill the petal inside the contour with a smooth surface. We embroider one row with one color, the second with another, and so on. At the base of the three front petals, by a black thread of a mulina, we lay out the dashed strokes filling the 3/4 petals.
We take out the fabric from the embroidery frame and carefully cut out the petal as close as possible to the stitches. Having made 5 petals, we insert a fabric in a hoop and attach to it petals seam "for a needle." First 2 rear, with their bases laid on each other, then 2 front (opposite each other) and the remaining petal. We put it on the front side of the other petals, grab a pair of stitches in the center and bend it. The location of the petals is shown in Fig. 2. The center of the flower is filled with white, yellow and green knots.
For buds make two petals. Pattern sepals (3) transfer to the fabric and insert it into the hoop. We sew a dark-green string with loop stitches, and fill the sepals with the stitch inside the contour. When the sepal is almost ready, turn it over and trim the upper cut with stitches - they should be located in the direction of the smooth surface. Carefully cut out the sepals.
Now you can proceed assembling buds. Cut off a piece of wire and one end of itbend the loop. We fix a loop from the underside of the petal, which we did for the bud. Fold the petal in the following way: the wrong side peeps out, the edges overlap, the wire is closed. We seize the petal together with the wire with small stitches at the base. We turn the sepal around the base of the bud and sew it with a few stitches of light green wool thread, grabbing the bud.
We twist the wire with two dark green threadsat the base of the sepals about 8 cm. The end of the wire is bent, thus securing the thread. The remaining thread we will attach the buds to the main fabric.

To make leaves, translate the pattern of the leaf (4) onto the fabric andwe put it in the frame. With a light green thread, we trim the contour with stitching stitches, and fill the area inside the contour with the stitch (the direction of the stitches is from the edges to the central veinlet). Pale green silk thread embroider veins. For the central vein, we use a stalk seam, for the side veins - the smooth surface. Carefully cut out the leaves.
When all the elements are ready, start assembly of flowers. We attach the leaves to each flower. They can be placed on one side or on opposite sides, half hidden under the flowers. To attach each flower, lay the stitches on the remaining fabric on the flowers. We have flowers next to the leaves of some violets to close the flowers. Buds on wire stems are located under the flowers, fixing them with stitches "for a needle" on the main fabric.
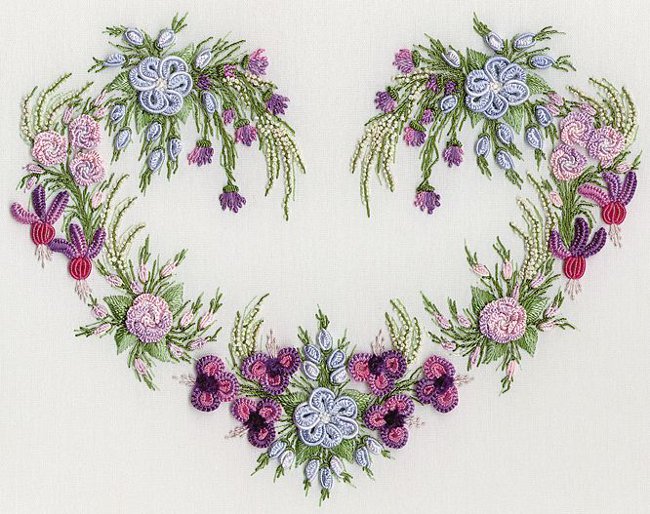
Volumetric embroidery "Violet" is ready!
During the preparation of the article the materials of H. Pierce's book "Volumetric embroidery"