Amigurumi for beginners: schemes with job descriptions, photos, video lessons

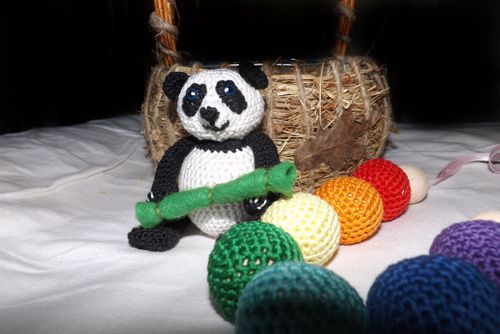
Sure, many of you paid attention topretty knitting toys that can be found literally everywhere - in children's, in cafes and even in offices. You can not miss them without a smile. Ruddy cheeks, good eyes and a sweet smile - all this is on a small crocheted crochet toy. We will reveal a small secret: the name for such toys is amigurumi.
What is amigurumi?
Very intricate name. Indeed, the name is complicated for the Russian citizen, as the toy was invented in Japan. From there it was just such intricacy and sweetness of features of various characters. Amigurumi is one of the elements of Japanese culture. And what distinguishes their particular culture? Of course, mad love to create disproportionate parts of the body of different characters. Amigurumi also adopted this feature.

And now you can see such a smalla bear with huge legs, a broad, kind smile and ruddy cheeks. In addition, the charm of amigurumi toys lies in the fact that the naked eye can see what work was invested in creating a small masterpiece. By the way, as for the sizes, it is worth adding that there are a variety of amigurumi. Someone can knit so small toys that they fit on one finger. Others like to have an amigurumi toy of impressive size. In any of the two cases, knitting with amigurumi is hard work.
How is this toy made? The basis is taken by circular crochet. As a result of knitting, balls of different shapes and sizes are produced.
If you have at least the slightest crochet skills - you will really like and knitting amigurumi. Let's first figure out what tools we will need for knitting.
Necessary materials and tools
First of all, of course, we should pay attention to what kind of yarn use. In this case, everything depends on your desire and vision of the ultimate toy.
Next, prepare crochet hooks amigurumi.
In addition, we will need soft filler for our knitted amigurumi toy.
Scissorsto cut the yarn;
Prepared in advance toy details amigurumi (eyes, a nose, maybe even a mouth, etc.).

Amigurumi schemes with the description of works
So, amigurumi for beginners will be availablethen, when they master the basic knowledge of crochet. First you need to tie a ring. The diagram shows in detail how to do this correctly.

Another important aspect for beginners -the ability to knit a circular plane with an ordinary hook. Why is it so important? Knit Amigurumi means knitting in a circle, until the formation of round shapes, which will later be combined into a single figure. The diagram below will help beginners.

Master classes on knitting amigurumi for beginners
To understand how to knit an amigurumi forbeginners, it is necessary to understand at least one pattern of knitting toys. So, next we will present several master classes for beginners. These step-by-step instructions will show the step-by-step actions that you will need to perform in order to crochet your first amigurumi.
Master class 1: a bear cub in amigurumi technique
It will be logical to make the first master-class amigurumi crochet for beginners with a photo. With visual images in the sequence of work to understand much easier.
Attention! The most important reduction is "sbn", meaning everyone knows a known column without a crochet (+ this is an increase).
Are you ready to try to tie an amigurumi-bear with a crochet? Then let's move on to the diagram.

Initially, you need to knit the head bears (from the bottom up). So:
Carry out two air loops, then form an amigurumi ring (as a result of 6 RLS).
We pass to the second row. It is necessary to add one more column after each element (total 12).
Now the third row. Here we already add a column after two elements (total 18).
Next come the fourth and fifth rows - they do not need to add anything.
Starting with the sixth and seventh rows, you should get 24 columns. What should be done? In the sixth row, add 6 columns.
Now the eighth row. Again, add the same number of bars (total 30).
Finally, the ninth column. Here we again do 6 scs (total 36).
From the next level and up to 16 inclusive, at each stage there should be 42 bars.
Now, on the contrary, we went on a recession, since wewe approach the top, the head narrows. In the seventeenth row there are 36 columns, respectively 30, 24, 18, 12, 6. At the end it is necessary to tighten at the edges. Somewhere, in the eighteenth - nineteenth row, you need to take a break and fill the toy with soft contents.

Now you can move to the body of Amigurumi bears.
At first (to the third row) everything is absolutely the same as with the head.
Then the number of columns in each subsequent level: 24, 30, 36, 42 and 48.
After the eighth row and until the sixteenth, columns should not be added.
By the seventeenth there should be 40 ordinary columns, then reduce (by 30, then by 24).
Fill the toy with soft contents.
After that, reduce by 6 RLS in each row.
Continue this action until the very end.

Now go to the pens:
The first row - you need to connect that ring with the amigurumi, which we dismantled at the beginning. Further 6 эл. without a crochet.
Starting from the third to the fifth - + 9 columns.
6-8 - 12.
Following the instructions, perform crochet in the 9-11 series: four simple columns, four columns with 1 cap, 4 scs + 12 columns.
12-15 + 12 columns.
Fill the part and bring it to a tightening.

Let's turn to the hind legs of the bear:
Start with 5 air loops. They need to be linked: 3СБН, 3 more elements from 1 air loop (total 10).
From the second row: +, 2 sc, 3+, two bars, 2+ (total 16).
The third and fourth levels are 16 columns.
Fifth: 5 RLS, then we subtract three times with one crochet, after 5 columns in general without a crochet (total 13).
Sixth: simple 13 bars.
Seventh level: 5 RLS, +, 1 bar, +, 5PSN (total 15).
Eighth (total 15).
Ninth level: 6 RLS, +, 1 BN column, +, 6 elements, as in the beginning of 17.
10-12 for seventeen simple columns.
The thirteenth: 2 bars, reduced 4 times, then one simple column (total 13).
Finally, the fourteenth: one ordinary column, +, 1 element as in the beginning (total 9). After that, add the filling and tie the amigurum before closing, decreasing each time in the row.

Only small ears remained. Nothing is easier:
From the two air loops pull four columns of BN.
Second row: + after each element (total 8).
The third row: 12 simple columns.
Now you need to sew all the elements neatly. Note that all the details of the connected bear amigurumi are symmetrical with respect to each other. If you have prepared the original jewelry (eyes, nose, clothes), glue them.
Master Class 2: The Amigurumi Monster
Another master class. Beginners to knit amigurumi can be confused by the apparent complexity of toys. However, there is nothing to be afraid of, because all the designations (RLS, etc.) are the same. Pay attention to this photo-scheme.

Master class 3: bee amigurumi
So, if the first master class was successful, we think you are ready to evaluate more complex but no less interesting schemes of knitting.

Video tutorials for beginners: how to knit an amigurumi crochet
If suddenly you seemed to something incomprehensible from how to properly knit an amigurumi, check out these videos. They will help you on your creative path! Dare!