We sew glove doll, master class
 A doll that comes to life in its hands! She dances, jumps, rejoices, takes offense, is surprised and ... friends with her puppeteer. And as it is pleasant to children! The puppet theater fascinates children, and if you give such a "spiritualized" little friend to a baby, then he will just be delighted. Moreover, it is not difficult to create a glove hero with your own hands. In this master class we will tell you how to make a glove doll with kapron tights and cotton wool.
Master-class: a doll-glove with their own hands
To create your own cast for a puppet show, you do not need to go to the store for source code. I am sure that in almost every home there are materials listed below.
Necessary materials:
stocking
wadding
thread, needle
fabric section 30x60 cm
cardboard, paper
scissors
PVA glue
gouache
brushes

The basis for the doll
The core of our future product will be a "patron"on which the head is attached, with its help we will also manage the doll. To make it, we twist a straw with a strip of cardboard, having pre-coated one side with glue. The inside diameter of this part must beso that the future puppeteer could put it on the finger, but not to its base, but so that the finger could bend. This parameter should be considered if the doll is run by the child. In this case the patron should try on the child's finger. The height of the cartridge is about 8 cm.
Next, install a barrier on one sidea cartridge, on which the fabric of the glove will be attached in the future. We cut strips of plain paper about 3 mm wide and paste them on the edge of the cartridge, well lubricating the PVA. So we build up the step we need, about 3-4 mm high.
We put the ready cartridge on the battery, that would allow it to dry and to find strength. We make the head of a glove doll made of capron and cotton wool
For the head, two cuts from a stocking of 20See each of them we sew on one side with a firm seam, slightly rounding corners. One could, of course, use the side of the stocking where there is a factory seam, but for our invention, the width of the socks will not be enough, in addition, often in this place the pantyhose has a strong pull.
Now one of the resulting bags is stuffed with cotton. For these purposes it is good to use "roll" cotton wool. It can create a uniform surface without visible differences.
Weaving the cotton stocking, we pull it well, so that the "ball" that we get is dense and elastic. So we have got the preparation of the head.
Now we put the cartridge in the future head of the doll and, stretching the thread along the edge of the needle, tightly tighten the capron around the cartridge.

Drawing a face
Now the fun begins. We will create the face of our character. At today's master class, we decided to make a chicken - this, it seemed to us, is the easiest option for making dolls-gloves by our own hands.
It's time to remember the second "bag" thatwe sewed from the cut stocking. We pull it over our base-head and put under it the formed pieces of cotton wool. We put one cotton roll on the place of the scallop, and there, where the beak is subsequently formed, we put twisted cotton wool in the form of cones.
To give a more precise shape to the scallop and the beak, we fix these parts with threads, sewing them to the base.
Generously cover the entire surface with PVA glue.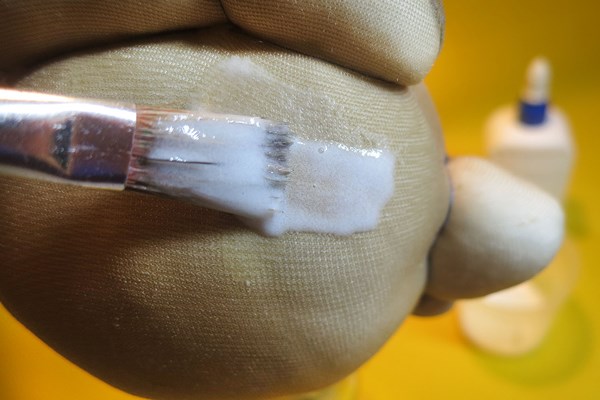
And then - take on the paint! First we set the main color, painting the entire surface with it. It is good to make this layer with paint, glued with glue.
To color a scallop with different colors, a beak andeyes, there is no need to wait until the first layer dries. Painting in a wet way, we can beautifully shade transitions and, moreover, there is always the possibility to erase an unsuccessful stroke.
Having painted the head of the future character, we leave it to dry, and we ourselves proceed to the next stage of creating the doll with our own hands.
We sew a dress-glove, a pattern and a process
For a glove doll, a pattern can be createdhimself. Moreover, it will be a real "ind-sewing"! In order to tailor the glove, we apply the hand of the future puppeteer to the cardboard in the form in which he must keep the doll. First, the right hand - we circle.
Then we put our left hand there too - we also circle.
The general outline is our pattern. Cut it out and put it on a folded cloth. So we will make two pieces of gloves.
We circle the curve, retreating to the centimeter - this is our allowance for free fitting, as real seamstresses say. Cut and sew.
We put our glove on the cartridge and, stretching the thread along the edge of the fabric, tighten it over the "threshold" - so the dress from our cockerel will never fly off. The doll-glove "Cockerel" is ready!
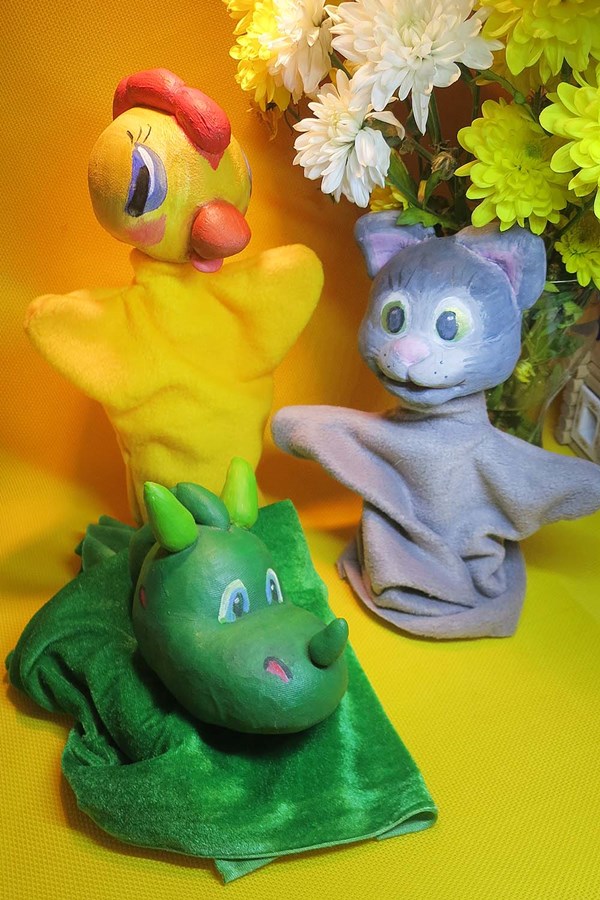
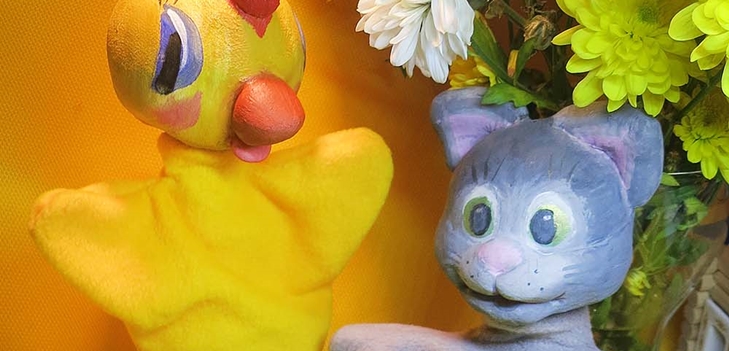
By the same principle, you can create the mostdifferent characters. Moreover, the only way to sew a doll-glove with your own hands is if you need some unusual character for the production, which is difficult to find in the store.