Children's crafts made of natural material on the theme of autumn

Gather with the baby cones, fallen leaves, acorns and curiously curved sticks - all this is not only fun, but also useful for autumn crafts.
Application of leaves
Application in general is one of the most developingcrafts in kindergarten, this is her option. Instead of paper elements cut from paper, children stick leaves, needles and other natural material onto the cardboard. This is a good development of the imagination, in particular, because the material already has some form of its own, which must be "turned" into the component part of the drawing.
Another important part of this craft is color. Autumn leaves can have almost any color on the ruler from green to brown, which automatically "color" the application.
In the most general form, you will need:
- a cardboard for the background (it is better to take white or light colors);
- leaves, twigs, grass blades, needles, acorn hats, etc. Leaves and blades of grass are best dried, although this is not necessary.
- PVA glue.
The most popular themes for autumn application are animals and humans. Here, for example, what set of material is needed to depict from the leaves of an elephant:

- small yellow leaves for the trunk (for example, mountain ash);
- large rounded leaf for the body;
- two small leaves for the ears and two pointed ones for the tusks (for example, willows);
- two more narrow and elongated - for the legs.
Another kind of application - a kind of"applique-coloring", when the child has a sheet with already drawn figures (for example, cartoon characters), which must be "filled" with leaves, grass and other natural materials. In this case, the leaves can be torn before they are glued - it is not necessary to search for the ideal shape.
Leaflet prints
A simple, but beautiful form of creativity. Collect the dry leaves and densely color them with colored paints, and then attach to the paper and press. It turns out a mottled print in the form of a leaf. So you can draw up a postcard with your child.
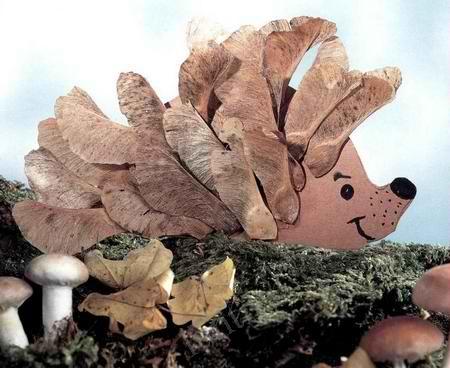
Animals-figures from acorns and cones
In order to hold the bumps together,You can also use glue, but it's easier to take plasticine for this. Its color is usually unimportant, although sometimes it is worth taking one that is inherent in this animal, if clay is used not only for bonding - for example, a brown muzzle in a hedgehog.
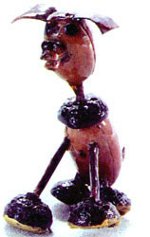
Fox of cones
Take:
- long fir cone;
- a small pine cone, rounded, with open scales;
- 4 sticks;
- an undiscovered pine cone with a pointed end;
- elongated, narrow spruce cone (2 times smaller than the first);
- black marker.

First break some of the flakes at the topa small pine cone. Leave the two largest ones out of them you need to make ears. The long fir cone is the body. Attach the tail to the pointed end of the plasticine - the second spruce cone, and to the rounded - a small pine without a part of the scales.
Attach it should not end, but a little higher(imitating the breast, neck and neck of the fox, which seemed to lean back, listening). To the empty part of this bump, attach the muzzle - an undisclosed lump, a sharp end forward (you can cut it before it into 2 pieces to make it more comfortable). Now attach to the head ears - two large scales left after a small pine cone.
Ears should be just above the muzzle, that isTo be attached to the same bump from which they were broken off. Sticks will become feet - stick them to the lump-body. All "legs" should be the same length; Do not make them longer than 2 cm, thin high sticks do not hold the body very well. Now draw two eyes on the face of the marker. A fox of cones is ready.
Author: Masha Larina