How to make modular origami?

Origami - this is an amazing art of folding the mostdifferent figures of paper. The craftsmen of origami are able to turn an ordinary piece of paper into a beautiful crane, a tiger cub or an elephant. A separate direction in the art of origami is the modular origami. How to make modular origami yourself?
Modular origami is a specialtechnique of creating three-dimensional figures of paper. In order to obtain in the technique of modular origami the figure of a swan or, say, a Christmas tree, it is necessary from small pieces of paper make a lot of small modules, and then build these modules like a constructor.
To make a modular origami, you need to stock up on paper and patience: since figures in the technique of modular origamiusually performed in fairly large sizes, then the modules may need a lot. To manufacture modules, glue is not needed, it is enough to have paper, white or colored paper, and scissors or a clerical knife.
Ready-made origami modules have a triangular shape. Make modules from rectangular pieces of papersize 53x74 mm or 37x53 mm. To obtain rectangles with a size of 53x74 mm, a standard sheet of A4 paper should be divided into 4 parts on the long side and 4 pieces by a short one (16 pieces in total). If you cut the A4 sheet into 8 parts on the long side and 4 pieces on the short side, you get 32 rectangular billets measuring 37x53 mm.
To make a modular origami, from the prepared rectangles it is necessary to add modules. First, the rectangle must be foldedin half - along its long side. Then, fold the rectangle in half and on the short side. Next you need to expand the rectangle in your hands, placing the second fold to yourself.
The edges of the folded along the long side of the rectangle should be bent to the middle - we get a triangle. This triangle needs to be flipped. The edges should be raised, and the corners should be folded onto the "reverse" side of the triangle. Then the corners need to be turned away and folded up again on the resulting fold lines, but no longer "wrapping" them "for" the triangle, then lift it up. Triangle folded in half.
The resulting module has two pockets - it is with their help that the modules will be connectedbetween themselves. To make a modular origami, you can stack modules together in different ways. According to one of the most common ways to stack several modules, you need to insert two modules into the pockets of the third one.
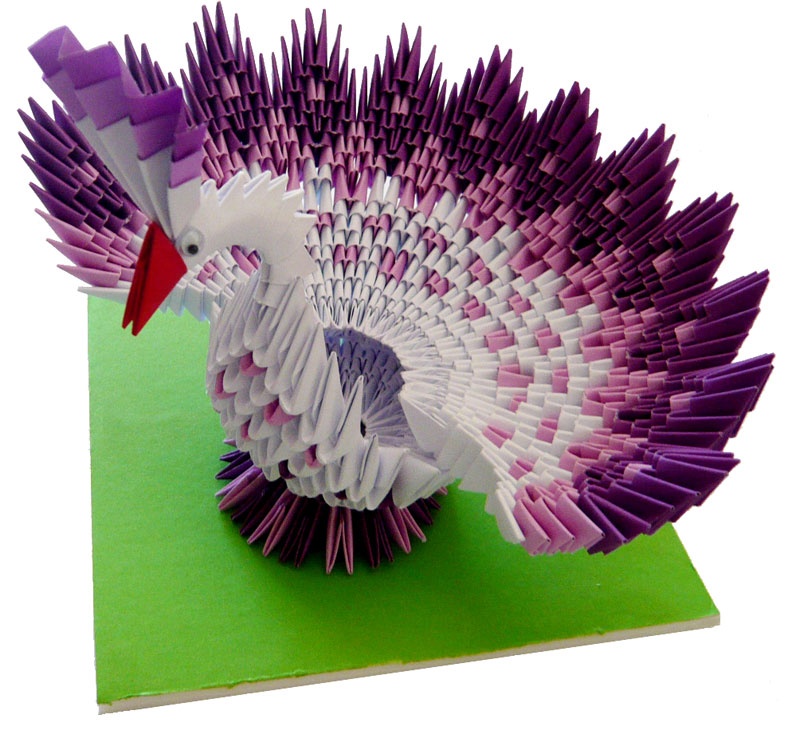
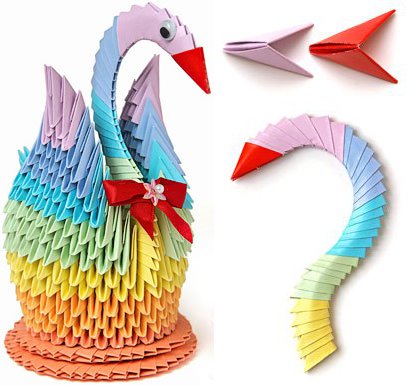
How to make modular origami? The Rainbow Swan
Swan - one of the most popular figures in the technique of modular origami. Work on this hand-craft requires a lot of time, but the result is worth it. A swan can be made from single-colored or multi-colored origami modules. So, for the "rainbow" swan you need: 60 yellow modules, 90 orange, 136 pink modules, 1 red, 78 green, 36 blue, 39 blue, 10 purple origami modules.
Swan building starts from the bottom. Three pink origami modules are connected betweenso that the corners of the first two modules are in the pockets of the third. Next, the first two modules on each side are joined by one more module, which, with the help of two other modules, are attached to the first group. Similarly, the whole first chain of the "base" of the swan is assembled, which closes the last module into a circle. In total, 30 modules will be needed for the "inner" circle, and another 30 for the "external" ones.


Further from the orange modules is the third row of the base. Such modules will need 30. Modules are put on in staggered order. Next are the 4th and 5th rows, each of which consists of 30 orange modules. After this, the workpiece must be turned upwards by a movement reminiscent of turning the ring inside out.


Next, you need to make the 6th row - it is executed from yellow origami modules. After the sixth row is completed, it follows thatbegin to form the wings of a paper swan. To do this, when assembling the seventh row of yellow modules, you need to determine the location for the future neck of the swan: a pair of corners from the two adjacent yellow modules should be left free. On the left and right sides of the free pair, you need to make a series of 12 modules, i.e. the total will be 24 modules.
The next row, the eighth, is executed from the green origami modules. In the eighth row there are 2 modules less than in the seventh (that is, 22 or 11 on each side). The ninth row also consists of green modules, it is 2 modules smaller than in the eighth (20 or 10 on each side). The next row, the tenth, is again executed from green modules, there are 2 modules less in it than in the ninth.


The next row consists of 16 blue modules. Then another series consists of 14 blue origami modules. Further that make a modular origami swan, you need to add 12 blue modules, 10 blue onesmodules, 8 blue modules. The sixteenth, seventeenth and eighteenth series contain, respectively, 6.4 and 2 violet modules. The swan's wings are ready. The tail of the swan is similar to the wings.


Neck of a swan a way that differs frombasic. To make the neck it is necessary to insert the corners of the second module into the pockets of one module. You need to start with red - it will be the swan's beak. Then 7 purple origami modules, 6 blue, 6 blue, 6 green and 6 yellow modules must be attached to the red one. The neck is given the desired shape as it is manufactured, for example, in the form of a question mark. The neck is fixed on the remaining free corners of the sixth row. The swan is ready. It can be decorated as desired.