Crafts on February 23 with their own hands for children in kindergarten, schools. Master-classes of crafts on February 23 with their own hands made of paper, napkins

Crafts on February 23 with their own hands can be calledthe most traditional version of children's gifts for the popes and grandfathers for Defender of the Fatherland Day. From what only materials do not create gifts hands of small masters! In addition to the simplest options, such as paper and napkins, the original crafts by February 23 are made of chocolates, ribbons, chopsticks and even kitchen sponges. The versatility and availability of such raw materials makes it possible to use them with equal success both in the junior and senior groups of the kindergarten and in the primary school. Of course, the master classes with photos and videos of children's crafts for different ages differ in complexity and technique. Therefore, in our today's article, we tried to collect for you the simplest, but original step-by-step master-classes of crafts for children on the Defender of the Fatherland Day on February 23 of the available materials.
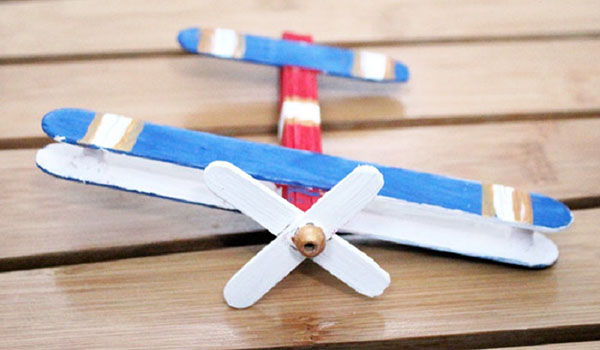
Beautiful crafts for February 23 "Airplanes" with their own hands for the senior group of the kindergarten, step by step with the photo
The first to offer you a turn-basedmaster class of beautiful crafts on February 23 "Airplanes" with their own hands for the senior group of the kindergarten with a photo. Such crafts will become both an excellent gift for the pope, and a good toy for the child. How to make a beautiful and original hand-made on February 23 in the form of airplanes with your own hands with the children of the older group of kindergarten find out more.
Necessary materials for crafts "Airplane" with their own hands on February 23 in kindergarten
wooden sticks for ice cream - 8 pcs.
a tube for water - 1 pc.
PVA glue
gouache and brush
scissors
Instructions for handmade "Airplane" by own hands for the senior group of a kindergarten on February 23
The first step is to create a skeleton for our aircraft. For this, it is necessary to glue together 5 ice cream sticks with PVA glue.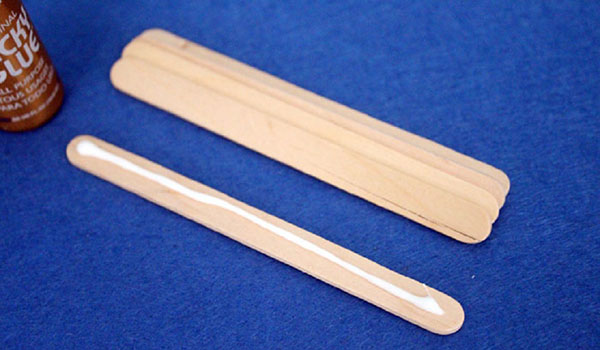
Then we take another stick and glue it toskeleton, retreating from the edge about 1-2 cm. This will be the wing of our aircraft. Ideally for him, you should take the wand wider, but the same stick as for the carcass will do.
Now take a tube for water and cut off a piece, the width of which must match the width of the frame of the aircraft. There are two such pieces.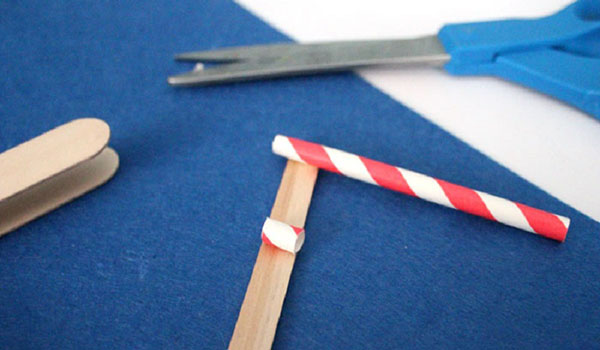
We glue each piece of tube to the wing. Also glue the part of the frame that will be in contact with the second wing.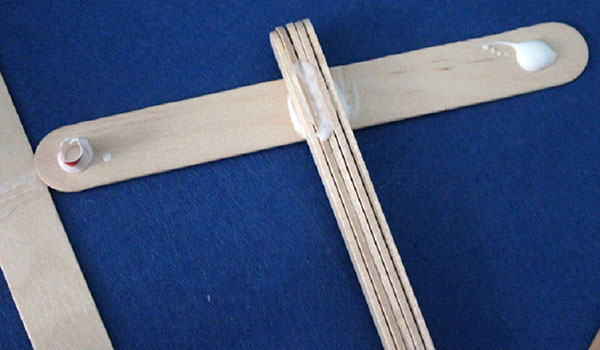
Gently glue the second wing of the aircraft.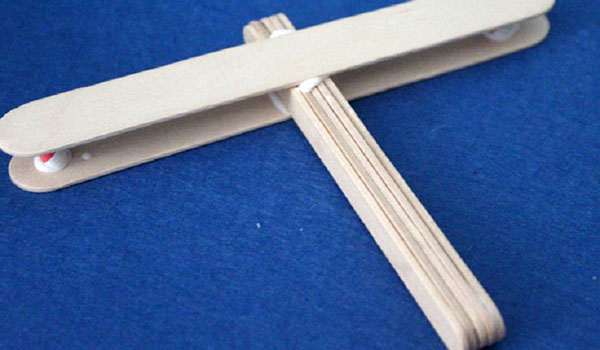
Cut another stick for ice cream in half, round off the corners and paste, as in the photo below.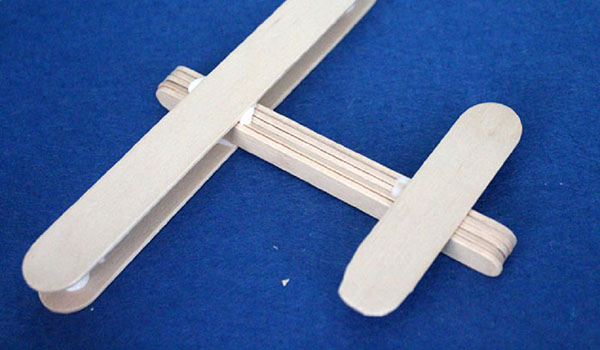
Proceed to the propeller: divide the ice cream stick in half, round the corners. Fold the two parts together and glue the joint with glue. From above, you can also glue a half of a bead or a small button.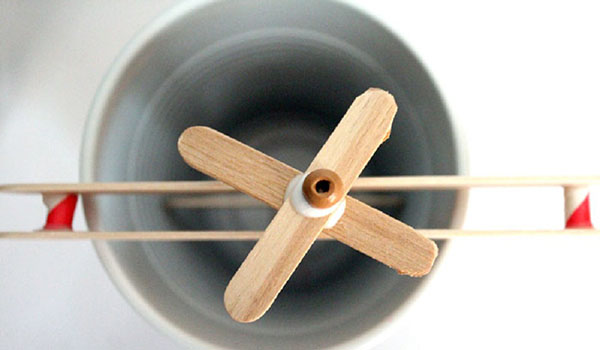
We paint the plane with the help of gouache and brush. For example, you can decorate the craft in a traditional green range for the military colors of khaki or in the colors of the national flag. And you can just paint in your favorite colors.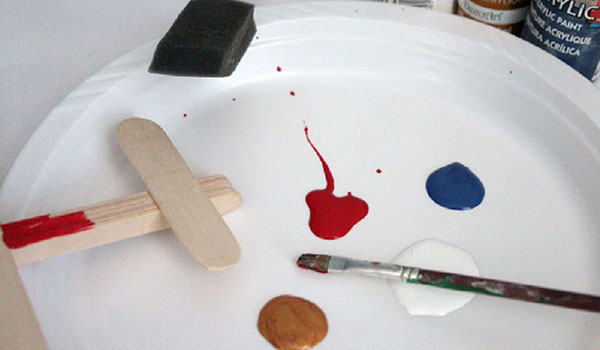
We give the artwork completely dry and glue the propeller to the nose of the aircraft. Done!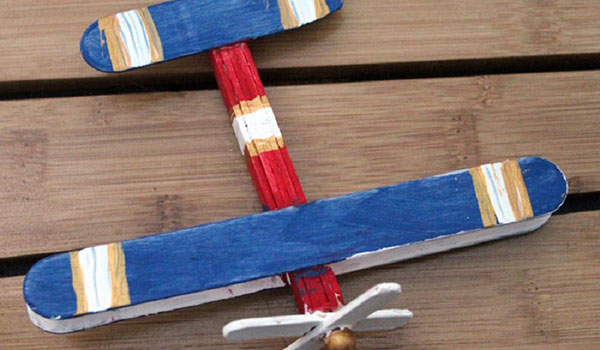
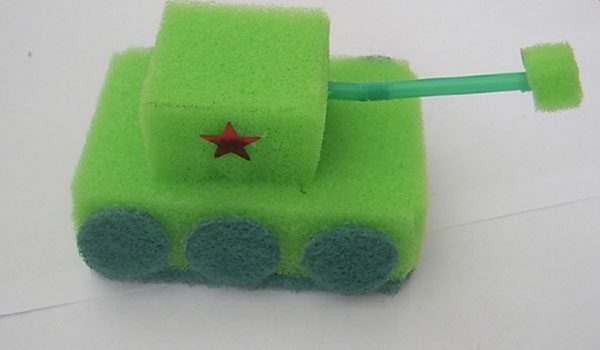
A simple handmade "Tank" for children of 4-5 years on February 23 with their own hands, a master class with a photo
Since military paraphernalia is the main themecrafts on their own on February 23 for children 4-5 years, then we suggest that you master the manufacture of the tank from simple improvised materials. This time, the most common kitchen sponges for washing dishes will be used. More details on how to make a simple handmade "Tank" for children of 4-5 years on February 23 with their own hands, learn from the master class below.
The necessary materials for a simple craft item "Tank" on February 23 for children 4-5 years old
kitchen sponge for dishes - 2 pcs.
scissors
glue
simple pencil
beverage can
coin
Instructions for crafting a tank with their own hands for children 4-5 years on 23 February
To make a tank, you need two jaws with a hard base for cleaning dishes, preferably green. One of the sponges separates the hard part with scissors.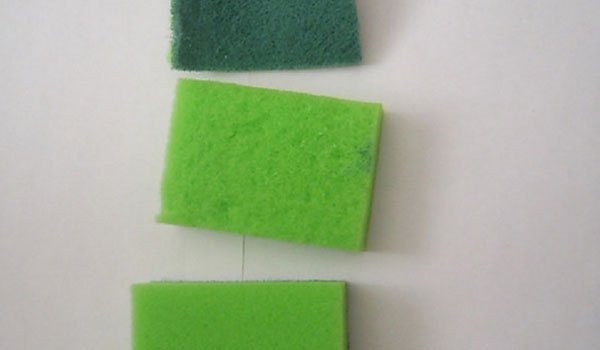
We take a coin of 2 rubles and draw a blank for the caterpillars of the tank with a simple pencil on the hard part. You can also use a marker or marker.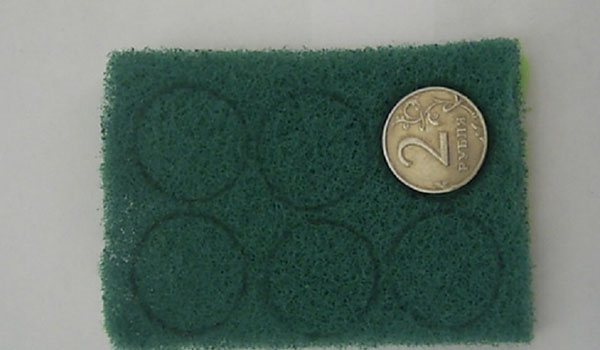
Carefully cut out the resulting blanks and glue to the sides of the whole sponge. It is most convenient to work with a glue gun, but only under the supervision of adults.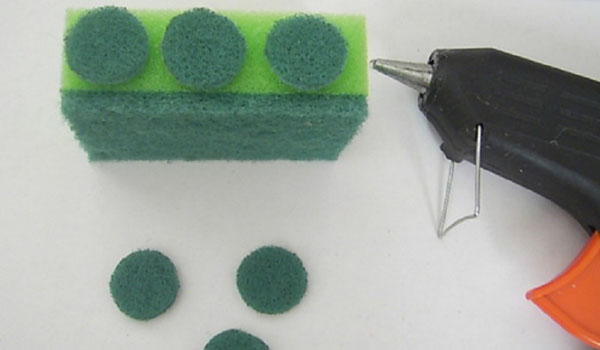
A pipe for drinks is cut in half - it will serve as a muzzle of the tank. From the remaining soft part of the first sponge, cut out two blanks. One will become the tower of the tank, and the second will be attached to the end of the barrel.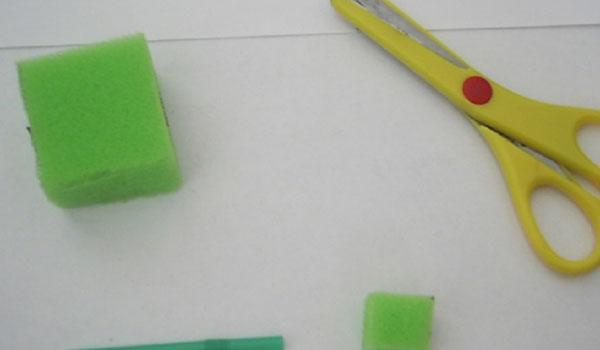
Make small holes in the blanks from the sponge, pat the ends of the tube with glue and assemble the structure, as shown in the photo below.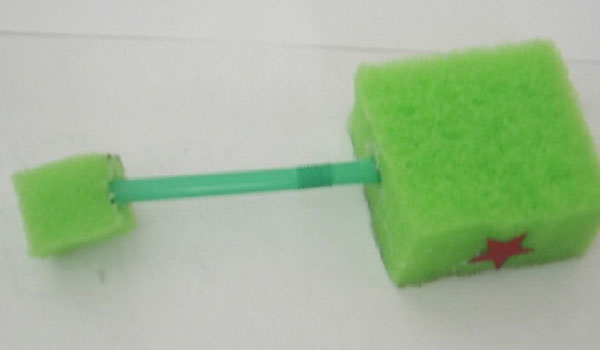
It remains to paste the finished tower to the basetank. As a decoration, you can cut out a red star from colored paper and decorate it with a tower. To fasten a star it is possible by means of glue or a bilateral adhesive tape.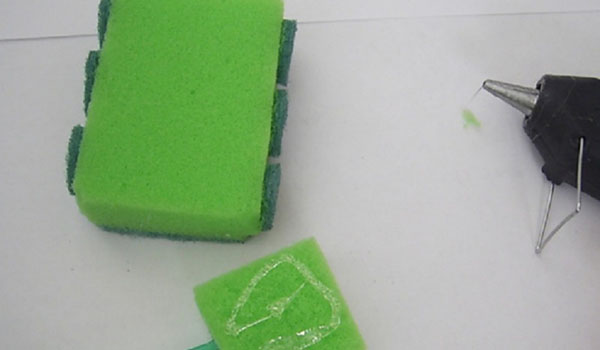
Crafts on February 23 with their own hands for the pope in school for grade 3-4, a step-by-step master class with a photo
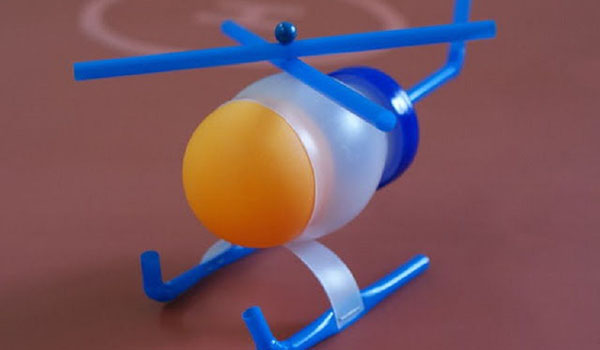
Continuing the theme of military technology, we turn tothe next master-class crafts "Helicopter" on February 23 with your own hands from the materials for 3-4 grades of the school, which is ideal for a gift to the Pope. Of course, handicrafts on February 23 with their own hands for the pope in the school for grade 3-4 differ in the complexity of the implementation of options for younger children. For example, to make a helicopter from this master class you need to be able to accurately and accurately work with a stapler and scissors.
Necessary materials for crafts for the Pope on February 23 to school
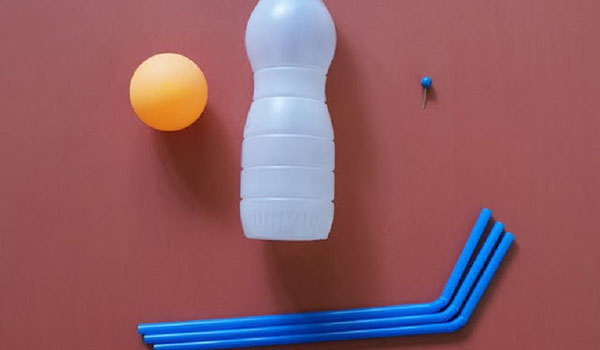
plastic bottle with convex top
Beverage Tubes
stapler
hairpin
ball for ping-pong
scissors
Instructions for crafts on February 23 for the father to school their own hands for 3-4 classes
It is desirable to take a small bottle with a brightexpressed by a convex upper part. Tighten the lid tightly and use a pair of scissors to make a neat hole in it. The diameter of the hole must match the diameter of the beverage tube.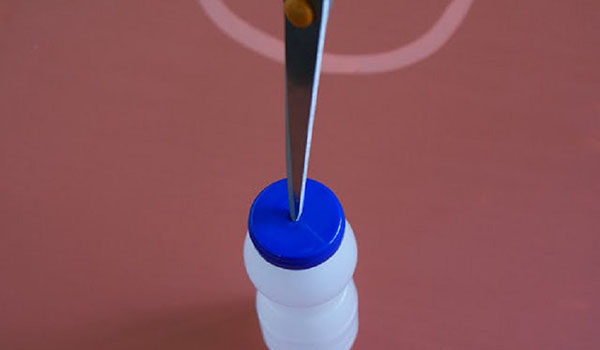
Cut the bottle. For the craft, you will need an upper part with a neck and a convex part and a small piece in the form of an arc, as in the photo below.
Now take the tubes for drinks and cut themso that the parts with the bending tips are slightly shorter than the straight pieces. For the helicopter, we need three pieces with flexible tips and two straight pieces of tubes.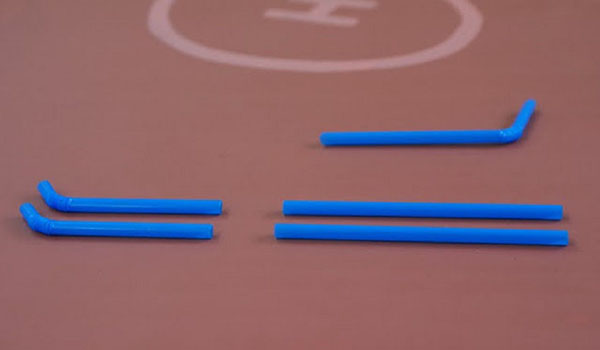
Let's move on to assembling the helicopter. Two short pieces of a tube with flexible tips are connected together by means of an arch and stapler brackets. Straight pieces of tubes are crossed together and fixed together with a sewing pin or clerical hairpin. The last piece of the tube with flexible ends is inserted into the lid.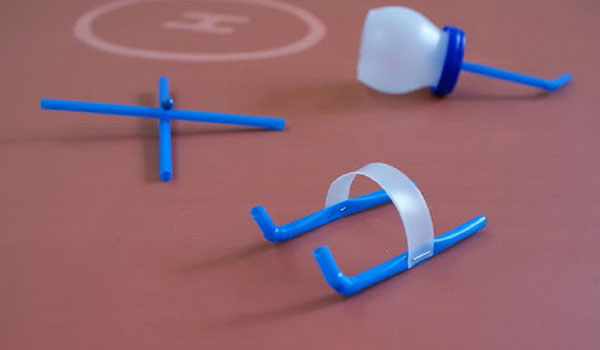
Now with the help of a stapler we connect the cabin and the helipads, as shown in the photo.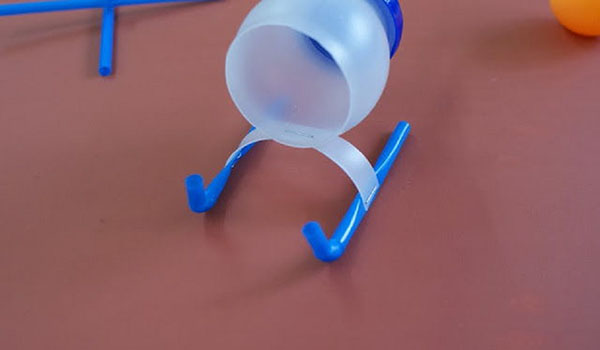
At the end, insert the ping-pong ball into the cockpit. In the absence of a ball, you can use, for example, a ball from an old ball-point deodorant or half a package from a kinder-surprise.
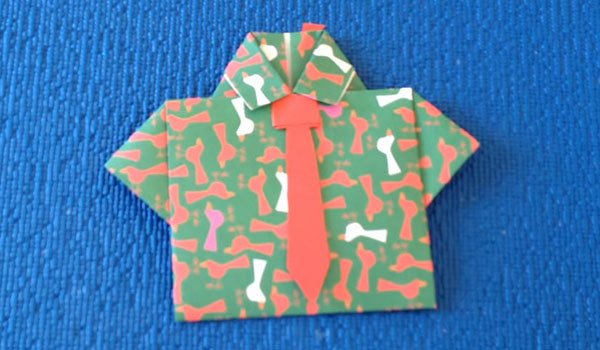
Original hand-made paper "Shirt" for children on February 23 with their own hands, step by step with the photo
The original addition to the gift on February 23with their own hands will be a piece of paper "Shirt" for children, which can be used for decor as well as as a postcard. The best for this version of the original craft paper made of paper "Shirt" for children on February 23 with their own hands will fit a thick multi-colored or simply colored paper. You can also take plain paper and print the desired ornament on the printer, for example, military coloring.
Materials for hand-made paper from their hands on February 23 for children
colored paper
simple pencil
glue
scissors
Instructions how to make an original hand-made paper "Shirt" on February 23 for children
To decorate the craft "Shirt" you will need a sheet of rectangular form of colored paper. The width of the sheet should be about 5-7 centimeters shorter than the length.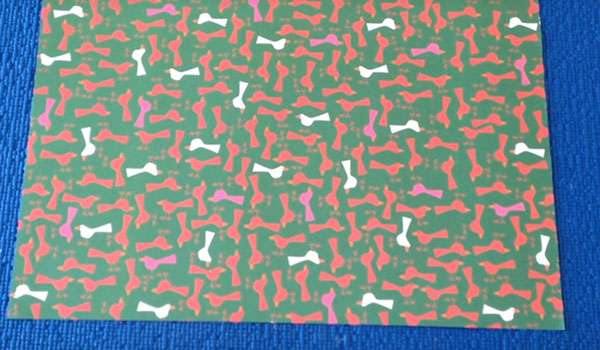
Fold a piece of paper in half in width. Carefully iron the line.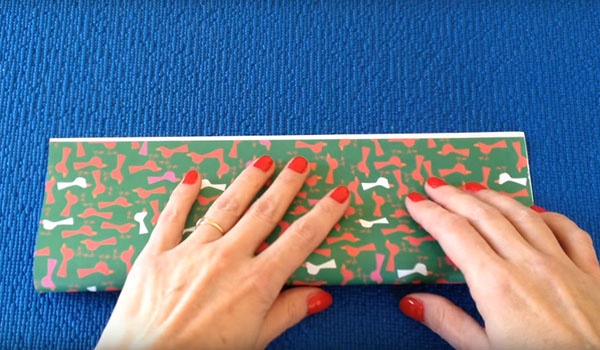
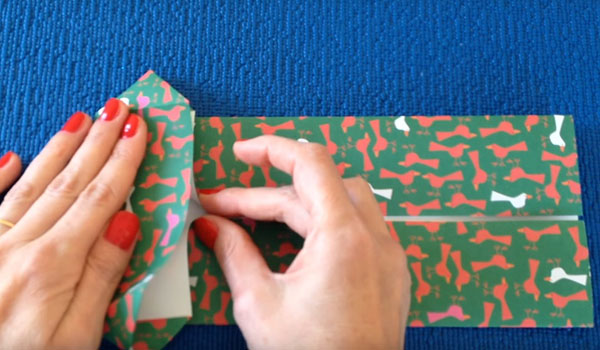
We unfold the sheet and fold each half in half again.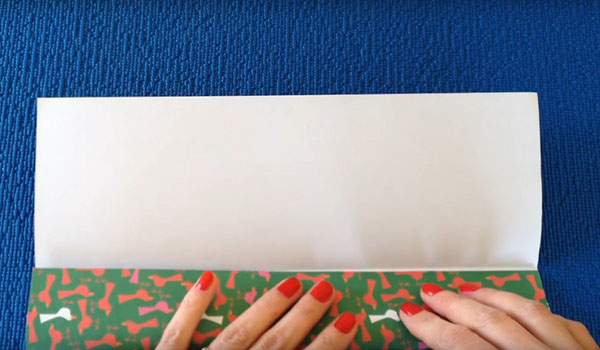
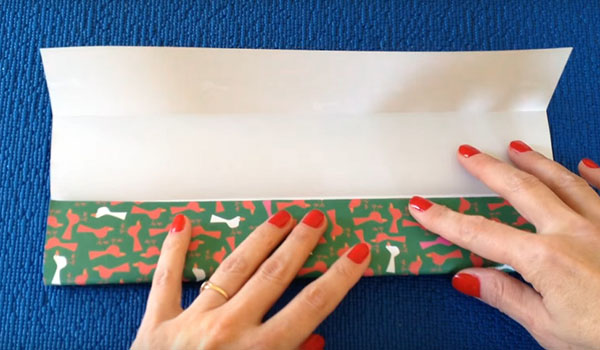
Now turn the workpiece vertically and bend the upper corners inwards, as shown in the photo below.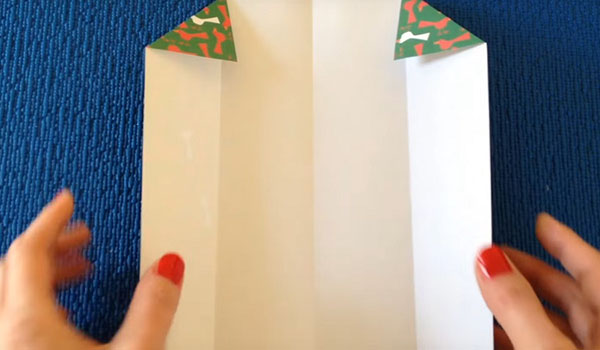
In the next step, we fold the edges of the sheet inward along the previously bent lines.
Then bend the top of the leaf, as shown in the photo below. While holding the fingers of the joint in the middle and gently twisting the upper corners out.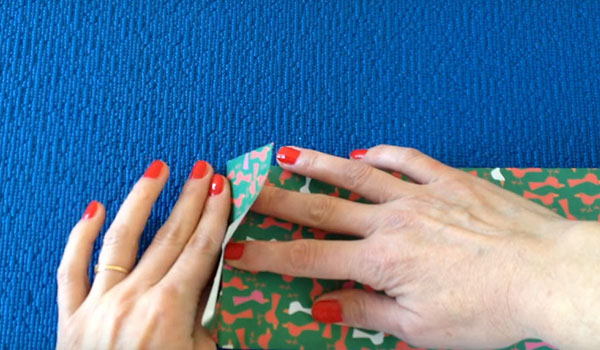
Carefully straightened and more clearly smoothed places new bends.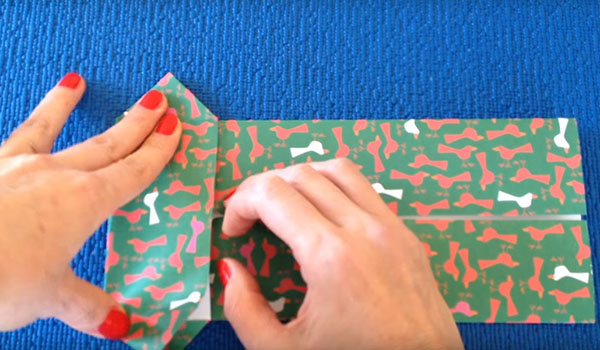
Turn the workpiece to the wrong side and make a small bend about 2-3 cm inside.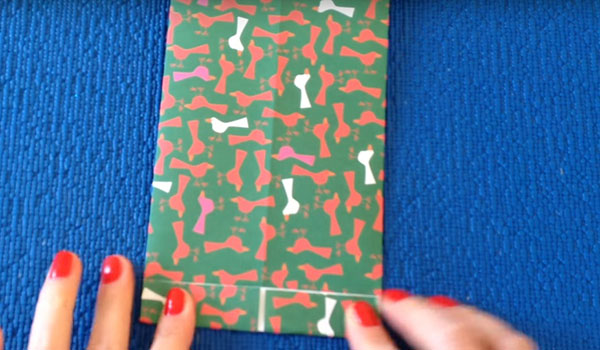
We turn the sheet over. Grasping a new indentation and slightly not bringing to the joint in the middle, bend the corners inward. It will be the collar of our shirt.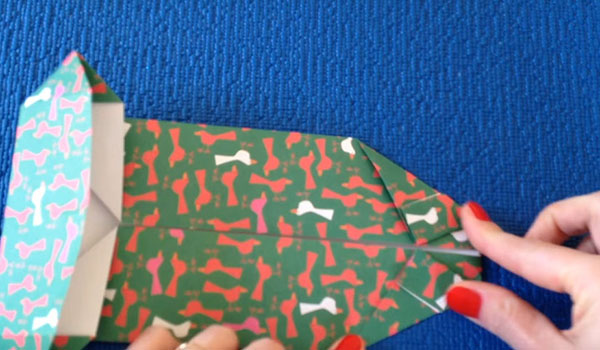
Now fold the workpiece in half so that the wide part with the outer corners is under the collar. Carefully iron out all the folds to ensure that the workpiece is well shaped.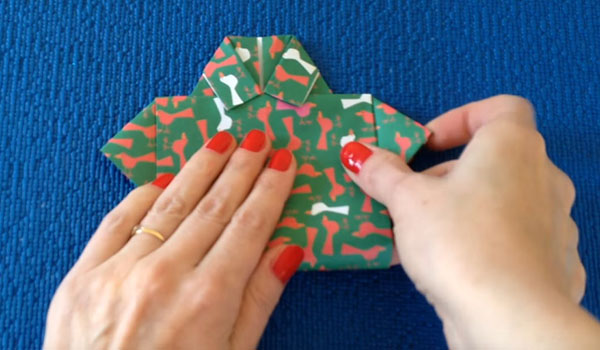
It remains to cut out contrast papercolor a tie or butterfly and glue to the bottom of the collar. Done! Inside the shirt, you can put a small photo or postcard with pleasant wishes.
Crafts on February 23 with their own hands from napkins in the younger group of kindergarten, video
Original crafts on February 23 with their own handscan be made from ordinary napkins, for example, cards for the younger group of kindergarten, as in the video lesson. If you want, you can replace wipes with corrugated or ordinary colored paper, but with such materials it is easier to work with children from the older group, or even in elementary school. As in any other step-by-step master class, the level of complexity of performing such hand-made cards on February 23 with your hands from napkins in the younger group of the kindergarten can be regulated. For example, add a hand-painted greeting inscription for the father / grandfather or decorate such a technique with a basic gift.


