How to make an arch of plasterboard
 Doorway-arch is not only fashionable, but alsoand very beautiful. Of course, because the arch instead of doors will give an inexpressible finesse to the design of any apartment. And to make an arch, you do not have to hire workers and spend extra money. You can do it yourself. Stalin's Council will tell you, how to make an arch of plasterboard.
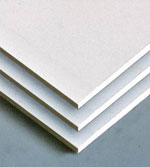
 Drywall - very malleable material, especially since it is easy to work with. That's why drywall is used as a material for building arches. But first you should talk about the arches themselves.
Arches are different in form. The classical arch is what we see more oftenTotal. Classic arches have beautiful shapes, and the rounded part has the correct radius. A small arch rise is characteristic of the Art Nouveau style. For a romantic style, arches are characteristic, which combine straight and rounded parts. In addition, there are still arches in the form of a regular ellipse. Any of these arches can replace the interior doors. But all the same it is necessary to consider, that it is easier to do classical arches. The Art Nouveau style, of course, is good, but it is characterized by asymmetric large arches, which the beginner in this matter may not be at strength.
If you decide to replace the doors with interior gypsum plasterboard arches, you should take into account that such buildings have one significant drawback - height. In order not to spoil the appearance of the room, the arch must be quite high, therefore the height of the doorway must reacha minimum of 2 meters. The best option for the arch is a 2.5 meter high opening. When you have already decided on the size and position of the arch, you can proceed to its construction. Tell you how to make an arch of plasterboard.
Before you make an arch in the opening, you will need make a rigid frame, which will be attached to drywall. A metal guide profile is used to make the frame. Straight horizontal and vertical guides are attached at the top of the opening. Secure the profiles using dowel-nails, which are located at a distance of 200-300 mm from each other. Also, be sure to fix the ends of the guides to the corners of the structure with nails.
From the plasterboard cut out the details that will form the archway. Every detail should be cut in twocopies. The prepared parts are fixed to the guides fixed on the upper part of the opening. To fully form the view of the arch, use a ceiling guide profile. Both of its shelves are cut to the back with a pitch of 5-8 cm. Bend the profile to make it flexible. The prepared profile is fixed on the guiding parts of the arch. Your frame is ready.
Now it is possible to proceed with the facing part. Screw the self-tapping screws to the profilegypsum plasterboard details of the arch. The distance between the screws should not be more than 200 mm. The curved lower part of the arch is also lined with plasterboard. To give the plasterboard the desired shape, a strip of a certain length is placed on two supports on which it will lie. From the spray, moisten the upper side of the plasterboard. And that the gypsum cardboard is bent, in the middle on it put a small load.
Besides, it is possible to make gypsum board pliable yet and in another way. Shilom make shallow holes on one of thesides of drywall at a distance of about 1 cm from each other. Then the spray is sprayed with plasterboard from the side where there are holes. For one and a half hours, wipe the drywall with a damp sponge from time to time. During this time the material will become malleable, and with it you can easily work. Then a piece of drywall is bent on the template. Remember that the wetted side should bend inward.
When all the work is done, you can proceed to filling the seams and dimples. Then the finished arch is primed. Any irregularities should be removed with sandpaper. Only after this, the finished structure can be plastered with the finish line.
Your arch is ready. As you can see, the process is not very laborious and complex. Now that you know how to make an arch with your own hands, you can start repairing your apartment.