False ceiling with own hands

You dream of elegant, elegant false ceiling, but you can not afford to hire a team of craftsmen? It's okay, it turns out false ceiling with your hands - it's possible!! How? The country of councils will share a secret.
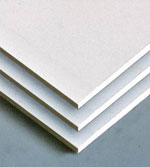
Suspended ceiling with their own hands is most often made of plasterboard - the material is accessible, easy to process. Therefore, the technology of installing a false ceiling with their own hands is considered for the ceiling from gypsum board.
Structurally suspended ceiling of plasterboard (as well as suspended ceilings with other fillings) consists of such elements:
- guide profile (supporting profile);
- binding (transverse) profile;
- jumper;
- profile angled (the extreme, is attached around the perimeter of the room);
- suspension (loop);
- gypsum board (or other filling material).
Before you mount the false ceiling with your own hands, it is necessary to do some preparatory work, in particular, to prepare all communications that are planned to be placed in the inter-ceiling space: electrical wiring, ventilation, etc.
Further it will be necessary to calculate the required number of drywall sheets for ceiling mounting, determine the type of material for the supporting frame (suspended ceilings from gypsum board can be installed on a metal or wooden frame). It is better to give preference to lightweight metal profiles - working with such a profile does not require any serious professional skills.
To calculate the required number of drywall sheets, make room measurements, in which a suspended ceiling will be installedown hands. Further, considering that the size of one standard sheet of drywall is 1.2 x 2.5 m, you can determine the required number of sheets. It is important to remember that depending on the ceiling design, you may need to cut sheets of drywall, so it's better to "bust" than "shortage" for the number of sheets.
The next stage of the work - installation of a skeleton of a false ceiling. It is best to draw a diagram of the installation in advance, taking into account the following recommendations:
- bearing profiles are installed with an interval of 120 cm - to attach to them sheets of plasterboard on the long side;
- transverse profiles are installed with an interval of 30 cm - for fastening sheets on the short side;
- When marking, you should take into account the location of engineering communications so that profiles do not affect these communications.
Marking of the location of the profiles of the carcass is carried out with the help of a level (rule) and a coated twine. It is also necessary to outline the location of the outer profiles of the frame.
Firstly the extreme profiles are fastened - to the walls of the room. To the wooden walls the profiles are fastened with screws for plasterboard, to the stone ones - with the help of dowels.
Further, at each anchoring point of the profiles, holes are drilled and the hinges are screwed (an interval of about 60 cm). Bearing profiles are filed and inserted into the outer ones, fastened with screws. Adjusting the height of the profiles with the help of attach carrier profiles on hinges.
Further, the mounting brackets are mounted on the supporting profiles - every 30 cm. Cross sections are fixed and fixed by the connecting elements. The "ears" of the connecting element are bent down around the carrier and transverse profile.
To fasten the whole frame, the screws are twisted into the bent ears. The frame is ready for installation of the filling.
Before fixing the edges of sheets of gypsum board it is recommended to grind it - it will facilitate the subsequent plastering of the ceiling.
The first sheet of drywall is always recommended to install in the center of the ceiling. On long sides the sheet is fastened with drywall screws every 20 cm, for short ones - after 30 cm. Further, focusing on the first one, the remaining sheets should be installed. On the long side, the sheets should be combined tightly, on a short - leave gaps of 3-4 mm. The marginal sheets are fitted on the wall. Between the wall and the outer sheets, leave a gap of 3-4 mm.
After the installation of drywall sheets, the necessary finishing work is carried out: puttying, painting, etc.

