Shellac at home: step by step instruction with photos and videos of shellac at home

The development of the beauty industry does not stand still, butgoes by leaps and bounds. Today, thanks to the use of modern technology, women are offered novelties. One of them is shellac, which became the last word in manicure. His photos can be easily found on the covers of fashion magazines or on websites on the Internet. It is a special coating for nails, combining the properties of the gel for correction and varnish. If you purchase the necessary materials and tools, you can make shellac at home.
Shellac at home: a list of materials
To execute the procedure yourself, you need the following set of materials:
tools for dry manicure (nail file and stuff);
means for the base layer (base)
Primer (for better adhesion of the coating with the nail plate);
shellac (among the wide range of colors you can choose the color you want);
fixer;
UV lamp;
degreaser, which removes the sticky layer after the polymerization process;
means designed to remove varnish.
Without a UV lamp, shellac can not be made at home, as it is necessary for rapid layer-by-layer drying.
Important! Get rid of shellac using a conventional means for removing varnish or use acetone is not recommended. This will adversely affect the condition of the nail plate. A special tool is used for safe removal.
The list of materials and tools also includesa nail file for polishing nails, special wooden sticks for removing gel-varnish and so on. Depending on the type of manicure, you can use a stencil, stickers (for a jacket) and more.
Shellac at home: step-by-step instruction with video
Girls who learned to apply gel-lacquer at home,will save a lot of money and time. The technology is fairly simple, you only need to step-by-step execute the algorithm of the necessary actions. The technology of such a manicure is safe for nails, retains the platinum's flexibility, provides its protection and guarantees an attractive appearance.
Step-by-step instruction:
First you need to prepare your nails. To do this, carefully remove the cuticle without the use of special chemicals, otherwise later they will cause a spoiled manicure. When the cuticle is removed, it is necessary to give the desired shape to the nail, sand the plate. Dust from the nails is removed using a dry brush.
On a note! Nail platinum is ground until the gloss disappears. This will allow the coating to last longer.
Then the plate is degreased, after which the primer is applied.
On a note! The primer is applied to the edge of the nail. It is necessary that it is dried in a natural way, a primer lamp is not necessary.
The base layer is applied, which is necessaryto seal. For this purpose, the end of the plate is greased with a brush, which is carefully wrung out. Then the base layer is dried under the lamp for about 2 minutes, setting the power to 36 W. As a result, a sticky layer will remain on the nail.
On this basis, the gel-varnish of the chosen color is thinly applied, which is dried immediately under the lamp for approximately 2 minutes. Then the procedure is repeated.
Important information! It is undesirable to apply gel-varnish in one layer, otherwise the color will be translucent.
At the end, the final coat is applied, intended for fixing the gel-varnish. Its layer is thicker than the rest. It is not recommended to leave a divorce on it, otherwise the appearance of the manicure will suffer.
The remaining sticky layer is removed with a degreaser. On the cuticle, a special nutritive oil should be applied.
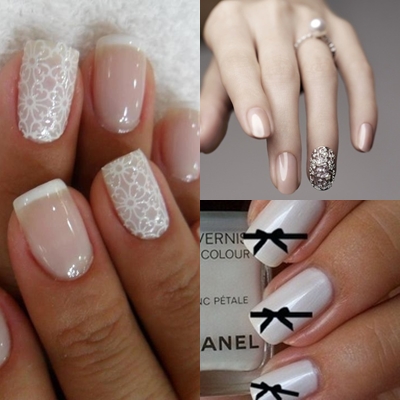
As with the use of ordinary varnish, with shellac you can make a jacket (buying special stickers), "moon" manicure and so on. It is enough to purchase the necessary materials.
Shellac at home: removal
According to the recommendations, Shellac shows resistance to conventional means for removing varnish. To get rid of it, you'll have to stock up with acetone, foil, special chopsticks.

If you can not remove it by this method does not work, the usual file, which cuts the coating, will help.
On the Internet, you will find lessons on how to make shellac step by step (source: YouTube). You do not have to worry anymore where to buy shellac (bluescen etc).