How to make a pendant book at home

Elegant suspension for all book lovers - and a handy mini-notepad for the most important entries, which will always be with you!
This decoration is done in three stages: first you need to sew a small book, then twist and decorate it, and then turn into a proper suspension.
Each stage will need its own tools and materials.
What will you need?
For the book itself and the binding, take:

- 1 sheet of white paper;
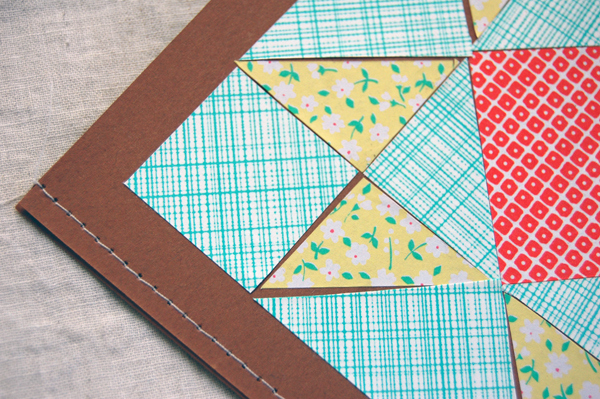
- 1 sheet of decorative paper for endpapers;
- thread and needle;
- a wax candle or a piece of wax;
- PVA glue;
- a piece of skin;
- very small decorative buckle (the size of a fingernail);
- ruler and pencil;
- sharp knife;
- rivet (1 piece);
- eyelet (1 pc.);
- a hammer.
- round pliers;
- chain;
- connecting ring.
And to turn it into a suspension:
Step-by-step instruction
- Choose the size of your future suspension. In this master class, the parameters are 2.5 x 4.5 cm, but you can make it a little more or less.
- Mark your sheet of white paper with a pencil. From the A4 format with the above parameters, 16 small rectangular reversal sheets are obtained.
Each of them fold in half - not all together in a pile, but each separately. Then fold these double sheets into each other to make stacks of notebooks of 4 pcs. in each.
Such piles in the book business are called"notebooks." Of these, those books are stitched that do not have an adhesive binding, but a sewn binding, on threads - the quality of such a binding is higher, and opening a book with it is much more convenient.
- Beat with an awl 4 small holes, at equal distance from each other, on the folds of each notebook.
- Treat the thread that you will stitch the book with, wax, and thread it into the needle.
- Start to stitch the notebooks. It happens this way:
- first pass the needle with the thread into the upper hole on the outside of the notebook, so that the knot remains outside;
- then thread the needle through all the holes; she ismust go through the last on the outside. Inside the notebook, thus, there will be two stitches with a gap in the middle, and outside - one stitch, knot and the rest of the thread;
- Now attach the second second notebook to the first, and thread the needle through the lowest hole. Sew up, moving up, just like the first.
- when you reach the end of the notebook, pass the needle through the first hole of the first notebook and tie the knot.

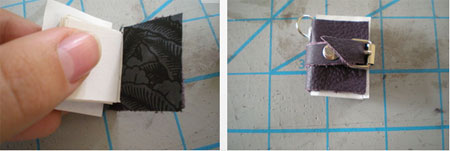
- Now prepare the binding. Cut out a piece of skin in a format slightly more than the turn of your book (by 1.5-2 mm.), And pierce with an awl the hole in the place that would be the top point of the fold if you folded a piece of leather in half.
- With a hammer, place the eyelet on this place, and then unbend the connecting ring with the round-screws and fasten it in the eyelet.
- Then make a strap: cut a narrow skin strip 2-2.5 cm long, more than the binding, and thread a buckle into one of its ends. Fold the skin immediately after it for 1 cm and pierce both layers through the awl.
- Glue the book block to the binding with glue (but not promazyvaya place for the spine). Now the grommet is in the upper point of the spine, and the connecting ring is not stained with glue.
- Cut out of the decorative paper two rectangles a little more pages of the book in size, and glue them like book-ends.
- Thread the chain into the connecting ring - and the suspension can already be worn!


Repeat until until it is sewnthe last notebook (you can later simply attach the new part of the thread to the stitch or the previous node, not necessarily to pass the needle through the hole every time).


Then attach the strap to the binding asyou want it to be located on the finished product, pierce one more hole, already in the binding itself, so that it is located directly under the hole in the strap, and fasten all three layers with a rivet.