Bracelet made from rings: Japanese weaving with own hands
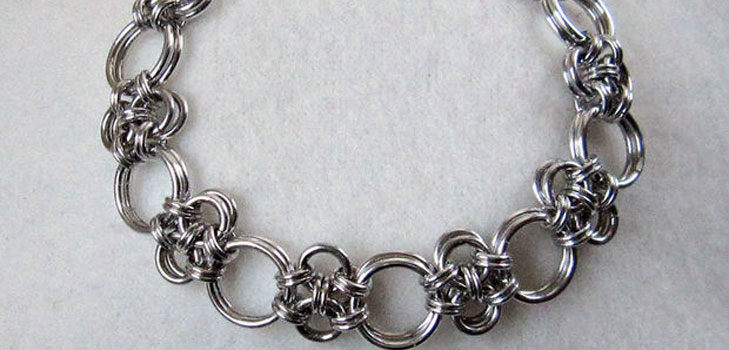
Japanese weaving (otherwise - "Japanese cross")is very popular among those who prefer wicker ornaments from wire and connecting rings. They seem at first glance to be very simple, because besides the rings, they do not use beads, stones or rhinestones, but this laconism has its own charm, which all lovers of minimalism appreciate. Of several round procrastinations, a real work of art is obtained.
What you need for this decoration:
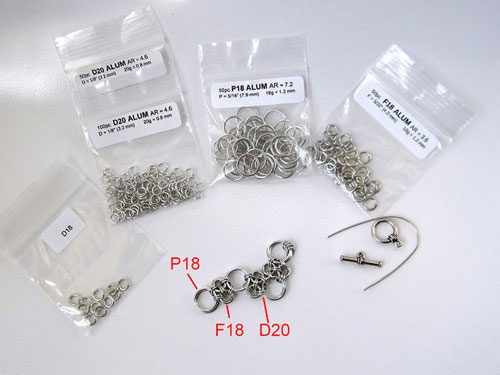
- 150 rings with a diameter of 3.2 mm (made of wire 0.8 m thick
- 50 rings with a diameter of 7.9 mm (made of 1.2 mm wire);
- 50 rings with a diameter of 4 mm (of wire thickness 1.2 mm);
- 11 rings with a diameter of 3.2 mm (of wire thickness 1.2 mm);
- 1 lock for decorations (any, but locks-togles look best on bracelets of this type);
- piece of wire;
- pliers.
This type of Japanese weaving isalternately connecting two pairs of large rings using a transverse construction of smaller rings, which in turn are connected by even smaller rings. In the original version, this transverse element contains 12 rings (with weaving 12 in 1 respectively); in this master class a variant with 8 rings is shown. The original design was created by Rebecca Mojic.
About working with rings:
In the photo you can see that all the ringsare laid out on a strange material. It is a fabric with a short pile (from a plush toy), and it is more convenient than a flat table surface, because it is much easier to pick up rings with pliers, when the material on which they lie is flexible.
Strictly recommended to protect the ends of pliers with rubber attachments. This can be done like this: take the usual heat shrink tubes and burn them with a cigarette lighter to the desired size.
How to make a bracelet:
Step 1. Close the rings
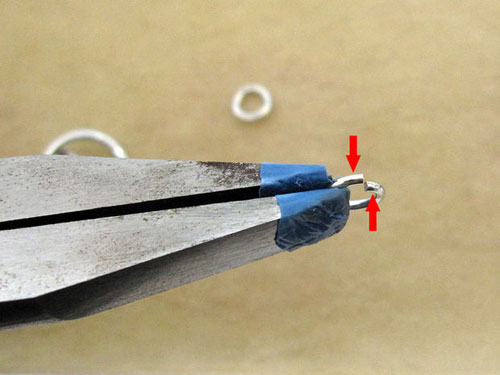
Coarse small rings of fine wire. To do this, just squeezing them with pliers is not enough; make a rotational motion. The ends of the rings should not go behind each other, and the ring - lose its shape.
Step 2. Start making the first section
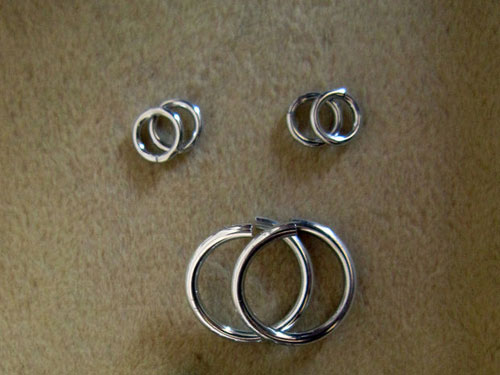
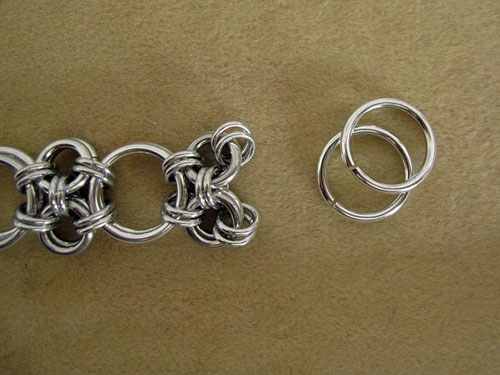
Lay out in front of you two large rings and four small ones (from the thinnest wire). Open the two big rings with pliers and thread them both at once, through four small ones.
This is the beginning of the bracelet and the beginning of each section.
Step 3. Cross-section construction
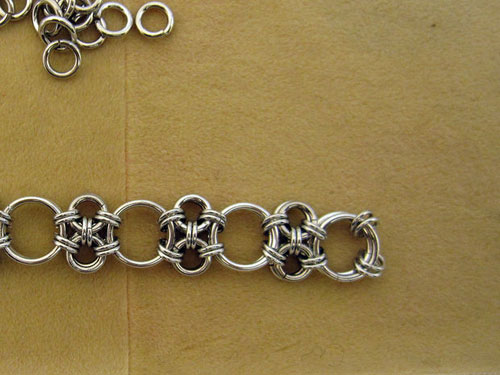
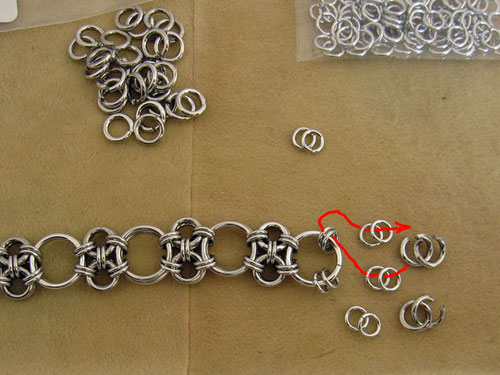
Take the first workpiece, 6 closed small thin rings and four open middle rings.
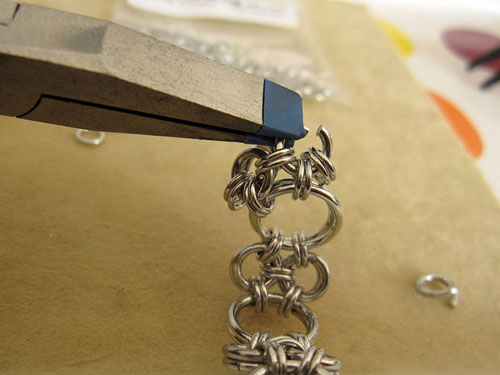
Pass the 2 middle rings in two small ones on the first workpiece (you can select the upper or lower ones - it does not matter), and through it, skip the four thin "loose" rings.
Then through the two remaining rings, pass the last two middle ones, not forgetting to pass them both through the two lower small rings from the first section.
Step 4. The second segment
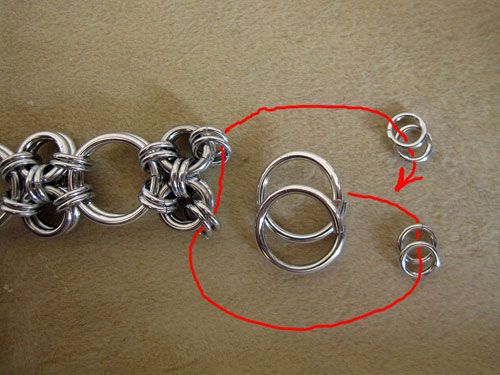
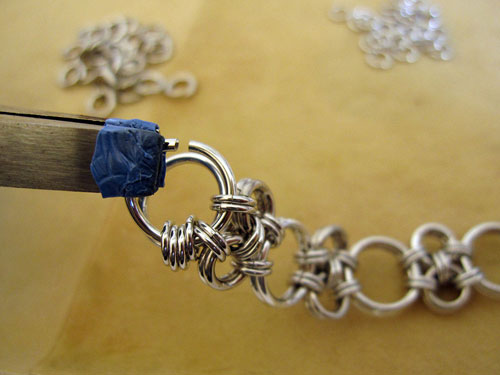
Attach two large rings to foursmall, which in the first segment are connected (each pair) with middle rings, and then add, already to large ones, 4 more small ones - as in the very first workpiece.
Never forget to close the rings with a rotational movement. The whole bracelet consists of rings, and if one of them is not fixed well enough - the whole structure will be scattered.
Repeat these steps until the bracelet is sufficiently long.
Step 5. Lock
The bracelet must end with large rings, andnot a transverse section. When you realize that the bracelet has reached the desired length, put on two more large rings, or remove four small ones (if you wanted to start a new section), attach instead one ring and thread it into the first part of the lock.
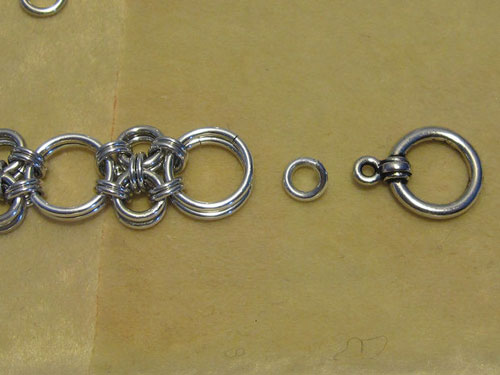
Do the same with the beginning of the bracelet, attaching the second part of the lock.
The bracelet is ready!

