"Casket of Athena" - decoupage caskets, master class with photo
 Today in our master class we will doDecoupage with Greek motifs. To make such a decor for your house is not difficult, detailed instructions, tips and step-by-step photos will help you.

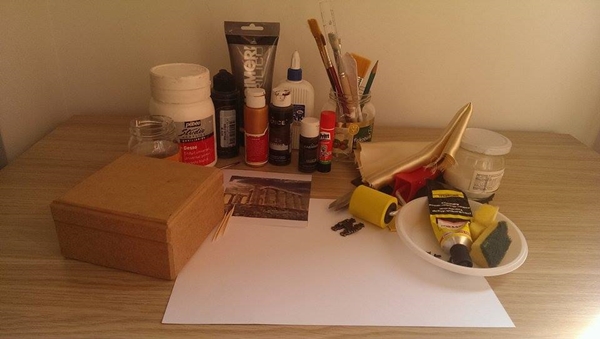
We need:
wood or MDF workpiece;
printout with a picture;
acrylic primer;
acrylic putty;
acrylic paints;
a small sheet of cardboard;
beige satin;
decoupage glue (you can use glue "PVA");
glue stick;
glue "Moment";
sandpaper No. 140 and No. 800;
acrylic matt lacquer;
screwdriver, pencil, ruler, a pair of toothpicks;
brushes, foam sponge, plastic plate, glass with water;
knife or any other device for working with putty.
Decoupage caskets - step by step instructions
First we prepare the workpiece: we draw metal pins around the pencil, and then we twist the box from the details, also we designate the place where the lock will be. Advice! Screw the lock and remove it immediately. It is necessary that in the end when putting on the lock do not damage the decor. Let's go through the preparation with rough sandpaper №140 from all sides. If there are chips, then they need to be covered with putty and after drying, sanding. We cover the entire workpiece with ground, except for large surfaces of the inner part. There will be a cloth finish. Also there are uncovered places for the lock and loops. Primer we try to apply evenly, use either a brush or a sponge. We are waiting for the drying. Advice! To get a smooth white cover surface, cover it with soil twice. After drying, if irregularities are visible, then sand it with sandpaper No. 800.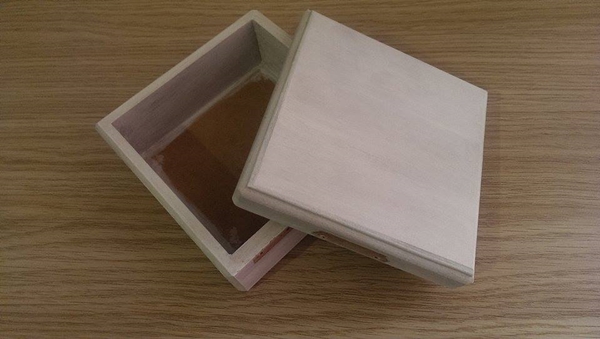
Now go to the printout. We will transfer the drawing to the cover by the "implantation" method. Ideally, the size of the pattern should fully correspond to the size of the cover surface. In our case, it turned out that the picture is slightly smaller. But it's not scary, we'll do a sketch, and nothing will be noticeable.
And so, cut out the picture to the size of the surface of the lid, leaving about 2 mm on each side. It is important to cut out exactly.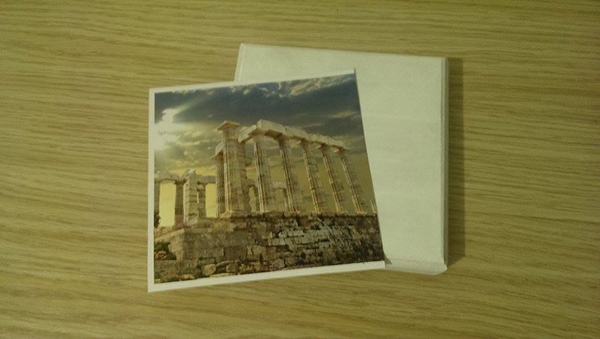
Cover the printout with varnish, leave to dry. We cover with varnish and the surface of the lid, where we will carry the drawing. Dry and repeat the procedure 2 more times. Now we again cover the printout with a varnish, abundantly and evenly lubricate the surface of the lacquer with a lacquer, do not dry it anymore, but stick the printout well with the lacquer.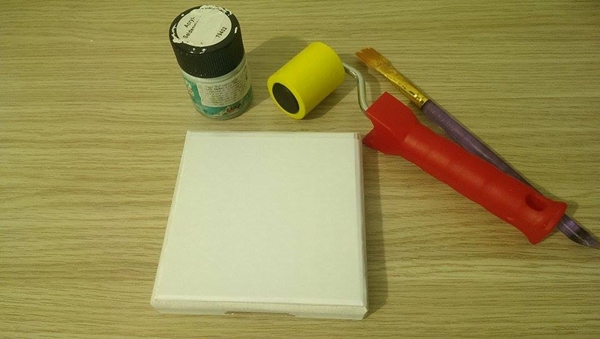 It is important to apply the printout exactly and press it firmly against the surface. I use a roller for this. It smoothes well, squeezes and expels air bubbles.
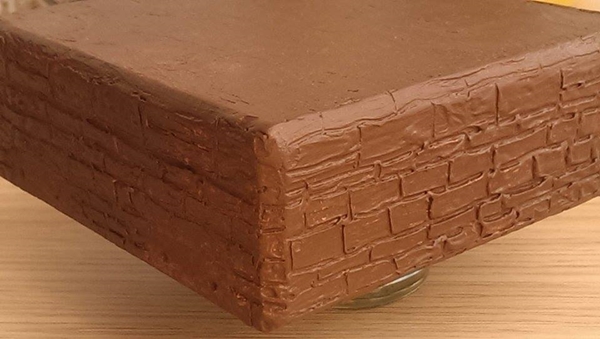
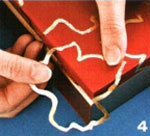
While the printout dries (not less than 6 hours, but betterleave for the night), we will create relief stones on the sides and bottom of the billet. To do this, add a couple of drops of glue "PVA" into the putty, mix well and apply a thick layer on the side walls with the help of a palette knife (do not touch the loops and the lock). Immediately with a toothpick, we draw not exactly straight lines, imitating a stone. The bottom of the blank is simply covered with a layer of putty and a palette knife is applied a couple of strokes in different directions. Now this structure should dry well. Leave it for the night.
The time has passed. We will exhibit a pattern on the lid. We take a foam sponge, we moisten it in water and quietly print a three-page printout. A white layer of paper rolls down, and the pattern remains. We dry it with a hair dryer and see that not all the paper has rolled down.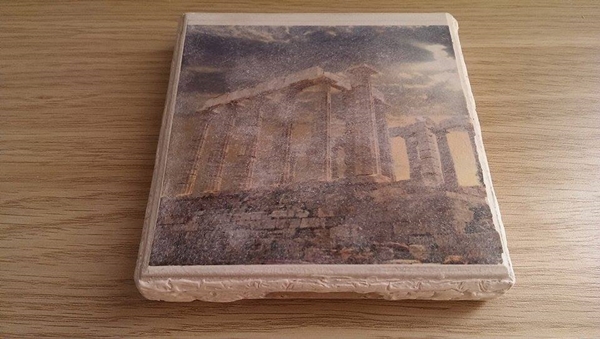 Wet the finger in the water and gently continue to roll the paper. When the result is satisfied, we cover the pattern with varnish.
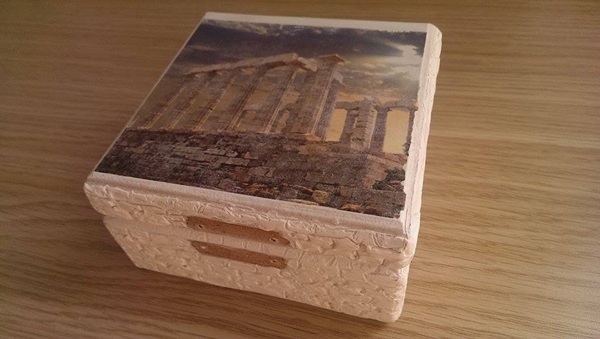 But before we cover with varnish we needfinish the missing part. Do you remember that the picture did not fully cover the cover? Therefore, we mix suitable colors in a plastic plate and correct the pattern. And then we cover with varnish.
We paint the sidewalls and the bottom of the billet in browncolor 2 times with intermediate drying. To do this, use the brush. Paint for the first time I recommend to dilute a little with water. After drying, it is important to inspect the painted surface from all sides, so that there are no missing places. We cover the workpiece with varnish.
Next, cover the entire workpiece of light beigepaint. We make this foam sponge with light movements without any special pressure. Our task is not to paint the surface completely, but to create a 3D image. I paint the inside of the sidewalls later. When everything dried up, dry brush-bristles with gold paint pass through the topography of the workpiece, further emphasizing it.
 We cover the workpiece with varnish.
Next, we begin to deal with interior decorationcaskets. We make the necessary measurements, transfer them to the cardboard, cut out, try on the workpiece. The surface of the workpiece should be 1 mm larger on each side. We make a pattern on the fabric, leaving an allowance of 1 cm from all sides.
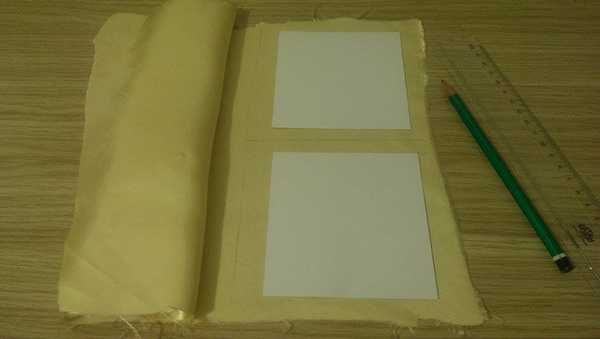 Now glue-pencil paste the fabric to the cardboard. It is important to smear the entire pasted surface of the cardboard, otherwise the spaces will be visible later.

It's time to paint the inside of the sidewallsblanks in beige color. We painted with a sponge, although you can do this with a brush. We dry. Then on all sides, let's go through with a dry brush-bristle with gold paint. We cover all with varnish. We dry. While the varnish dries, "gild" and we will varnish the lock. You also need to adjust the color of the loops. To do this, paint them first in black and after drying a little pass gold paint. We cover with varnish.
We try on fabric tabs. After fitting, it seemed to us that something was missing. And we decided to add the stencilled drawing with gold paint to the tab, designed for the cover. The finished stencil was not there. Therefore, on a free piece from another stencil, we drew and cut out the drawing we needed. You can not do this at all, or you can apply a pattern on another stencil. As you like best.
After drawing the picture, glue the tabs on the glue "Moment". We put it on a thin strip around the perimeter, not reaching 1 cm to the edges, and also a couple of drops dripping into the middle.
Bring the motive on the lid to smoothness: 3 layers of varnish with intermediate drying, sanding with sandpaper No. 800. We repeat the procedure 2 more times. Cover with the final layer of varnish. We fasten the accessories.
 It turned out an unusual casket, which will decorate any interior and will always attract the eye.
Read more:

Frame for a photo in the technique of decoupage

Let's update the wooden box!

Decoupage for beginners. What a decoupage technique

Decoupage of bottles of champagne

Decoupage of plates for beginners

Decoupage of flower pots
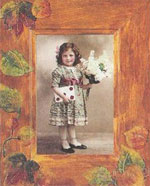
Frame for a photo in the technique of decoupage
Let's update the wooden box!
Decoupage for beginners. What a decoupage technique
Decoupage of bottles of champagne

Decoupage of plates for beginners

New Year's Decoupage

Decoupage of flower pots

"Casket of Athena" - decoupage caskets, master class with photo