Salt dough molding

To feel at least a little sculptor does not need to stockpile plasticine or look for clay in a nearby ravine. Simple, cheap and, most importantly, fun can be sculpted crafts from salted dough!
The salted dough was made by ourancestors and even in a fast age of technological progress, this fun is still in high esteem. Now the dough is especially recommended for young mothers - together with the kids. Such activities not only help children develop, but also contribute to the rapprochement of mother and baby, their closer emotional contact.
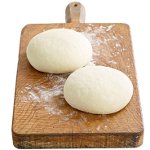
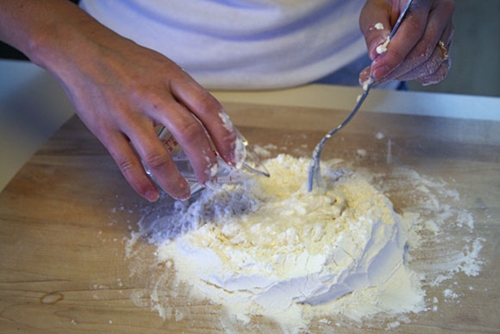
So, you decided to tackle a salty dough. First of all, you will need the actual dough itself. Prepare it is absolutely simple. Most simple recipe: 2 glasses of flour, a glass of salt and a glass of water. In hot water, dissolve the salt and, gradually adding flour, knead the dough.
In the dough, you can add food coloring ornatural vegetable or fruit juices with intense color (for example, beet or carrot juice). The use of natural dyes is particularly recommended if lessons of modeling from dough are conducted with children.
Ready-made dough should be rolled into a bowl, covered with food film and left for several hours in a cold place. This is necessary in order to make the dough not break and not crack during the molding process.
In addition to the test for crafts, you may needcoins, buttons, foil, beads, groats and other materials that will be useful for decorating your products. You will also need a board for rolling dough, rolling pin, knife, pencil, brush, cardboard.
Before the start of modeling, the working surface must be covered with polyethylene or with a washable tablecloth.
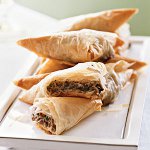
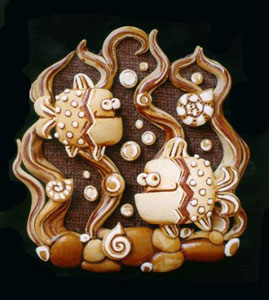
From the test it is possible to cut out with the help of moldsvarious figures, you can work with it as well as with traditional plasticine, fashioning various animals, birds, etc. If you need to connect several parts, then the joint should be moistened with water and pressed with a brush.
It is important to remember that the unused dough, when exposed to air, is covered with a crust, so it should be covered with a film or kept in a bag. Colorful dough is best stored in separate packages.
When the products from the salted dough are ready, it is necessary to dry them. The surest way - dry handmade itemsnaturally, in the open air. But this drying is very long. During drying, the product must be carefully turned, to more evenly dry.
Sometimes, wanting to speed up the drying process, the productsput on the battery, but in this case there is a high probability that cracks will appear, so it is better to refuse this method. It is better to use a combined drying method. First, crafts are dried in the sun, and then, at a temperature of about 75 ° C and an open door, bake in the oven. Watch for the availability of products, if there are bubbles and cracks - then the craft has overheated and you need to lower the temperature.
To give your handicrafts a nice warm shade, you can glaze. To do this, one hour before the end of drying, every 5-10 minutes, on the handicrafts brush should be applied salt (1: 2) or egg (1 egg per 1 glass of water) solution.
Glossy gloss your products from salted dough you can give with varnish. In addition, the varnish coating protects your craft from moisture and sunbathing.
A molding from a salted dough is a fascinating and useful occupation. Not only children, but also adults will receive from him a lot of fun!
 |  |