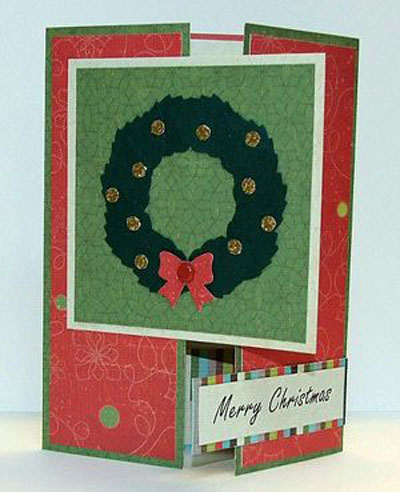
How to make a card for Christmas with your own hands, master class with photo

The best gift is the one that is presented with love. We will do it yourself with you. Your family and friends will be delighted with the card "Merry Christmas", decorated with a wreath. This wreath is a suitable decoration, symbolizing eternal life and completely passing the winter celebration and atmosphere. You will always succeed if you follow our detailed instructions with illustrations for each item, and by doing everything one by one you will be able to please your work with the art of people close and dear to you, giving them a bunch of positive emotions with your creation with your wishes.
For work you need:
- Glue "Moment Crystal" (you can any other transparent, fast grasp).
- paper or cardboard
- 2 satin ribbons (can be used silk) width 0.5 cm, length 2 meters
- lace or lace fabric
- either a button or a large bead, a glass bead; beads
- colored pens (gel, ball).

Step-by-step instruction
Warn before you start that you can change the size, the number of jewelry, their positions on the card at their desire.
- Let's start with paper (cardboard). Cut out the base of paper (25 * 20 cm), fold a sheet in half. On the right side and the lower part of our workpiece, lay the lace, cutting the desired length (22.5 cm). With the help of point application of glue on the paper (for each element of the pattern we put a dot so that the glue is not noticeable), we stick the lace tightly, give it a little time to fix it. Next, make a congratulatory inscription (if you want, you can leave more wishes in the part as indicated in the photo, but do not forget that there is also an interior for your warm wishes) with colored pens.
- Let's move on to making our eternal symbollife (Christmas wreath). Let's take two tapes (we took two different colors so that you could see the procedure for making a wreath more clearly, you can take the same colors, the main thing is not to get confused at the beginning) and tie them from one edge.
- We fold one part of the tape in half (green),so that the ends of the tape are criss-crossed, thereby forming a loop. The same thing we do with the other part of the tape (orange), where a loop is also formed. Then we pass one loop to the other and press it tightly. A new loop has formed (in the figure green).
- Then from the orange tape again add upThe next loop and we pass already in formed before (green). Thus, creating loops and passing them to already existing ones, we weave your wreath. Wreath size 17-20 cm. After finishing, we glue the ends of the wreath with glue so that it does not fall apart.
- We will apply our now obtained scythe. Let's create a circle shape, so that the braid becomes our present beautiful wreath. We glue our wreath as well as lace - a dotted way, but with a lot of glue to keep it.
- The most basic and painstaking work behind,turn to the decoration of our beautiful postcard. First, decorate our joint at the wreath with a bow, so that it is not noticeable. To do this, we cut off the lace, tied it in a bow and glued it to the joint with glue. Also we cut out pieces of lace that look like snowflakes, distribute them in free parts and glue them with glue.
- To our bow was even more beautiful, top of itpaste our next decoration - in our case, Bugle, you can use a bead, a button. We decorate the wreath of bugles. We will attach a bead or button to the bow.
- Now decorate the background with our small snowflakes (beads). We paste it on the adhesive throughout the remaining free zone in a chaotic order, it is better to use a needle for this procedure.
- We will take care of the inside. We use our beautiful lace, similar to snowflakes. We stick in the right bottom corner our remains after the work done.


You only need to write inside your warm greetings and wishes for Christmas!
Our gorgeous Christmas card is ready! Now you can please her with your loved ones in 2015 with a wonderful gift made by yourself.