3 bracelets-pigtails: from polymer clay, fabric and old T-shirt

Pigtail as a method of weaving will never loseIts charm, including in hand-made products. Three simple methods of weaving braids, which we will tell you today, will allow you to make original bracelets with your own hands.
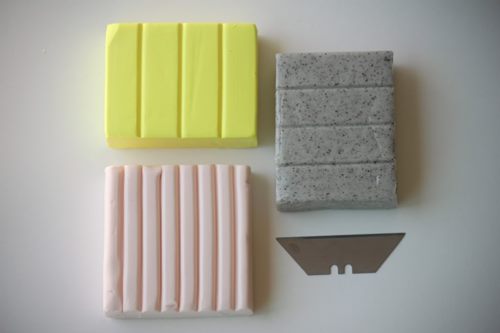
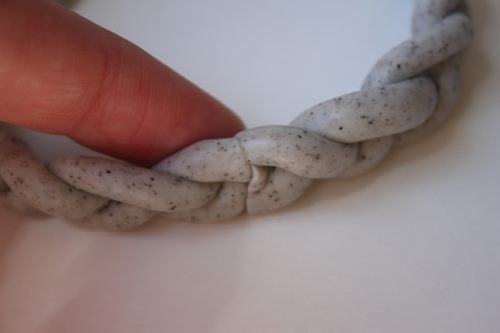
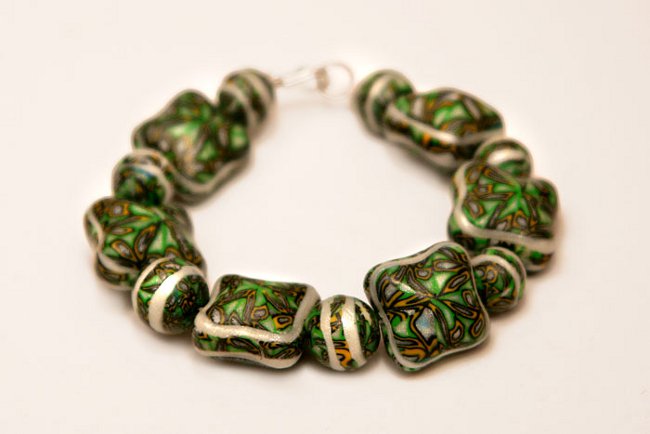
Triple bracelet-braid of polymer clay
Take:
- polymer clay of three colors (any; buttry to choose not just different colors, but different types - for example, this example shows clay with a shade of "marble" and small black patches. Clay can be mixed on its own, making it striped, spotted, or even with some geometric pattern);
- A blade-separator for polymer clay or an ordinary knife.
Let's get to work:
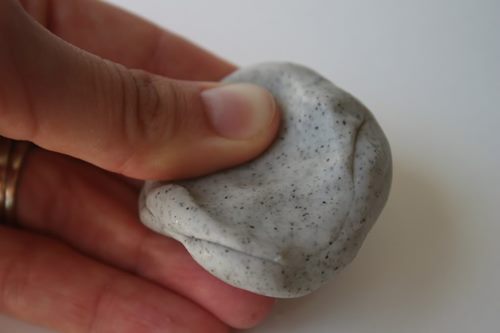
- Work with each color in turn and wipe your hands before moving on to the next one.
- Cut the clay of each color and roll 3 long thin "cylinders" from each part (they should be one and a half times longer than the circumference of your wrist).
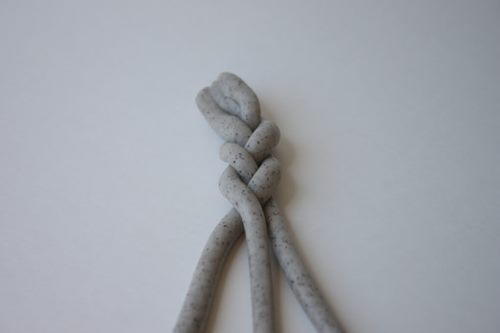
- Fold the three cylinders on top of each other, connecting one end and squeezing it hard so that all three cylinders are connected.
- Begin to weave like an ordinary pigtail, - with the difference that you can not pull "strands" here. Do not press them too hard, otherwise they will lose shape; leave them free to lie on top of each other.
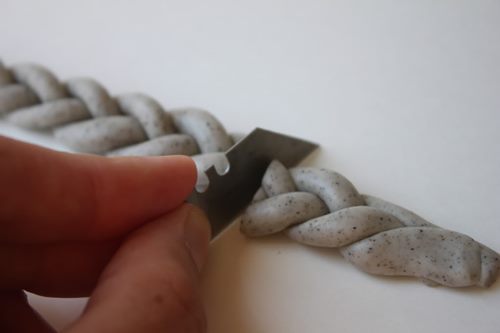
- Trim the flattened section with a sharp cut, which fastened the stripes at the very beginning, and wrap the bracelet in a ring, dowling the pieces so that the transition was not noticeable. Hide it will help you the pattern of pigtails.
- Repeat the same for each color, and after baking, keeping in the oven as much as indicated in the instructions for the chosen polymer clay.


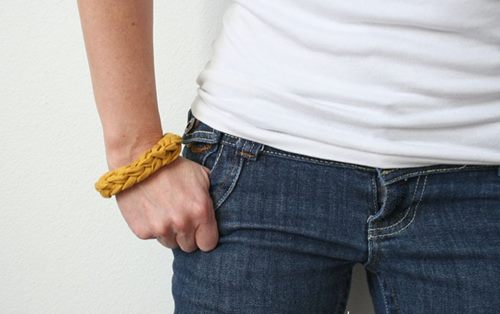
Bracelet-pigtail made of cloth woven by a knot "jersey"
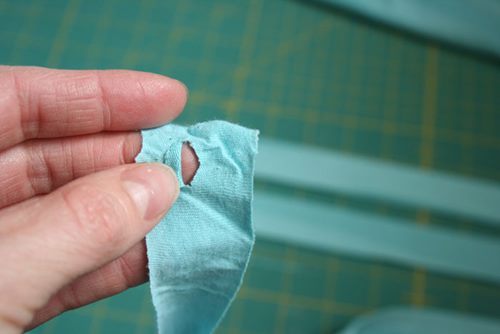
For this simple bracelet, take:
- a long strip of thin cotton fabric (at least 1.5 m long and 2.5 cm wide);
- scissors.
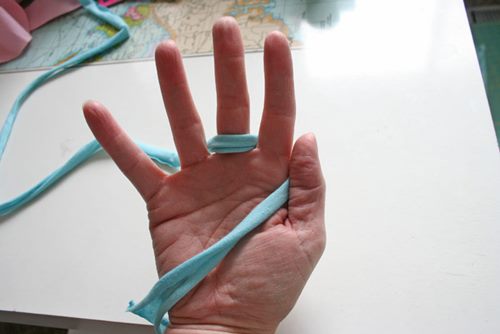
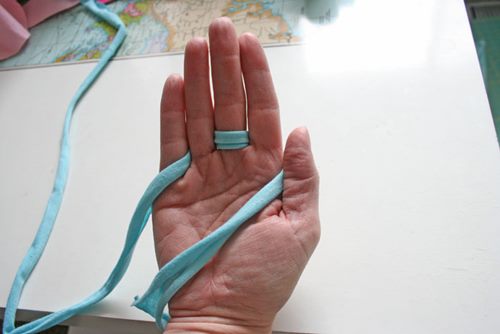
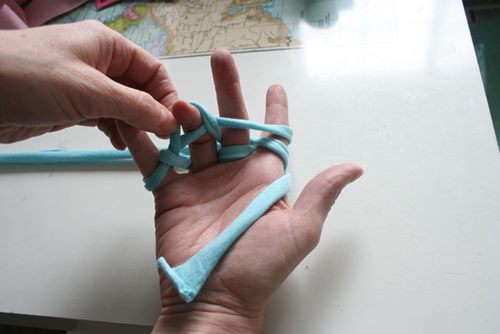
Bracelets "jersey" are braided on the fingers, and independing on how many fingers you use when weaving, the bracelet will be more or less wide. The narrowest one is on two fingers (the little finger and the ring finger), the widest one - on four (all but the big one). The principle remains the same.
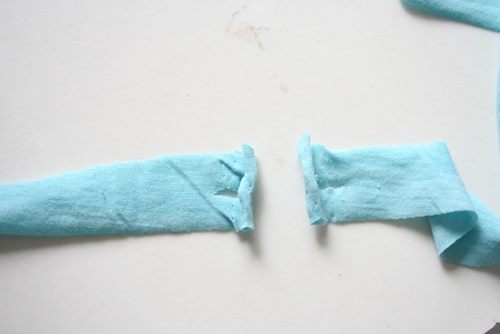
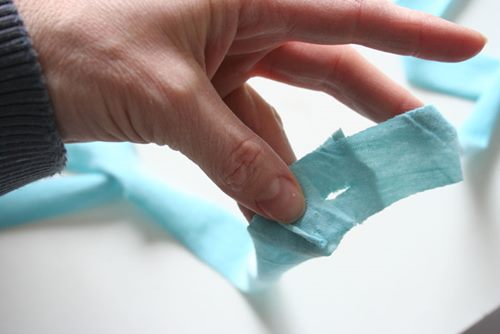
- Cut two small holes at both ends of the fabric strip (about 1 cm from the edge).
- Place both ends on top of each other and pull a little cloth from below through both holes. You should get a loop. Tighten the assembly.
- Now start wrapping the tissue around your fingers - one turn on top of the finger (from the side of the palm), the next - from the bottom.
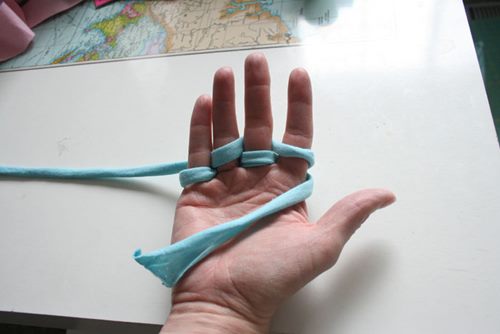
- After reaching the end, "turn" the strip and start wrapping the fabric in the opposite direction, this time passing it from above and from below in reverse order.
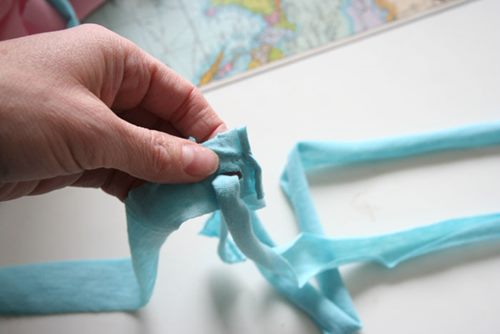
- Then toss the strip over all the fingers, without wrapping it at all.
- Now pass it through the loops of the fabric on each finger. The nodes are obtained.
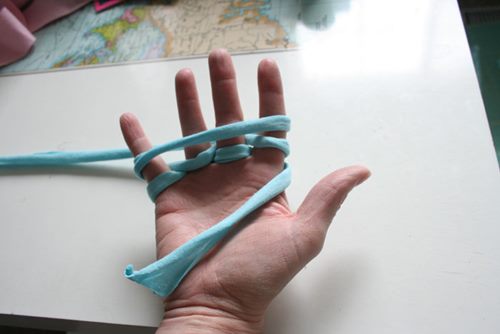
- Continue weaving until you get a bracelet of the right length. Usually there are 6 "chains".
- In the last loop, thread the remainders of the strip next to the first node and tie another knot.
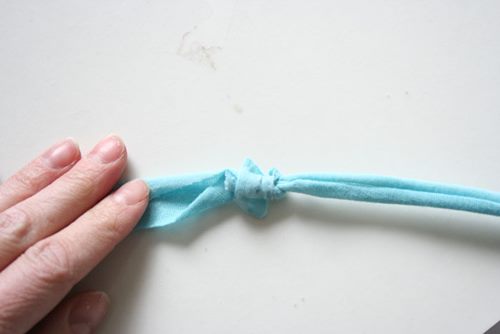

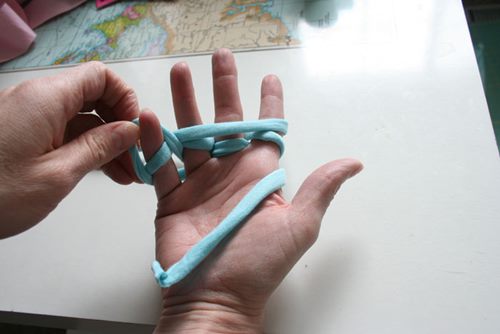
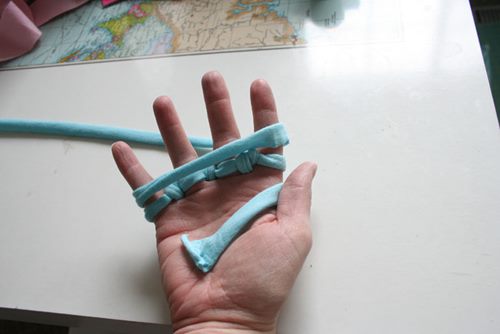
The bracelet is ready.
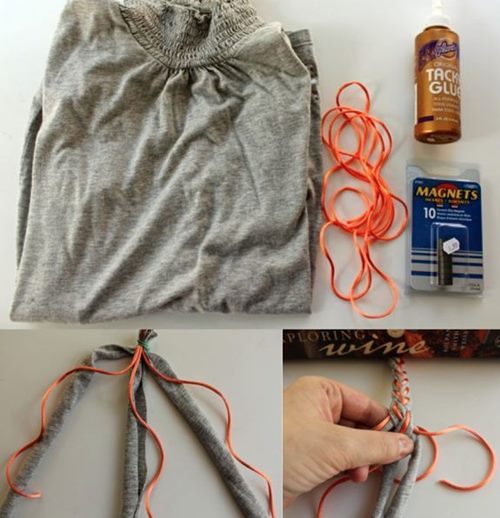
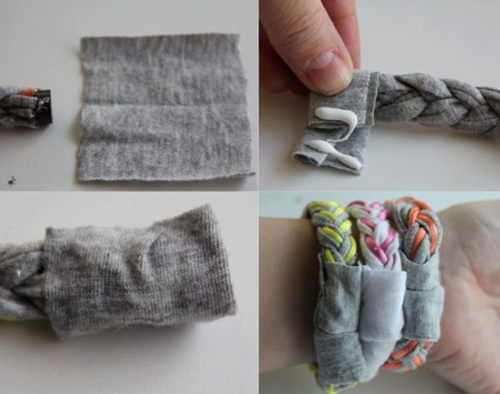
Bracelet-braid from an old T-shirt and a bright lace

Take:
- old plain shirt;
- 1 m of bright colored cord (of non-slip material);
- two small magnets;
- barrette or pin;
- glue and scissors.
Let's get to work:
- Cut out three stripes of fabric with a width of 2.5 cm and a length of 30 cm from the T-shirt
- Cut three pieces of cord - 25 cm each.
- Fix all the pieces of the cord and strips together using a pin or a hair clip, connecting their upper ends.
- You have 6 parts. Mentally "attach" to each strip of fabric one piece of cord and count them in one piece during the braiding of the usual "pigtail".
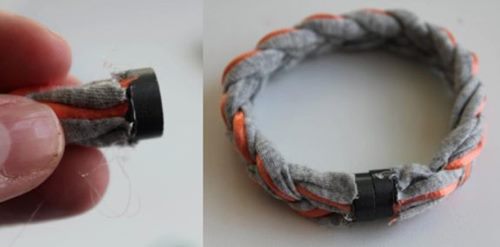
- When you finish docking, remove the hairpin and glue the magnet to the top of the bracelet.
- Try it on your arm. If it's the right length, trim the other end and also glue the magnet (just do not mix the sides).
- Cut two more pieces of cloth from the T-shirt to hide the magnetic clasp.
- Wrap the clasp with a cloth and secure with glue. Done.

Read more:

3 unusual techniques for working with polymer clay

3 bracelets-pigtails: from polymer clay, fabric and old T-shirt
Jewelery with their own hands

Costume jewelery from polymer clay
Earrings from polymer clay

Bracelets made of polymer clay

How to make a necklace of polymer clay own hands Photo master class

Jewelery with their own hands
Costume jewelery from polymer clay

Earrings from polymer clay
Bracelets made of polymer clay

How to make a necklace of polymer clay own hands Photo master class
Photo master class: beads of polymer clay own hands

3 unusual techniques for working with polymer clay