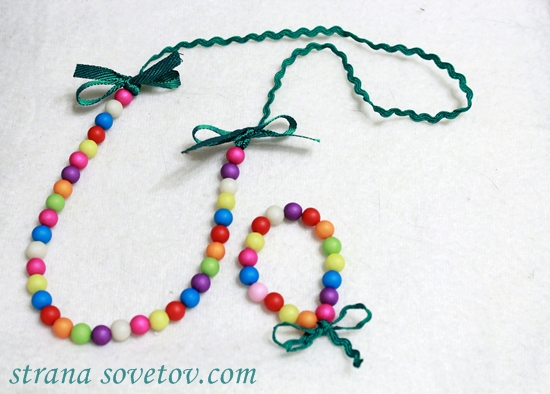
Children's set: bracelet and necklace of ribbons and beads

Make a bright set of jewelry for the baby! Children like jewelry as much as adults, and although materials and design for them should be chosen more carefully - for example, the overload of details for children's jewelry is uncharacteristic and undesirable - for creativity there is still no less room for creativity.
It is important and right to choose materials - heavybeads made of natural stone, ornaments of wire that can be scratched, and ornaments on very fine threads suggesting extremely gentle treatment, at this age also do not fit.
Children are active, it's beautiful, and decorations should match it. I will tell you how to make a simple bracelet and necklace from multi-colored beads of the same size, braids and ribbons.
You will need:
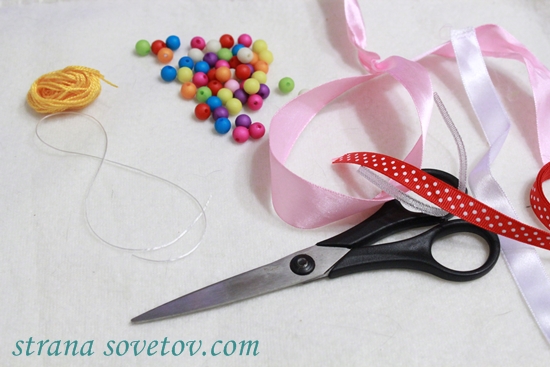
- tape and braid (one color / pattern of your choice, but not wider than 1.5 cm);
- multi-colored matt beads made of any material (plastic is best, this is the lightest beads, but you can use colored seeds, although their color turns out to be less bright);
- elastic band for a bracelet (translucent, for jewelry);
- dense thread (for example, iris);
- Scissors and a needle (to thread the thread through the beads, if the holes in them are small).
1. Measure the child's hand. For an adult, the average length of a bracelet for an ordinary arm is 21 cm, but the size of the bracelet of the child depends on more parameters (age including).
2. Cut off the desired amount of gum.
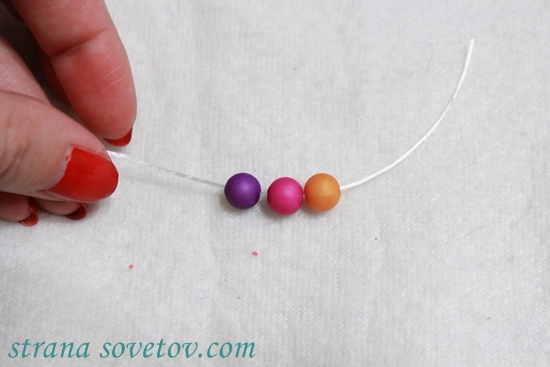
3. Put beads on it - in any order, but try to make so that colors were repeated not less than through 2-3 beads. Most children are very fond of bright, simple colors, but do not limit themselves to the rainbow colors - light pink, pale yellow and fuchsia, for example, are also very beautiful. Experiment. You can pick up the beads in one color scheme (only warm colors, for example), but eclecticism will be a good choice.

4. Tie up the elastic band with a surgical knot (the most reliable version of the knot for this material, the rest of the elastic can slip out.) The surgical knot is tied in this way: first, several times just twist the two ends of the rubber band so that one of them crosses the other as in a twisted rope (at least three times) then, from above, tie the most common single knot.This modification of the knot is very popular not only in medicine, where it is tied for sutures, or in needlework, but also, for example, in maritime business).
5. Hide the remainder of the threads under the beads. The bracelet is ready.

6. Now make the necklace. Cut the thread of the iris - not very long, about 33 standard medium beads (remember that the necklace will consist of low beads and braid or ribbon). On the photo the thread is yellow, but it is not necessary; you can take a white or any other thread. If the thread is difficult to pass through the beads, use a thin needle, this will greatly speed up the process.

7. Observe the same rules for the combination of colors as for the bracelet.
8. Now you need to attach the braid to the finished low. Just tie the thread to the braid with an ordinary double knot. The lock at the necklace is not, so make sure that the length of the braid allows you to freely put it over your head.

9. Hide the knots on the necklace with two small ribbons from the ribbon. Operate according to the principle of contrast - the color for these ribbons is the same as for the ribbon / main ribbon, and the texture is the opposite (silk ribbon, if the braid is with a bulk pattern, and with embossing, if the ribbon is smooth).

You can also attach the same bow to the bracelet (although the knot is hidden there) to connect the kit. Done!
Author: Anastasia Moskovskaya, workshop Wonderland
Are you fond of creating beautiful design tricks? Do you want to share your skills and declare yourself to the whole "Country"? Send applications for the publication of master classes in the mail [email protected], please specify in the subject line: Hand Maid lessons.


