Preservation of Bulgarian pepper for the winter - photo canning recipes

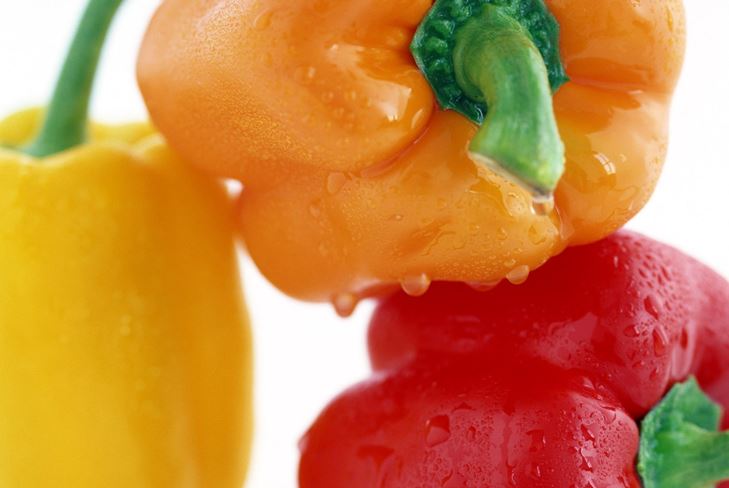
Today we will talk about harvesting for the winter fromBulgarian pepper. This vegetable is mostly used fresh and is a part of a large number of popular salads and second dishes, bringing to their taste a distinctive recognizable shade.
Preservation of pepper is another way of itUse, allowing to save a large harvest of fruits. Canned peppers are very, very delicious. Try to cook it in our step-by-step photo-recipe (by the way, in this recipe you can use not only Bulgarian pepper, but also sweet red Turkish pepper Kapya). Bulgarian canned peppers can be used as snacks, spreading on bread or adding to second courses.
Preservation of Bulgarian pepper for the winter
To conserve Bulgarian pepper, we will need the following ingredients:
- 2 kg of sweet Bulgarian or Turkish pepper;
- 1 cup olive oil;
- 2 tablespoons mustard;
- 2 tablespoons of honey;
- 1 teaspoon of salt;
- 1 teaspoon black pepper peas;
- 6 laurel leaves.
How to preserve Bulgarian pepper for the winter: turn-by-turn photo instruction
- Wash the peppers carefully and place them on a baking sheet / baking sheet.
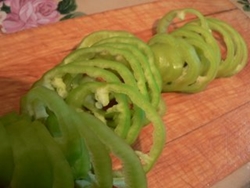
- Place the baking sheet in the oven and setthe temperature in her chamber is at 260 ° C. Closely monitor the condition of peppers during baking. When dark stains appear on the bottom of the pepper, remove the sheet from the oven. Be careful: the peppers will be very hot! Using tongs, turn each pepper upside down and again place the baking sheet in the oven. When the peppers are fried on both sides, remove the sheet from the oven and cover with foil or polyethylene film - this will subsequently facilitate the peeling process.
- After the peppers cool down (about 15minutes) - gently peel off the skin. It is more convenient to do this on a flat surface, while holding the pepper for the stem. Then, with the sharp part of the knife, separate the peppers into halves and place them on the cutting board with the inside part up. Using the blunt side of the knife, empty the inside of the peppers from seeds and membranes). Lastly, remove the stems. Place the peeled pepper in a food processor and chop it into small pieces (but do not convert into a paste!).
- Put the saucepan on medium heat, addthere is a glass of olive oil, 2 tablespoons of mustard, 2 tablespoons of honey, a teaspoon of salt, a teaspoon of black peppercorn, 6 laurel leaves, and bring to a boil. Add the chopped pepper, and, continuously stirring the mass with a wooden spoon, boil it for 7 minutes. Then turn off the oven.
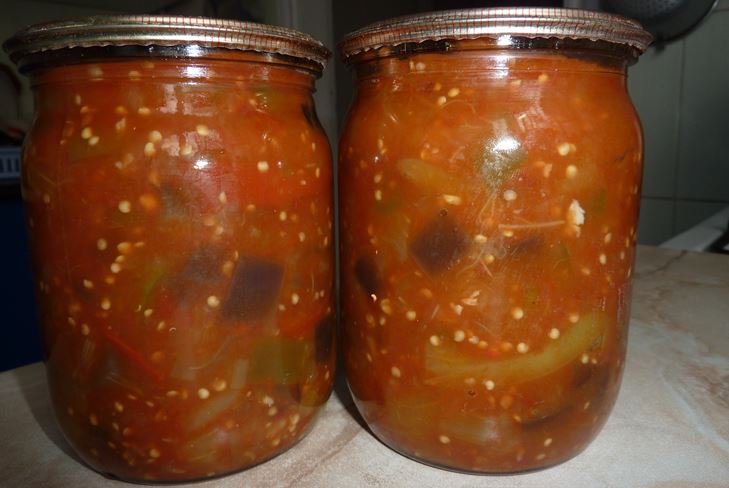
- Immediately before laying out snacks, wash anddry the jars with lids in the dishwasher. Then fill the jars with a ready-made snack. Slightly tap with a metal spatula on the walls of each jar so that the air that gets into the mass when filling the cans comes out, then seal the jars with covers.
- Make jars in a deep baking tray / roaster,filled with boiling water, and place it in an oven heated to 230 ° C. Leave on for 30-40 minutes. Allow the banks to cool slightly, then remove them from the water, wrap them in towels and leave them for final cooling.
- Snack from the Bulgarian pepper is ready! You can keep jars with it for several months in a dry, dark and cool place. In order for each portion of the snack to be fresh, we recommend that you use a small jar of 250 ml.
- A printed bank with a snack is stored in the refrigerator for several days. However, we are sure that the snack will end much earlier than you could think about its possible damage!


Author: Katerina Sergeenko
Read more:

Pizza Three Peppers

How to cook lecho of pepper and tomatoes for the winter - a simple recipe

Pickled pepper

Preservation of eggplant
Salad of cucumbers and pepper for the winter - photo recipes of blanks

How to marinate Bulgarian pepper for the winter: photo recipe marinade

Lecho of Bulgarian pepper with tomato paste for winter - photo recipe
Lecho of eggplant and pepper for winter - photo recipe

Bulgarian pepper in Korean for the winter - photo cooking recipe

How to salt pepper for the winter - photo salting recipes
How to freeze Bulgarian pepper for the winter: ways to freeze

Pepper stuffed with vegetables, for the winter - photo recipe

Caviar from Bulgarian pepper with aubergines for winter - photo recipe of preparation

Salad dressing from pepper for the winter - photo recipes of blanks